BACKGROUND // In 2020, there was a global pandemic in which I was confined to my house for long chunks of time and experienced the outside world through my computer. One of the videos I watched during this time was about a very elegant skin on frame style kayak. In the interest of staving off the impending Zoom meeting driven insanity I was facing, I decided to build one.
MATERIALS // Douglas Fir; Ballistic Nylon Fabric; Leather Straps; Artificial Sinew; Oak; Tarred Seine Twine
SKILLS // Woodworking
KAYAK EXPERIENCE // Near Zero
LESSONS LEARNED // I think the biggest lessons I learned had to do with the slightly more dynamic approach boat building than what my engineering brain and previous woodworking experience had required. For example, the ends of the gunwales are shaped with a Japanese saw as the ends are pressed together and the saw is run through them. This produces the closes mating surface between the two but would have been very difficult to accomplish were you to attempt to do this while the gunwales were separate independent pieces of wood. It felt as though there were more steps dependent on previous steps than I would have anticipated, but I suppose is a good reminder of the process of woodworking. My experience has always been that having the tenons that you want to fit into your mortises available to test fit while you’re chiseling is always better than producing those geometries in isolation. And when the mortises are at such challenging angles, it seemed so important develop both components concurrently.
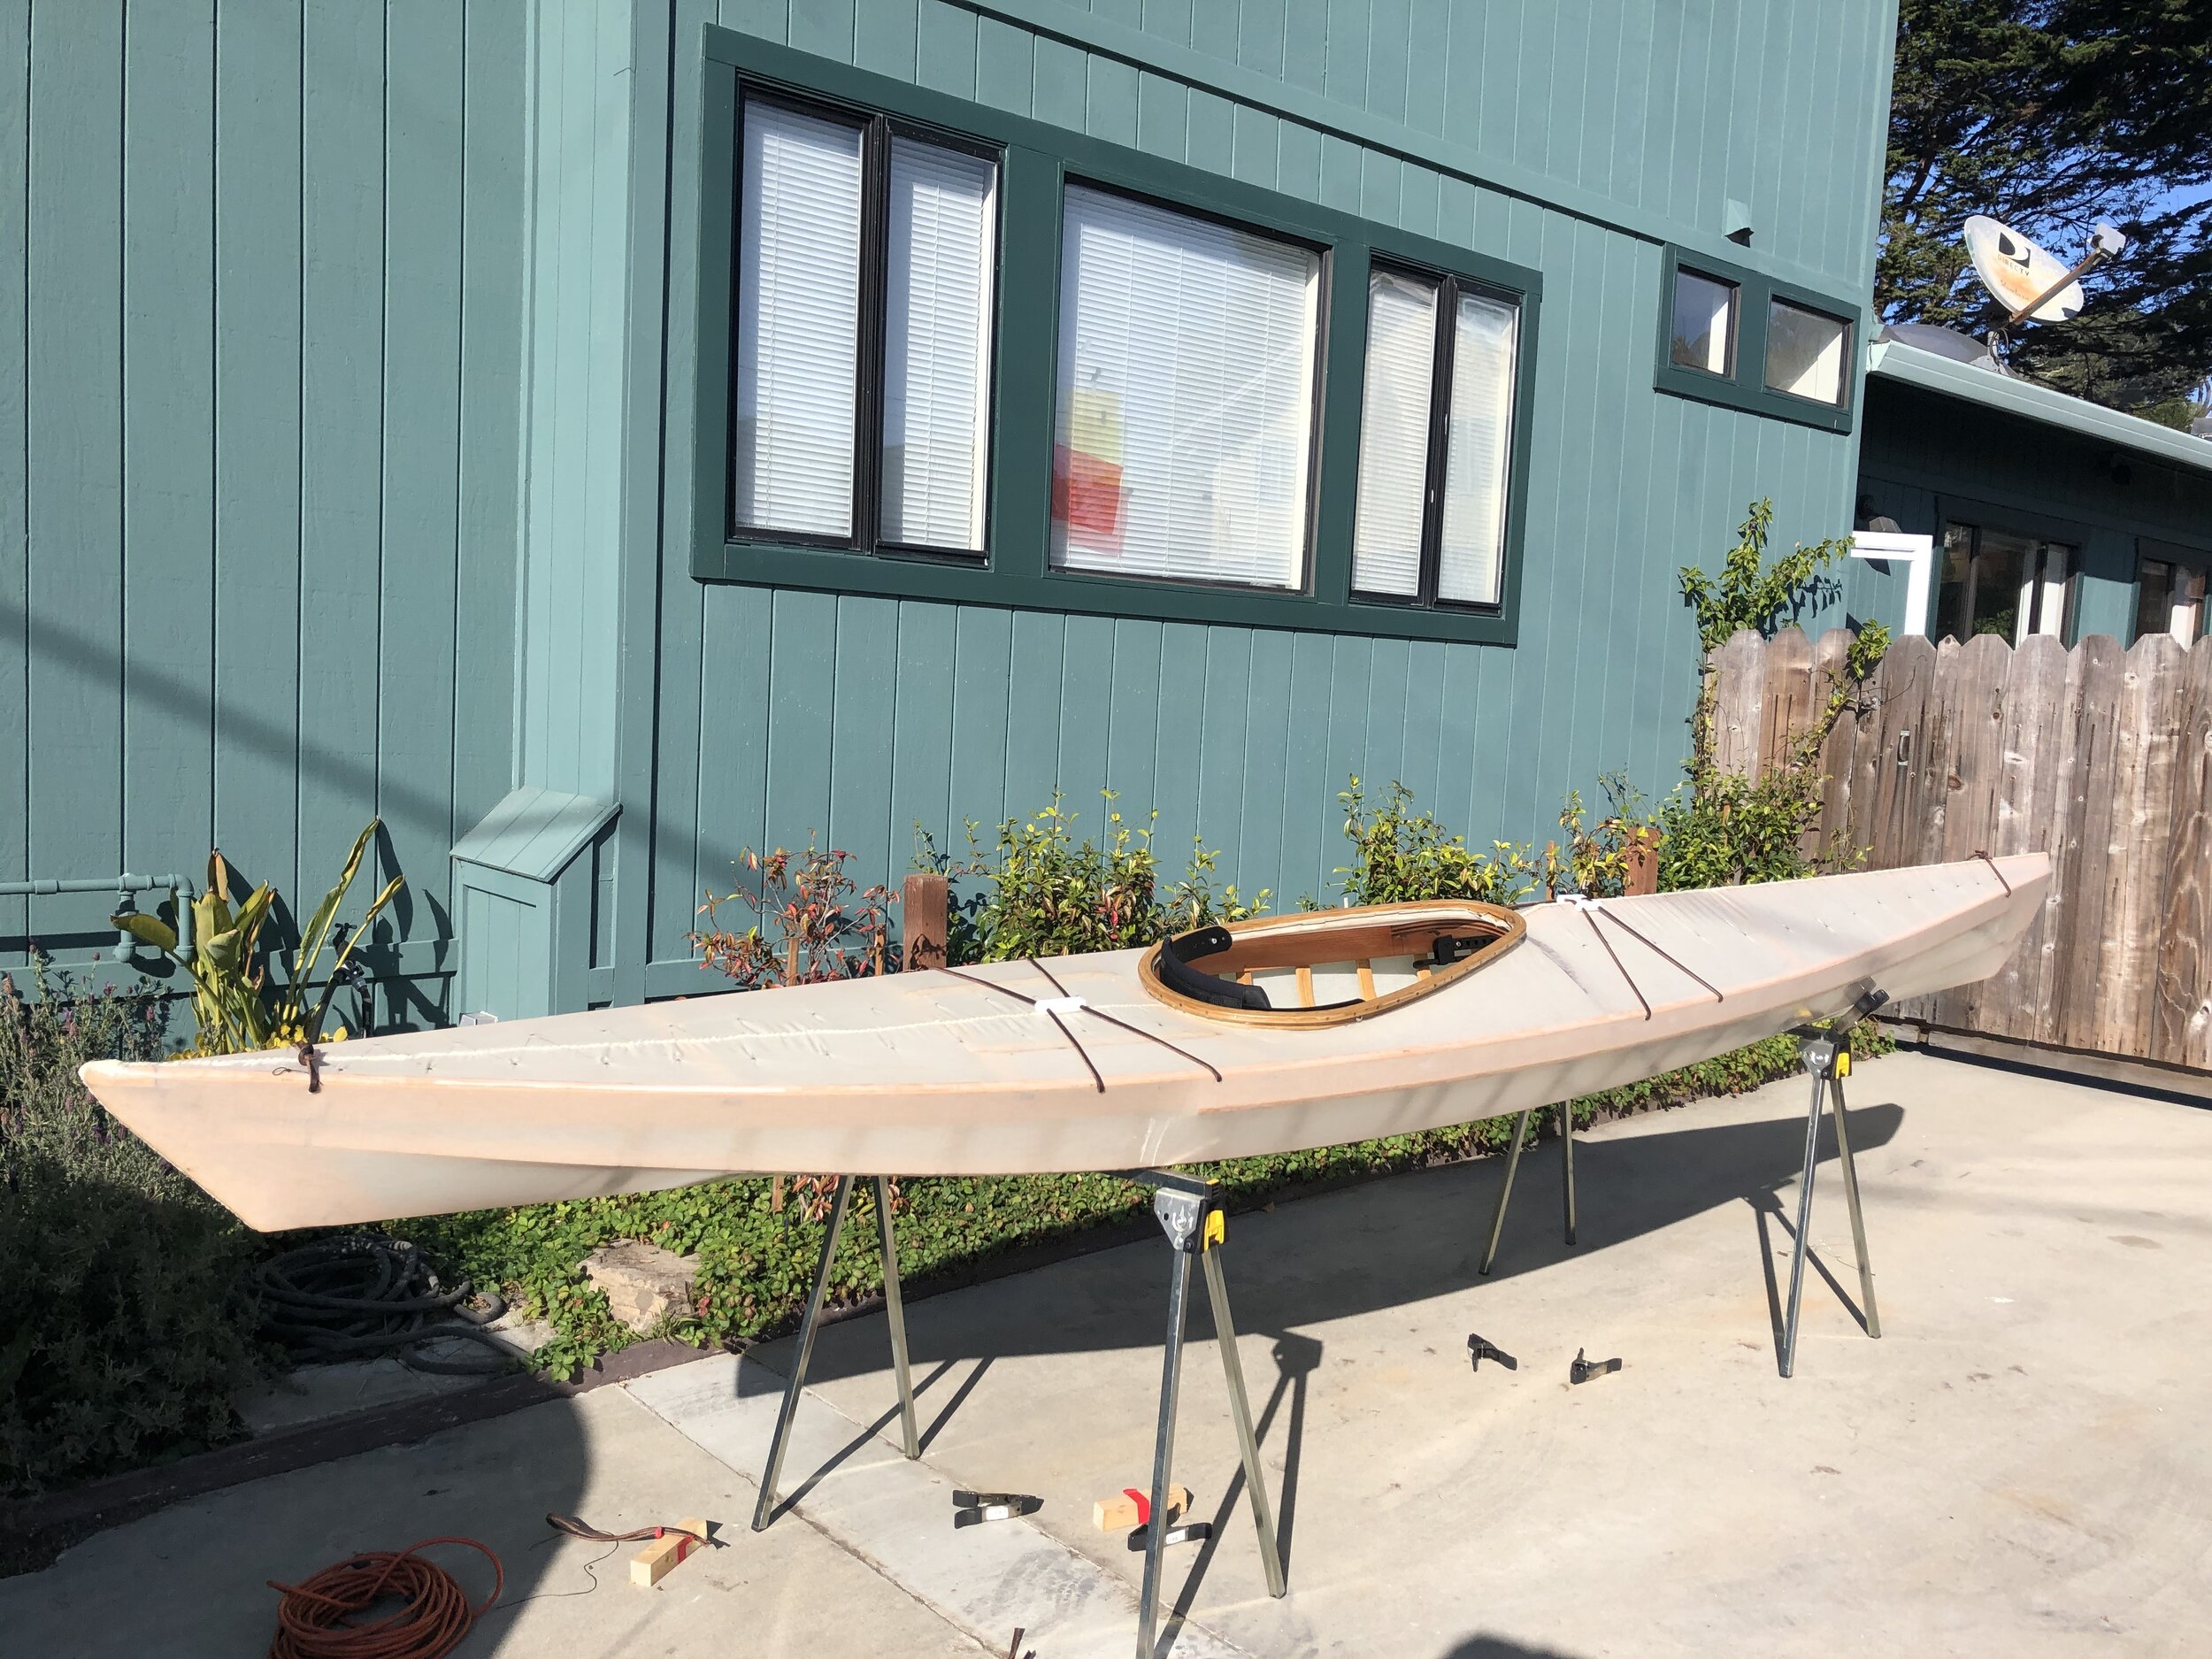
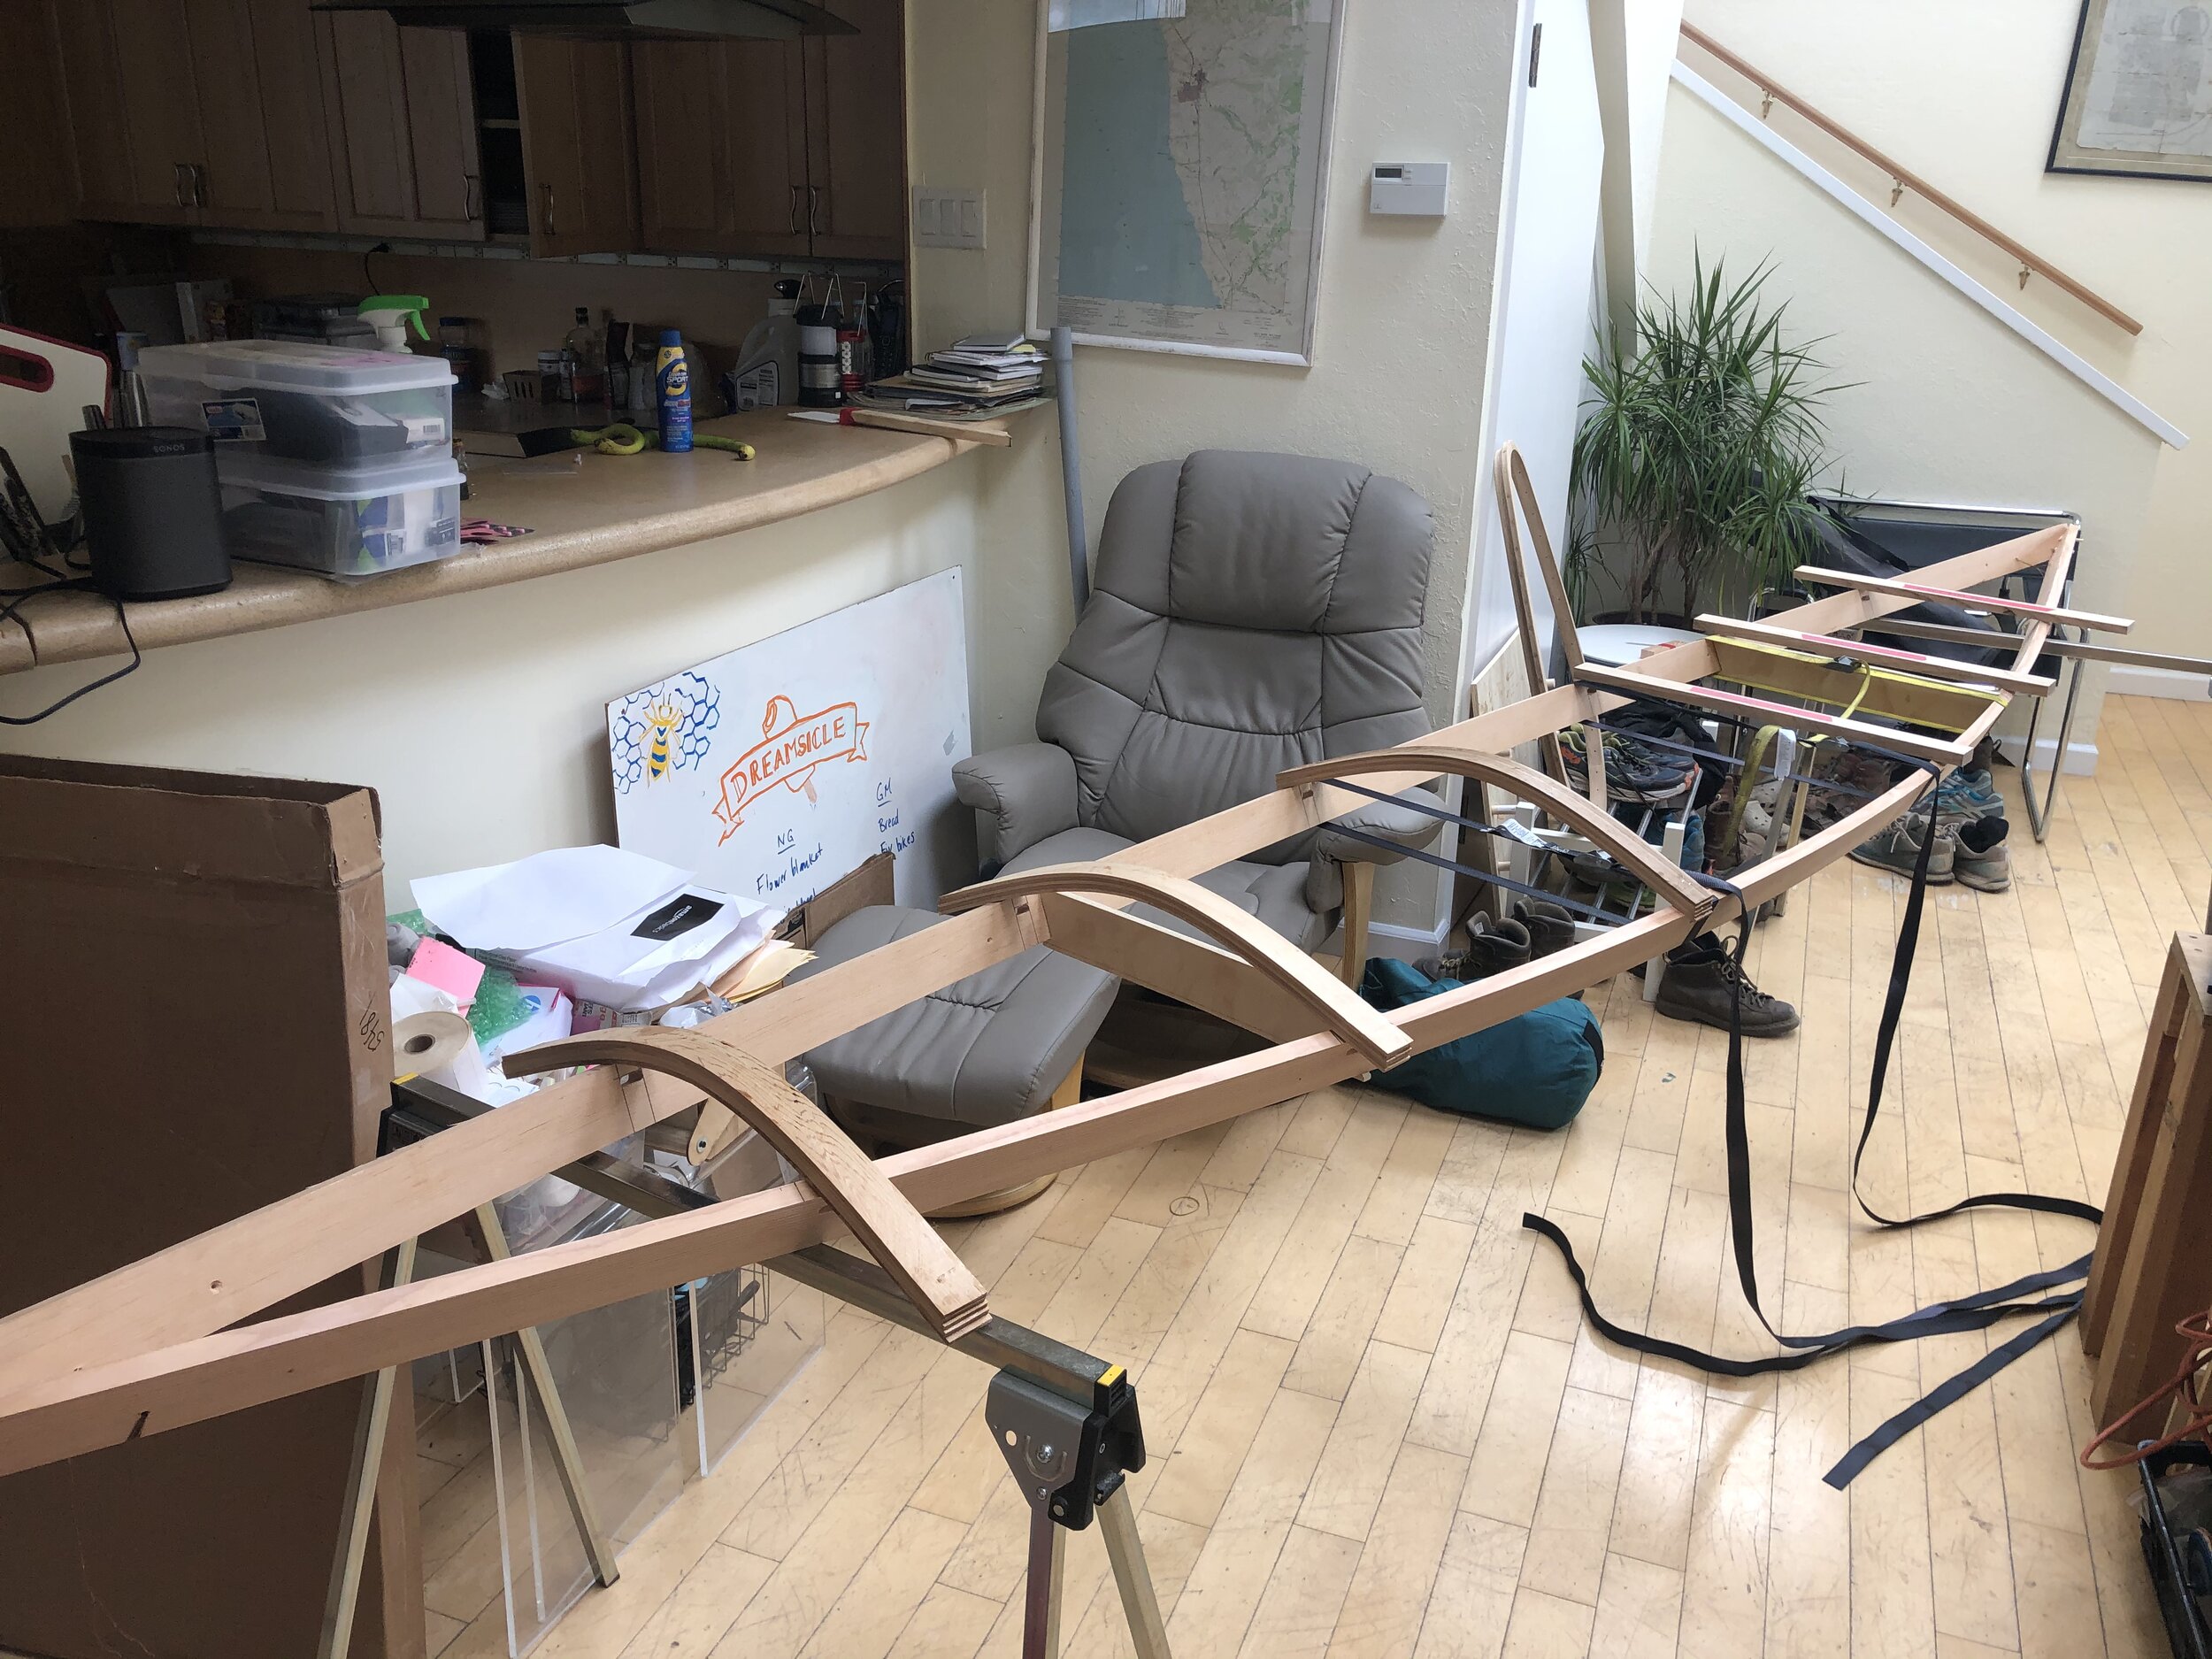
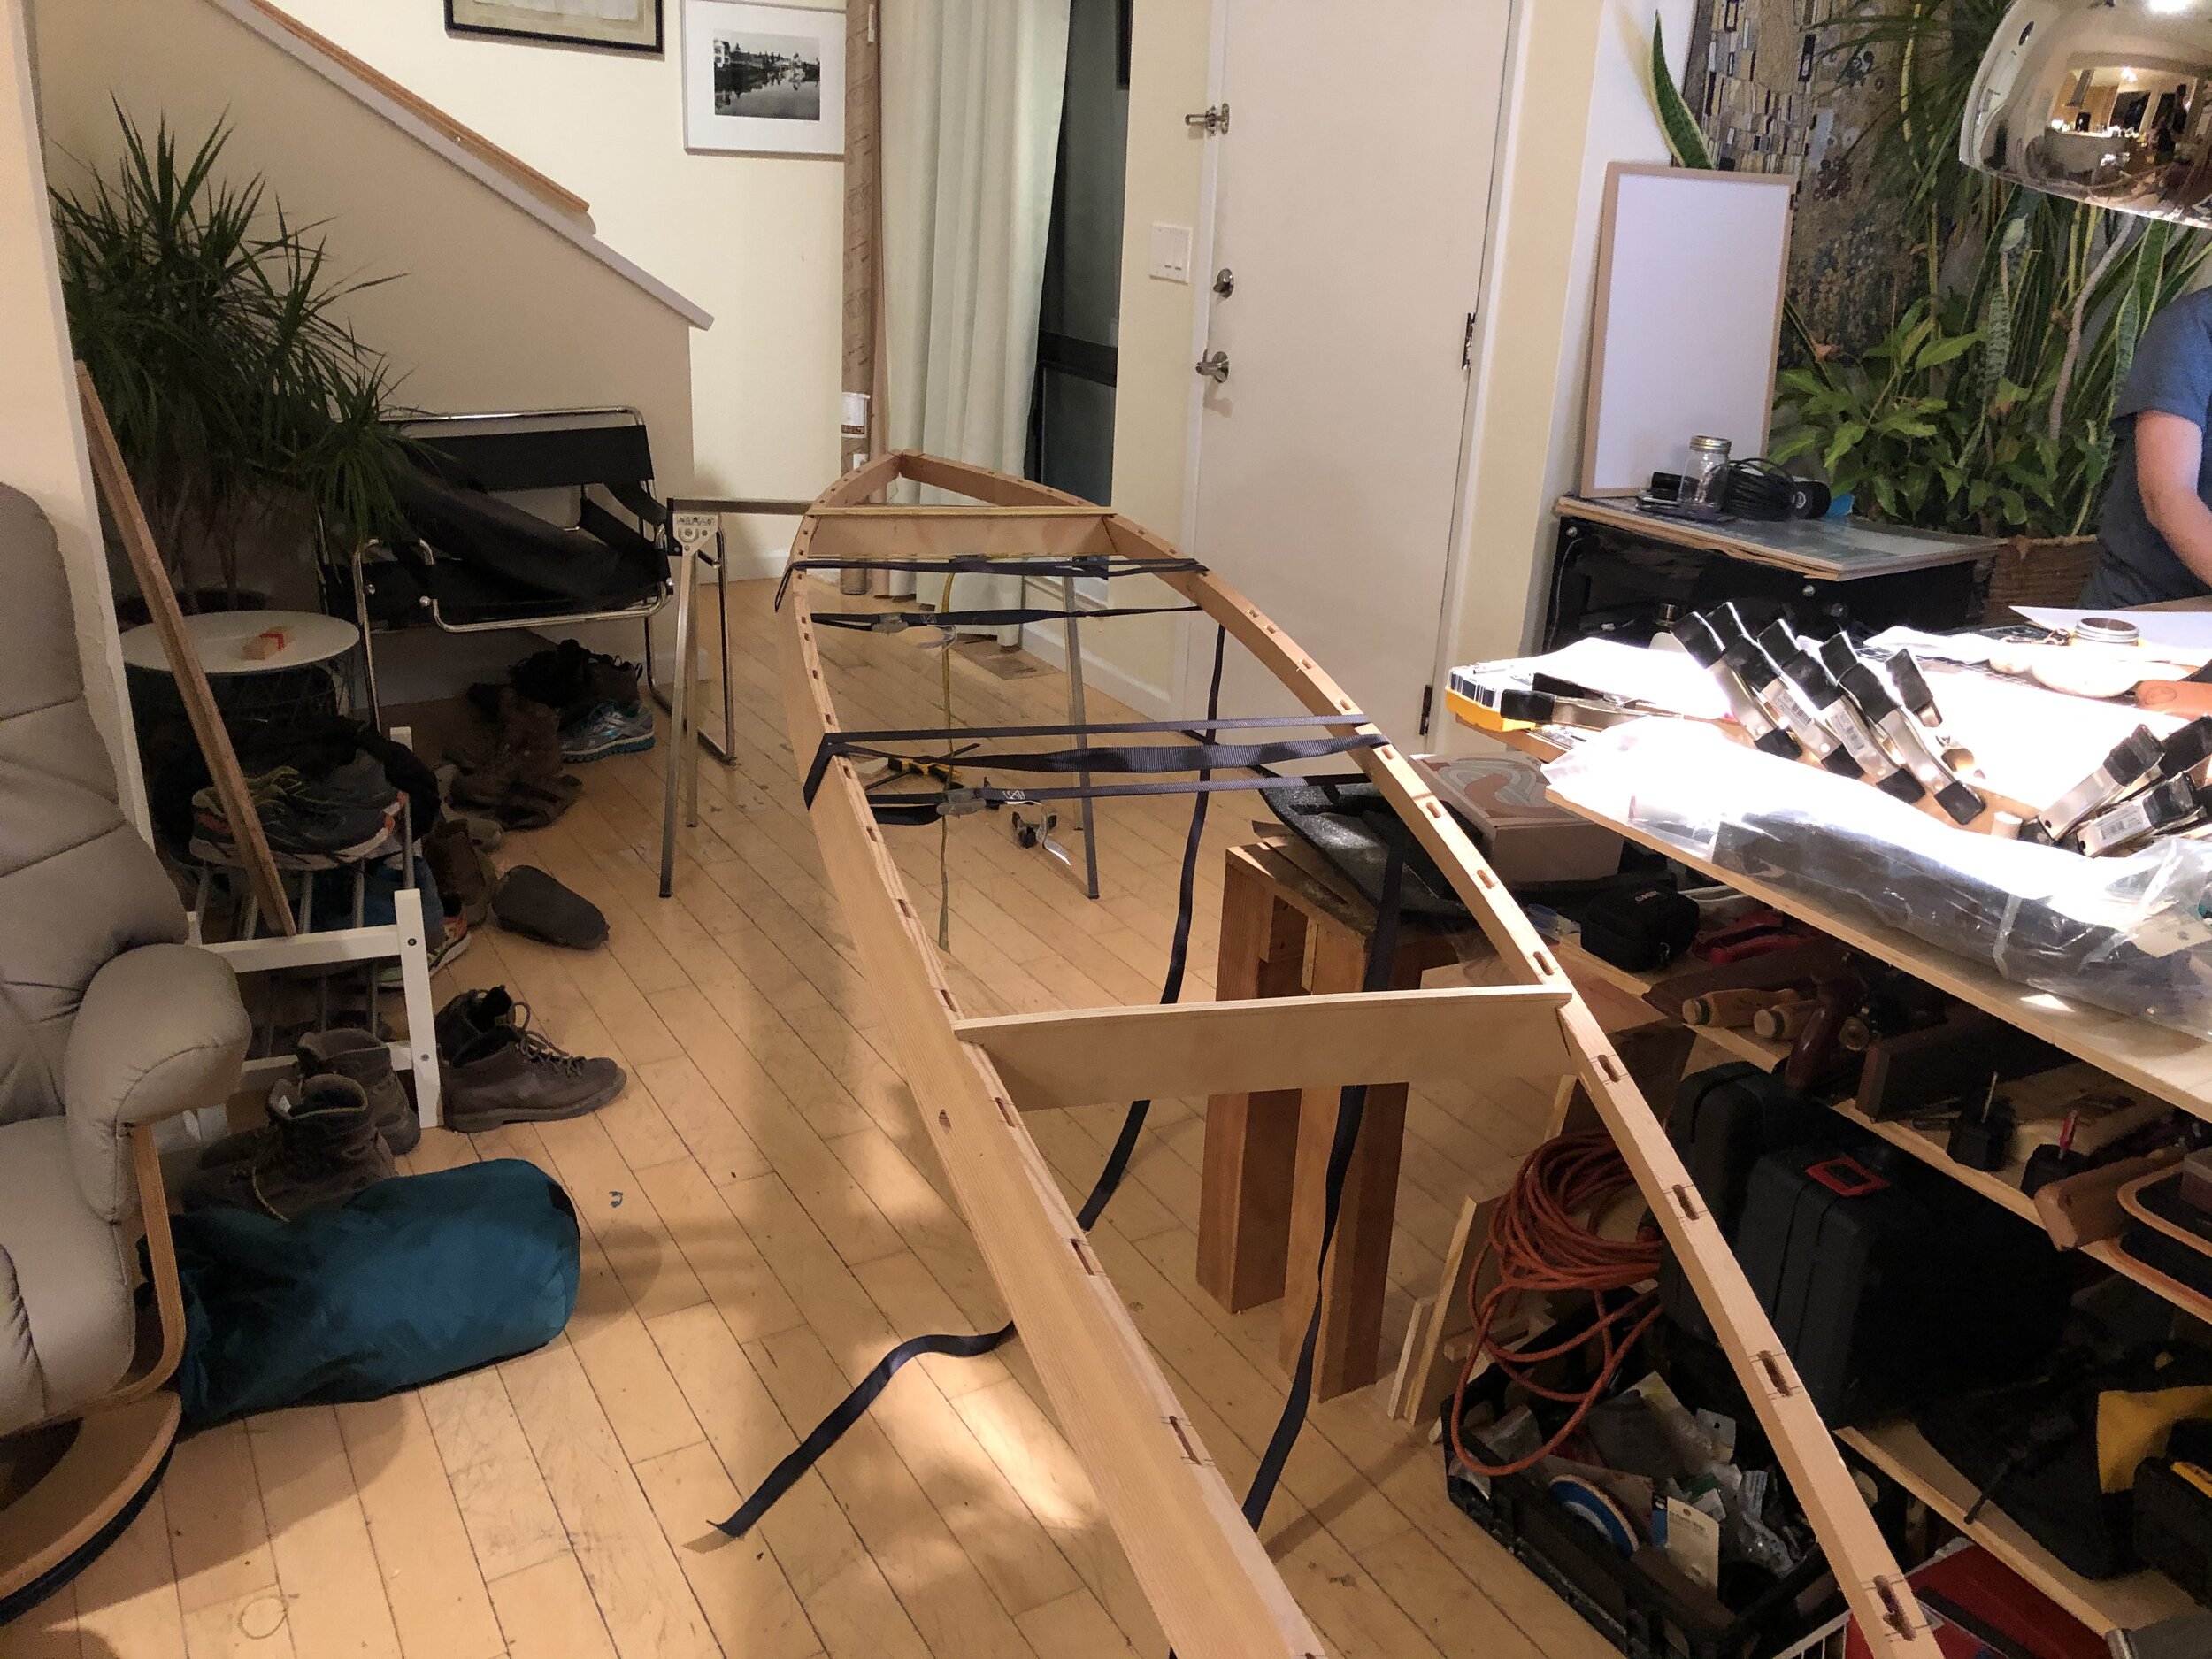
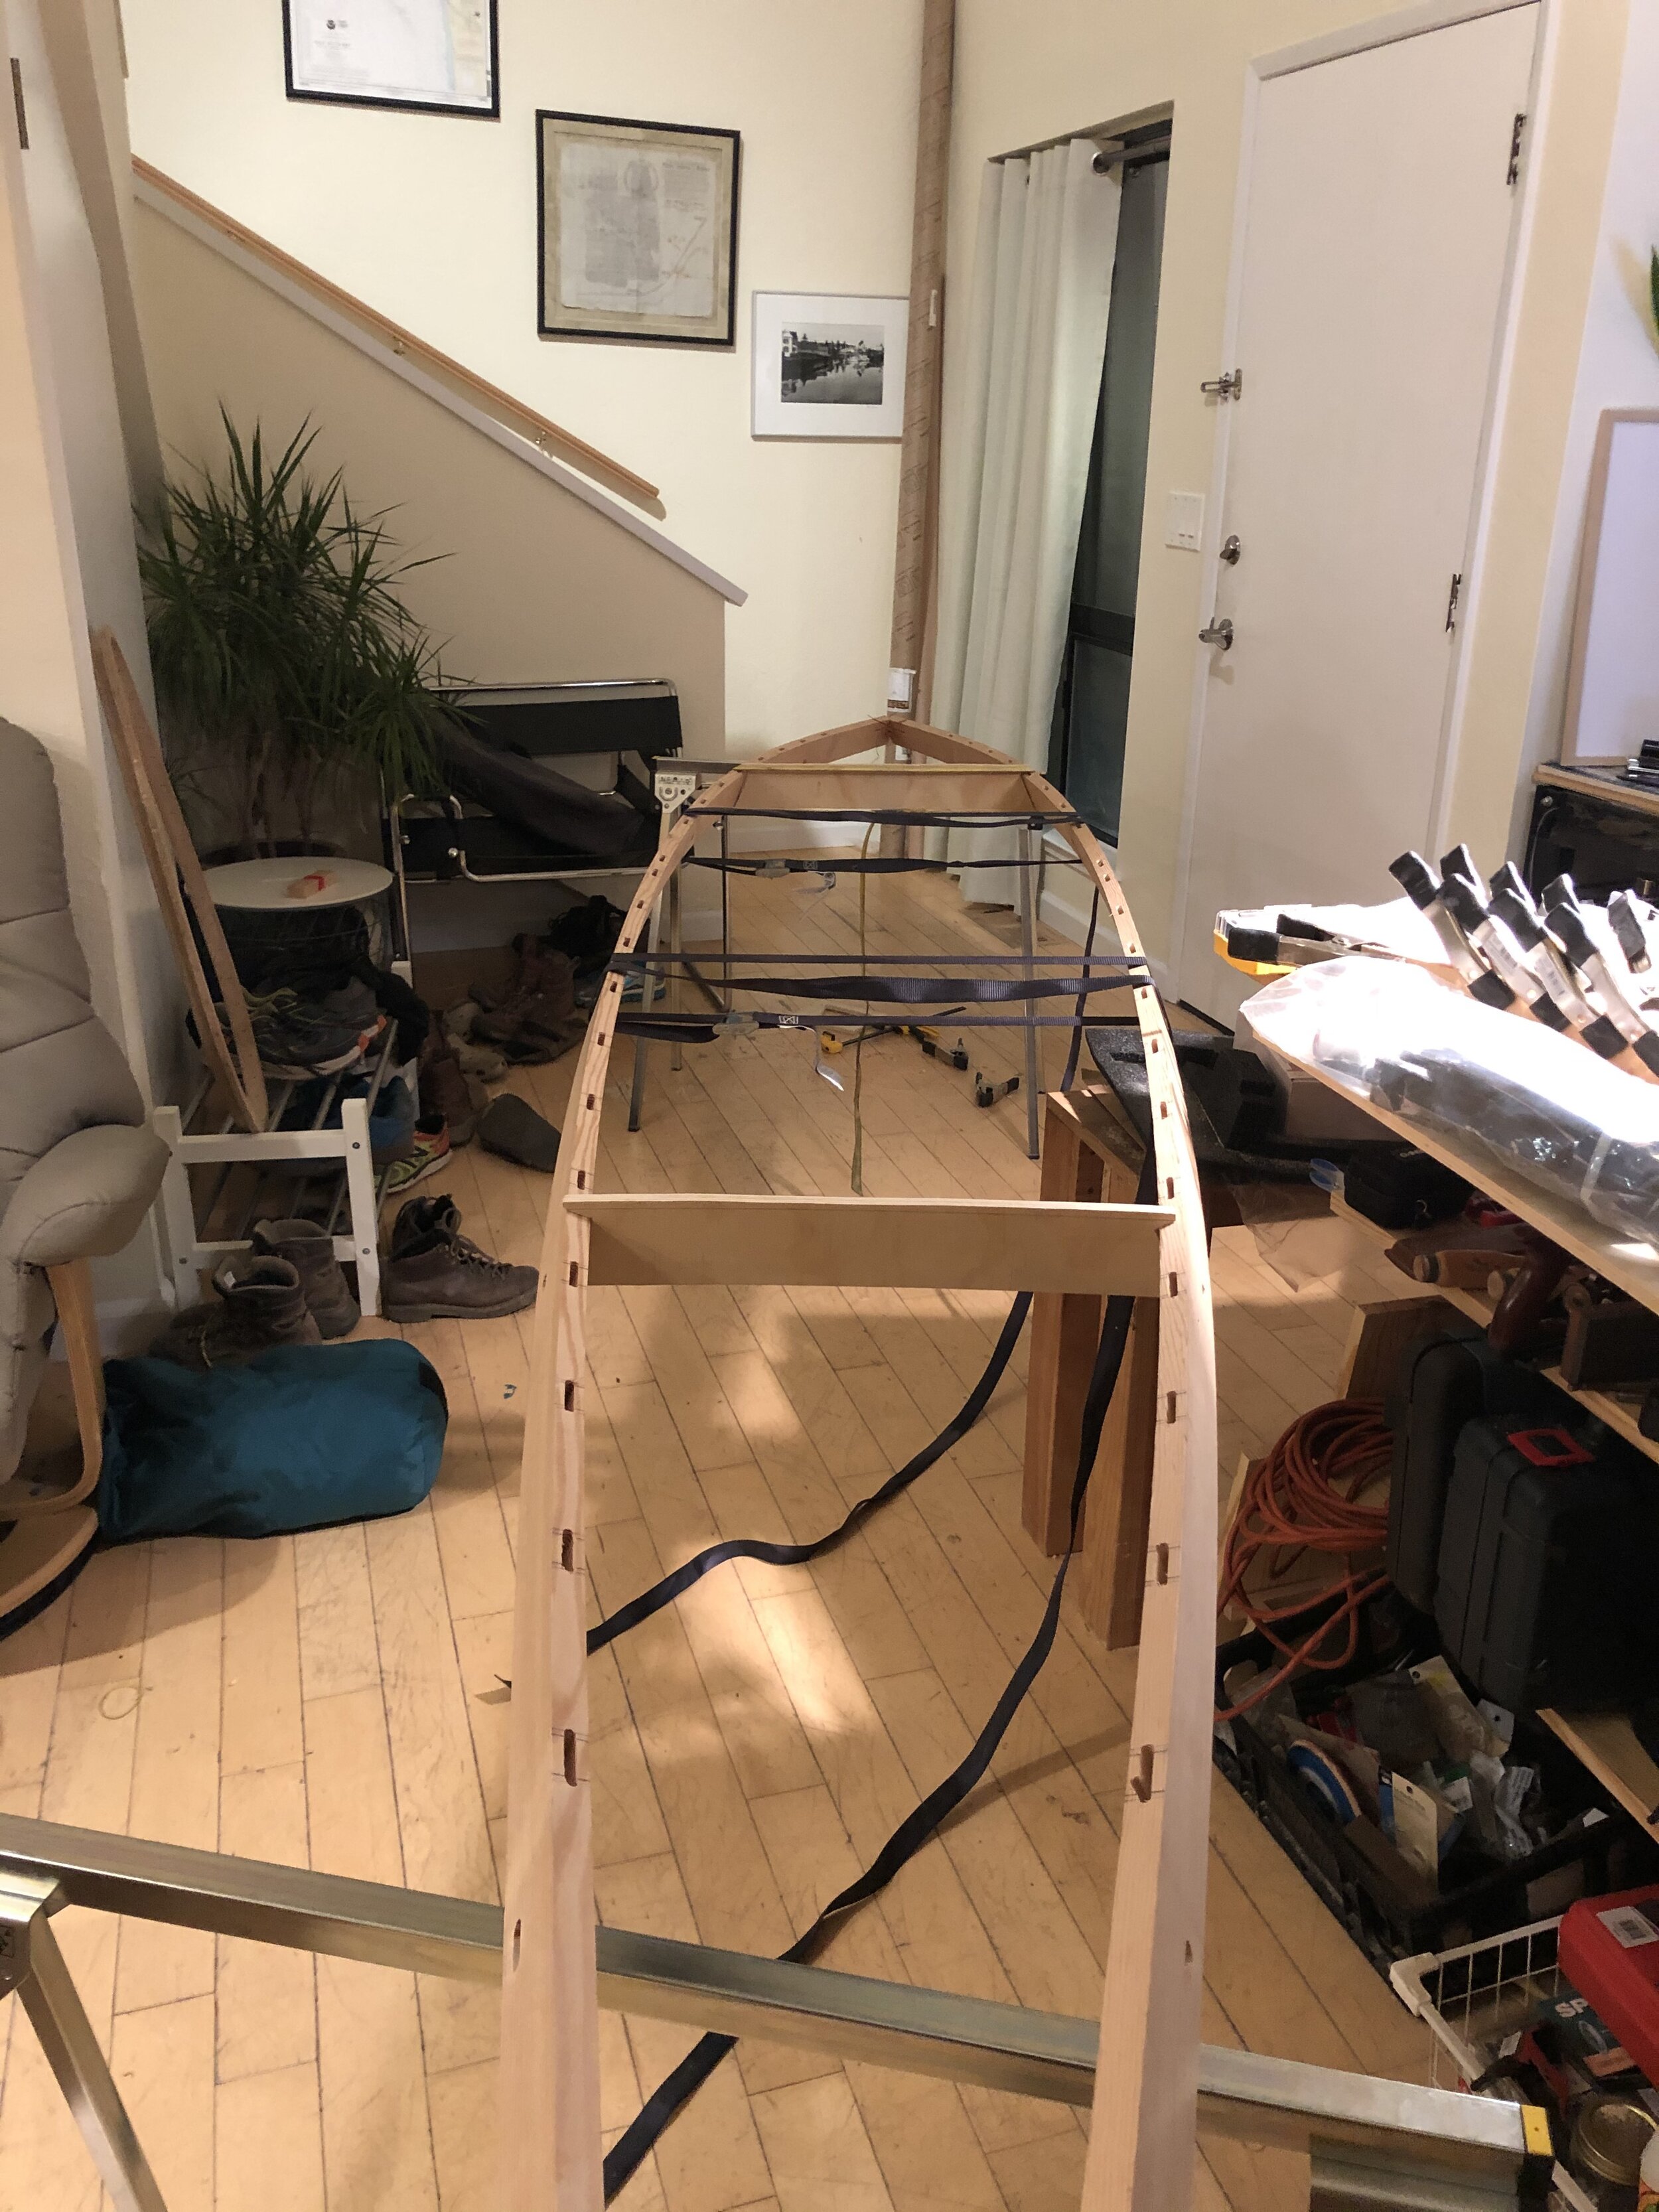
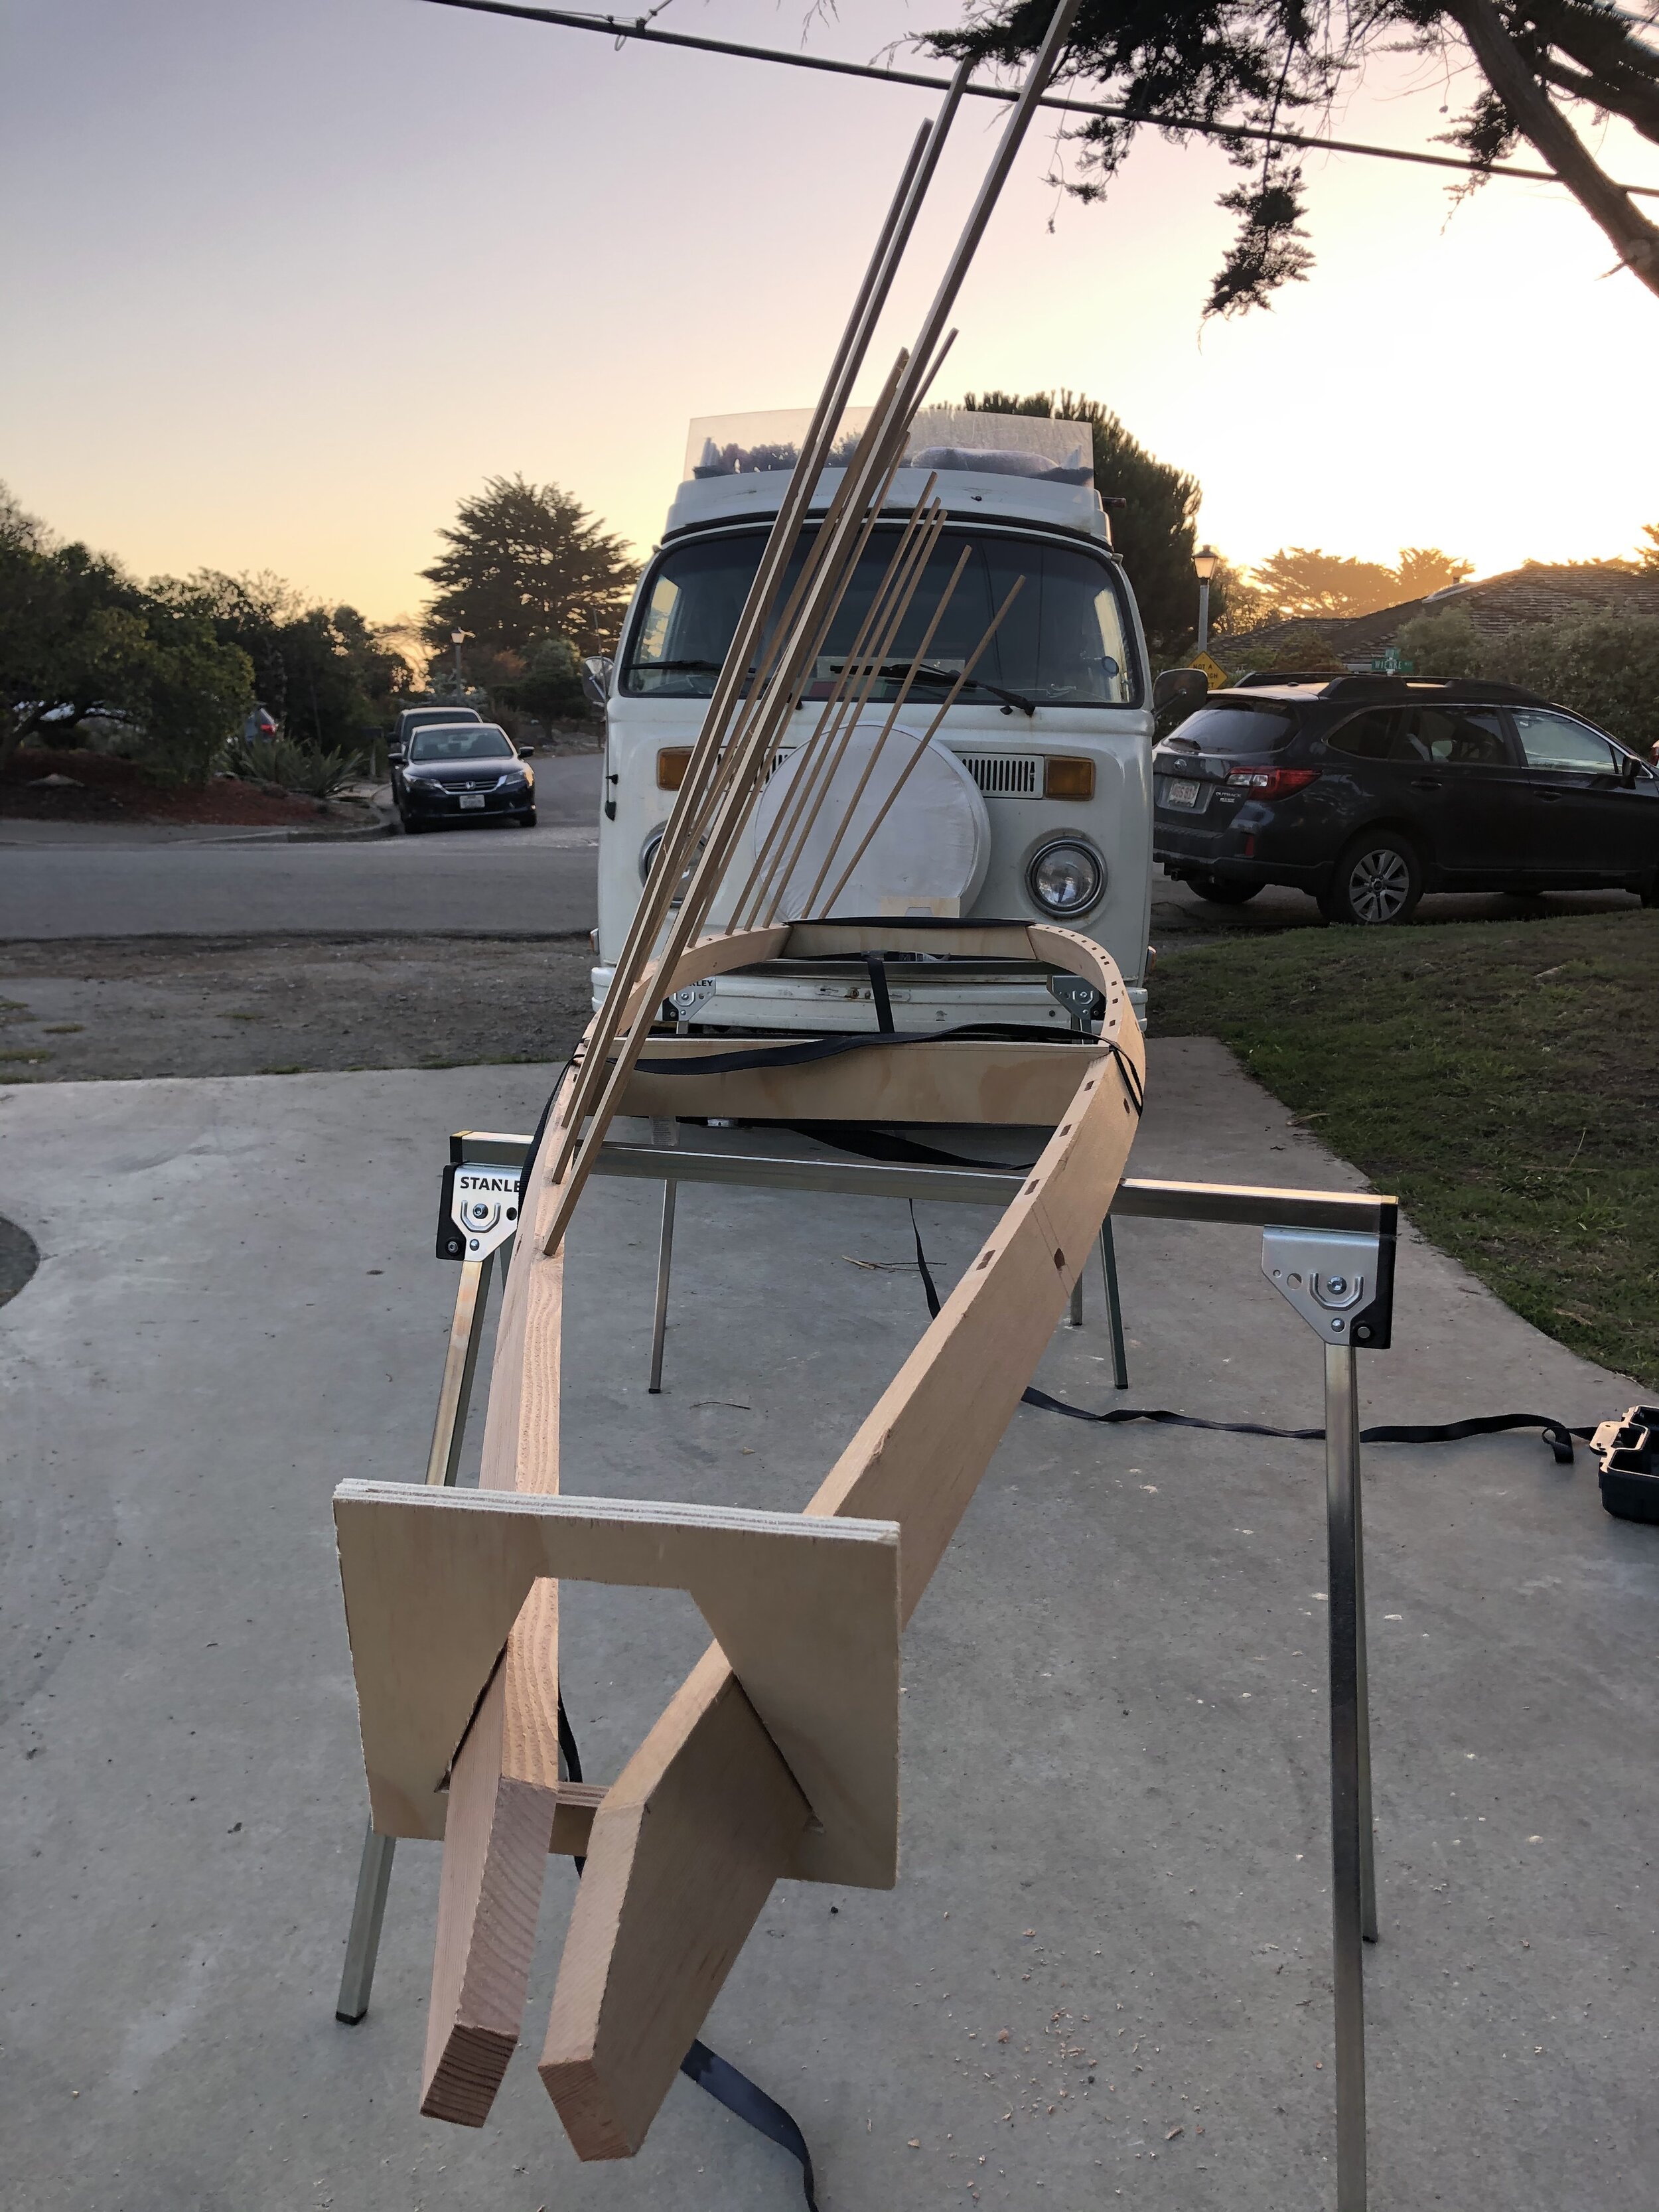
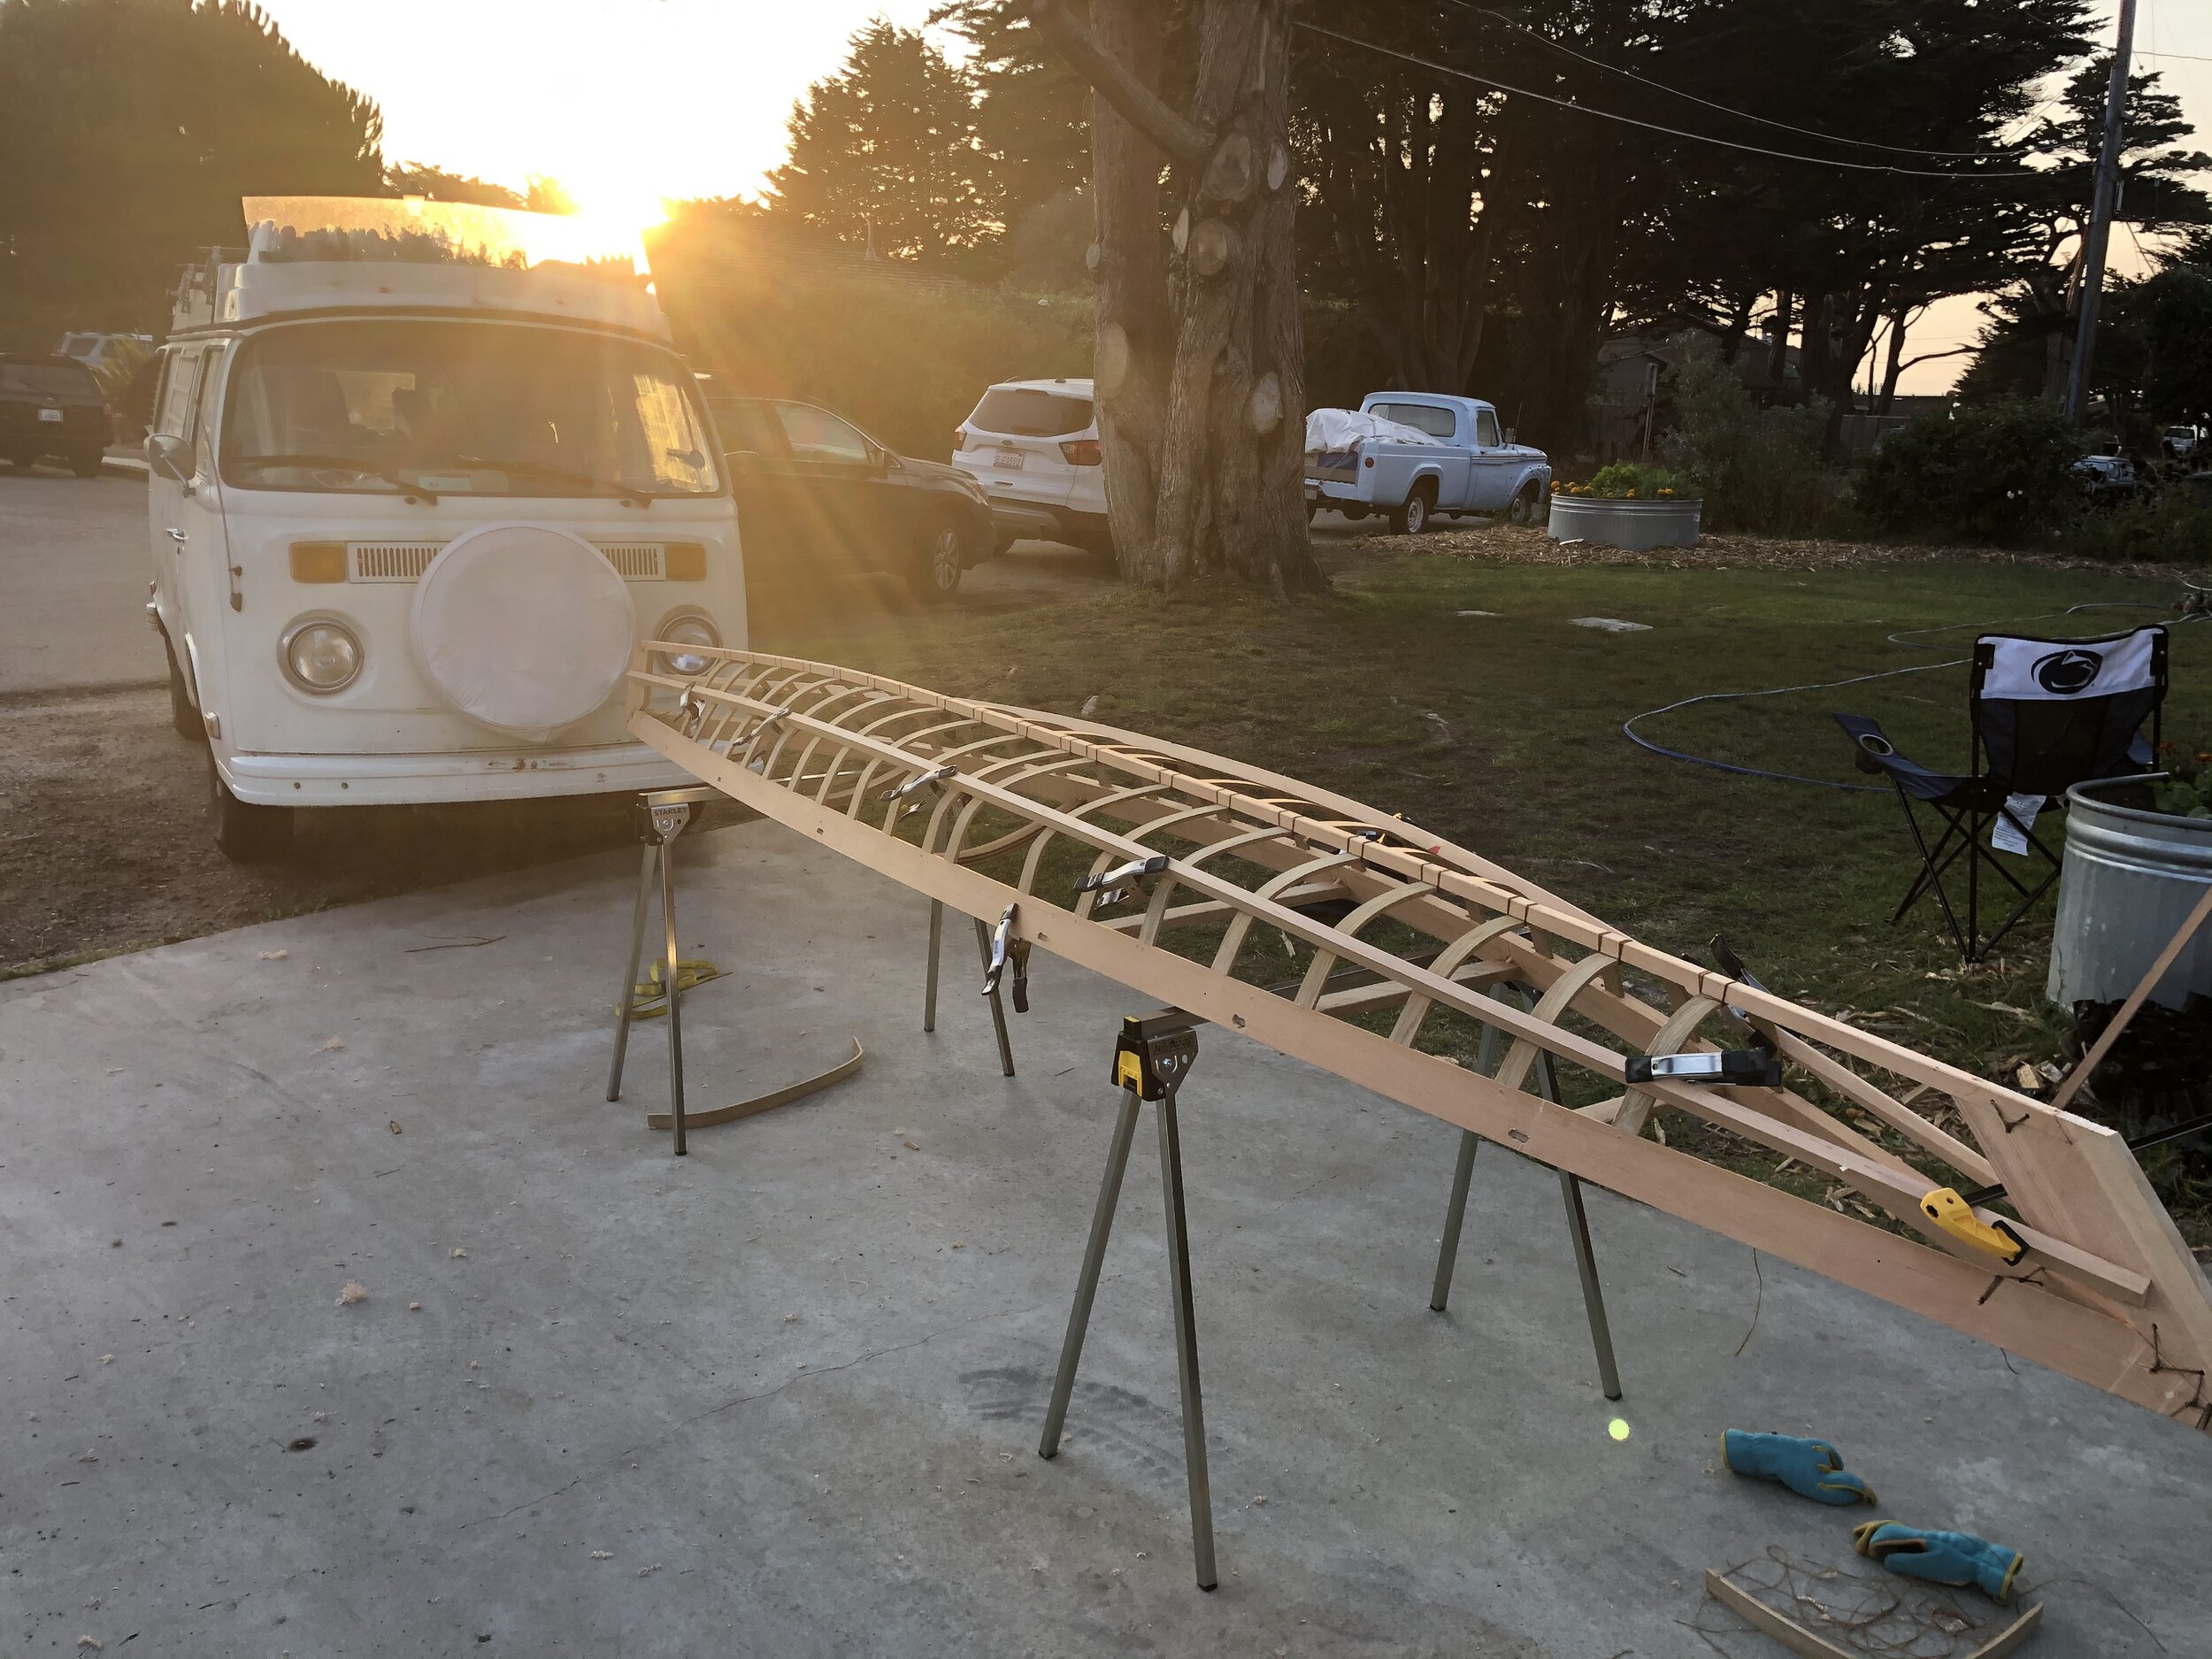
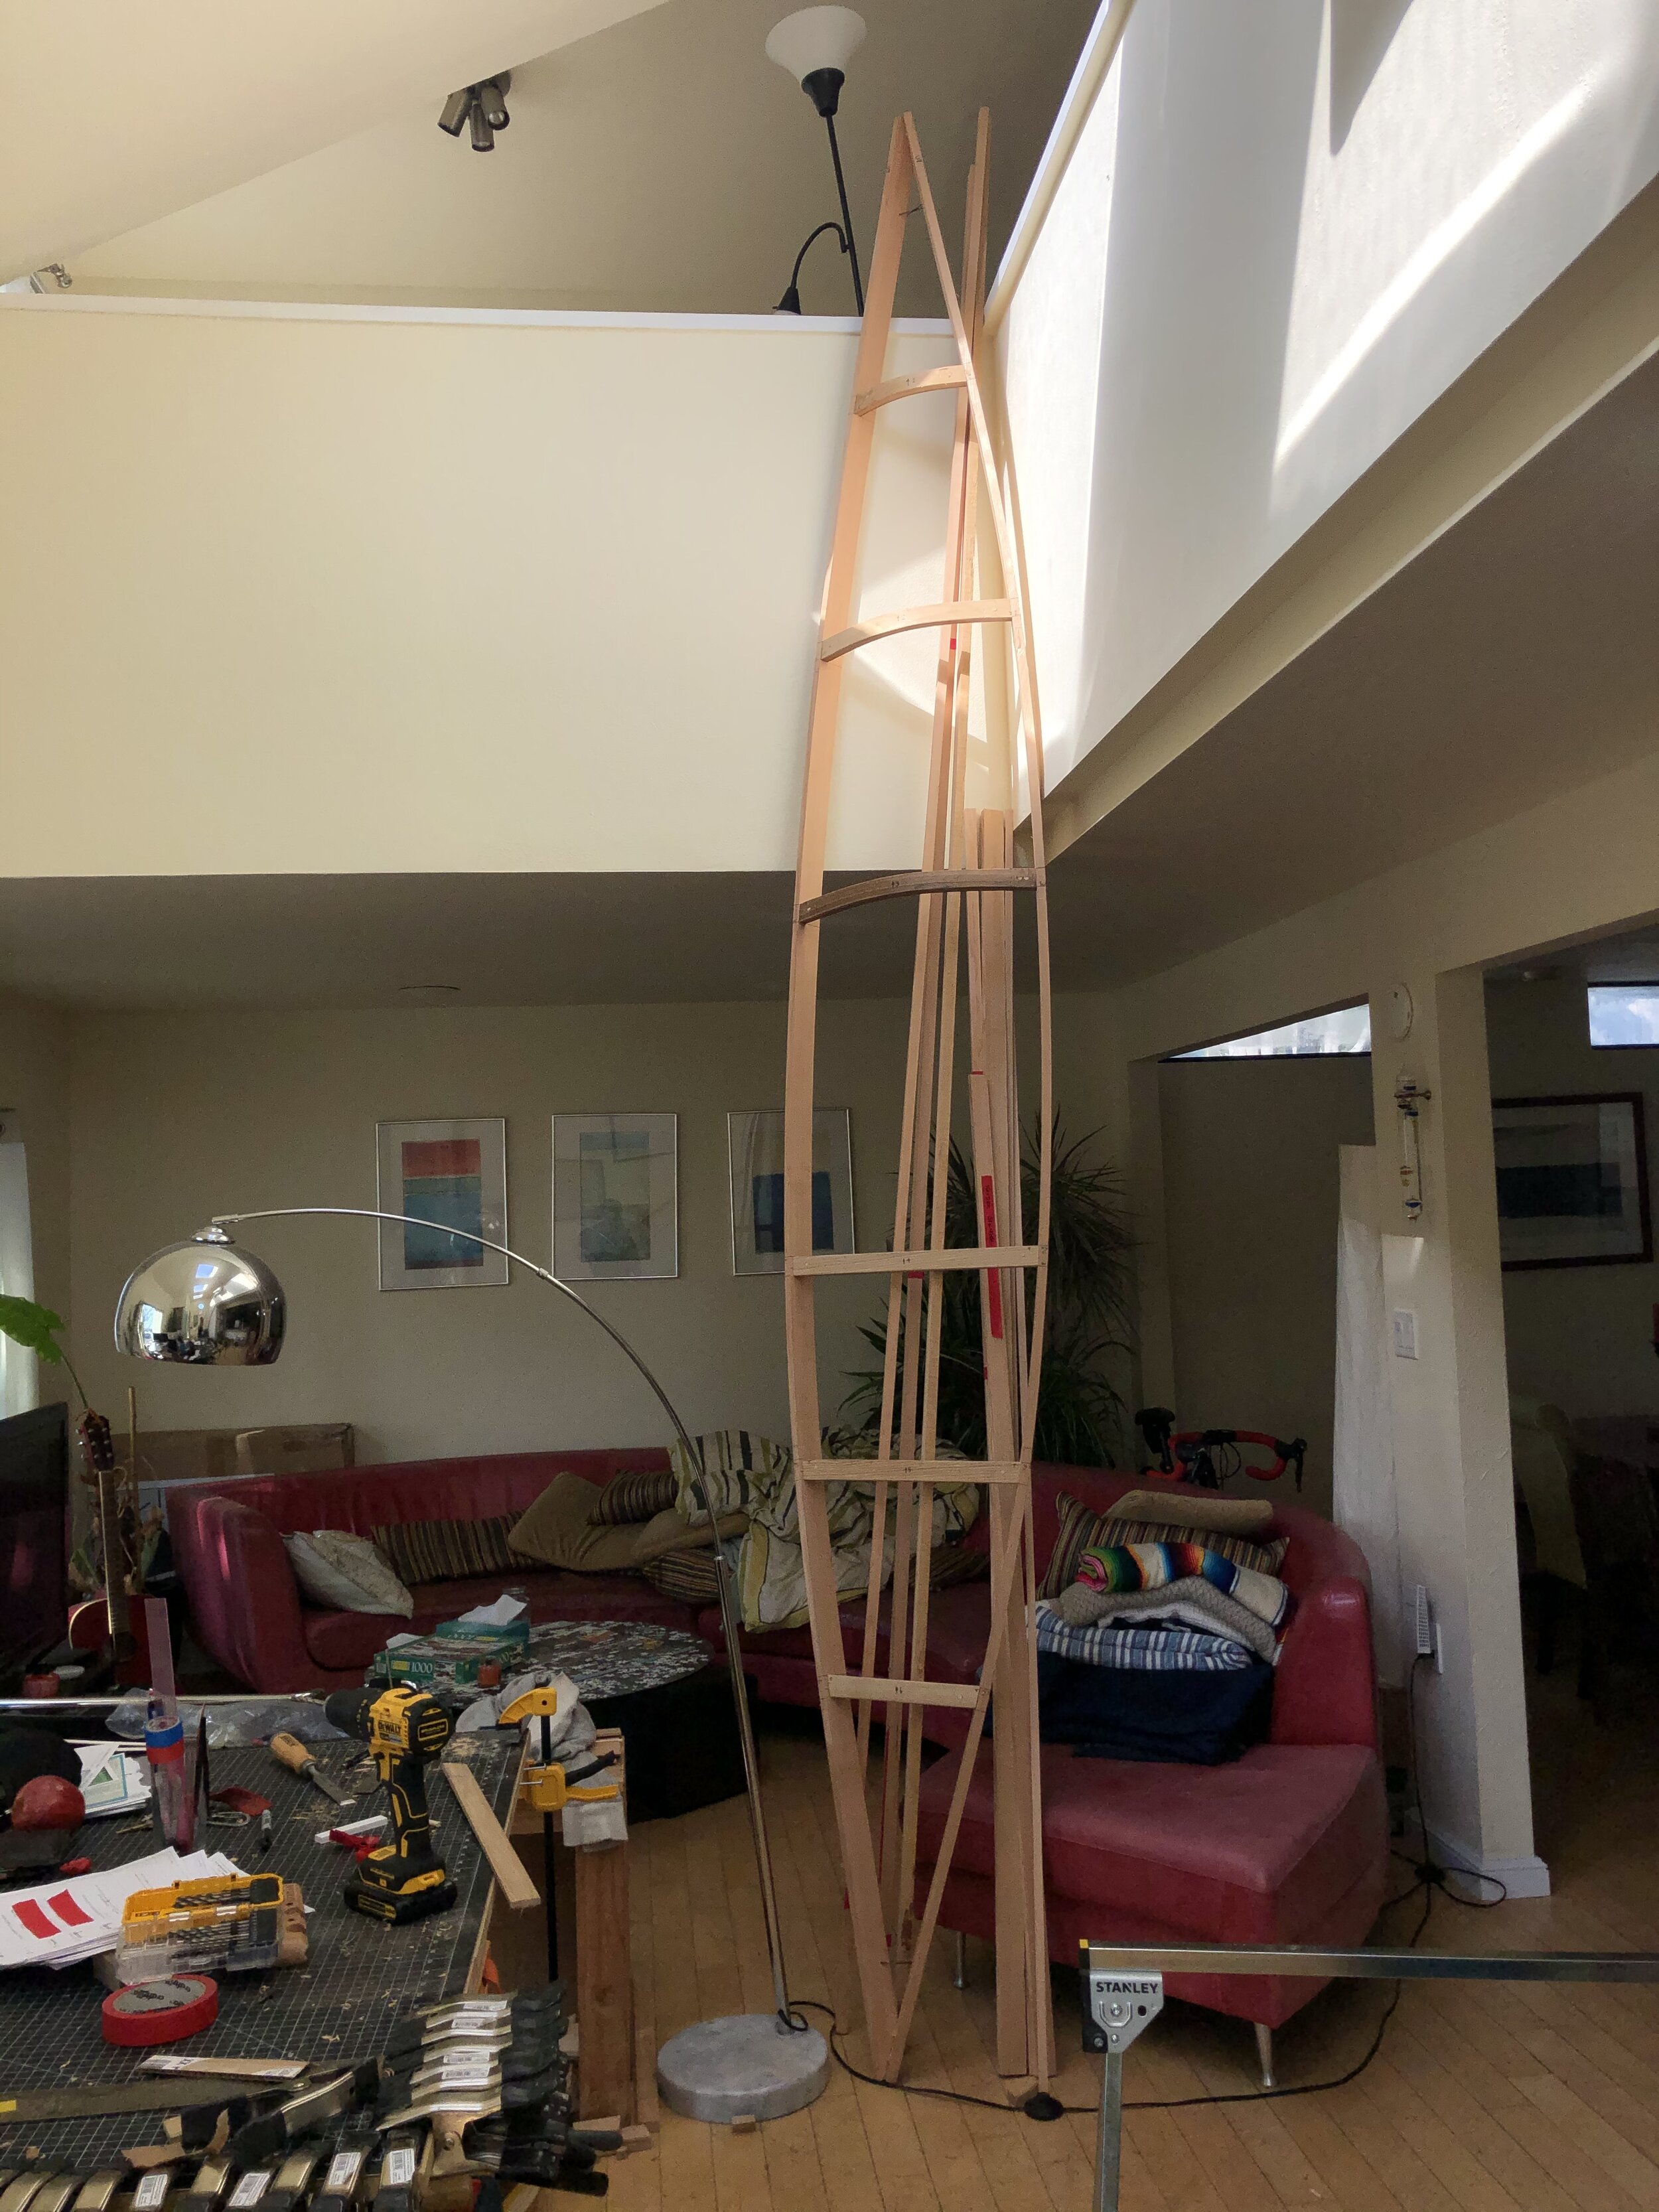
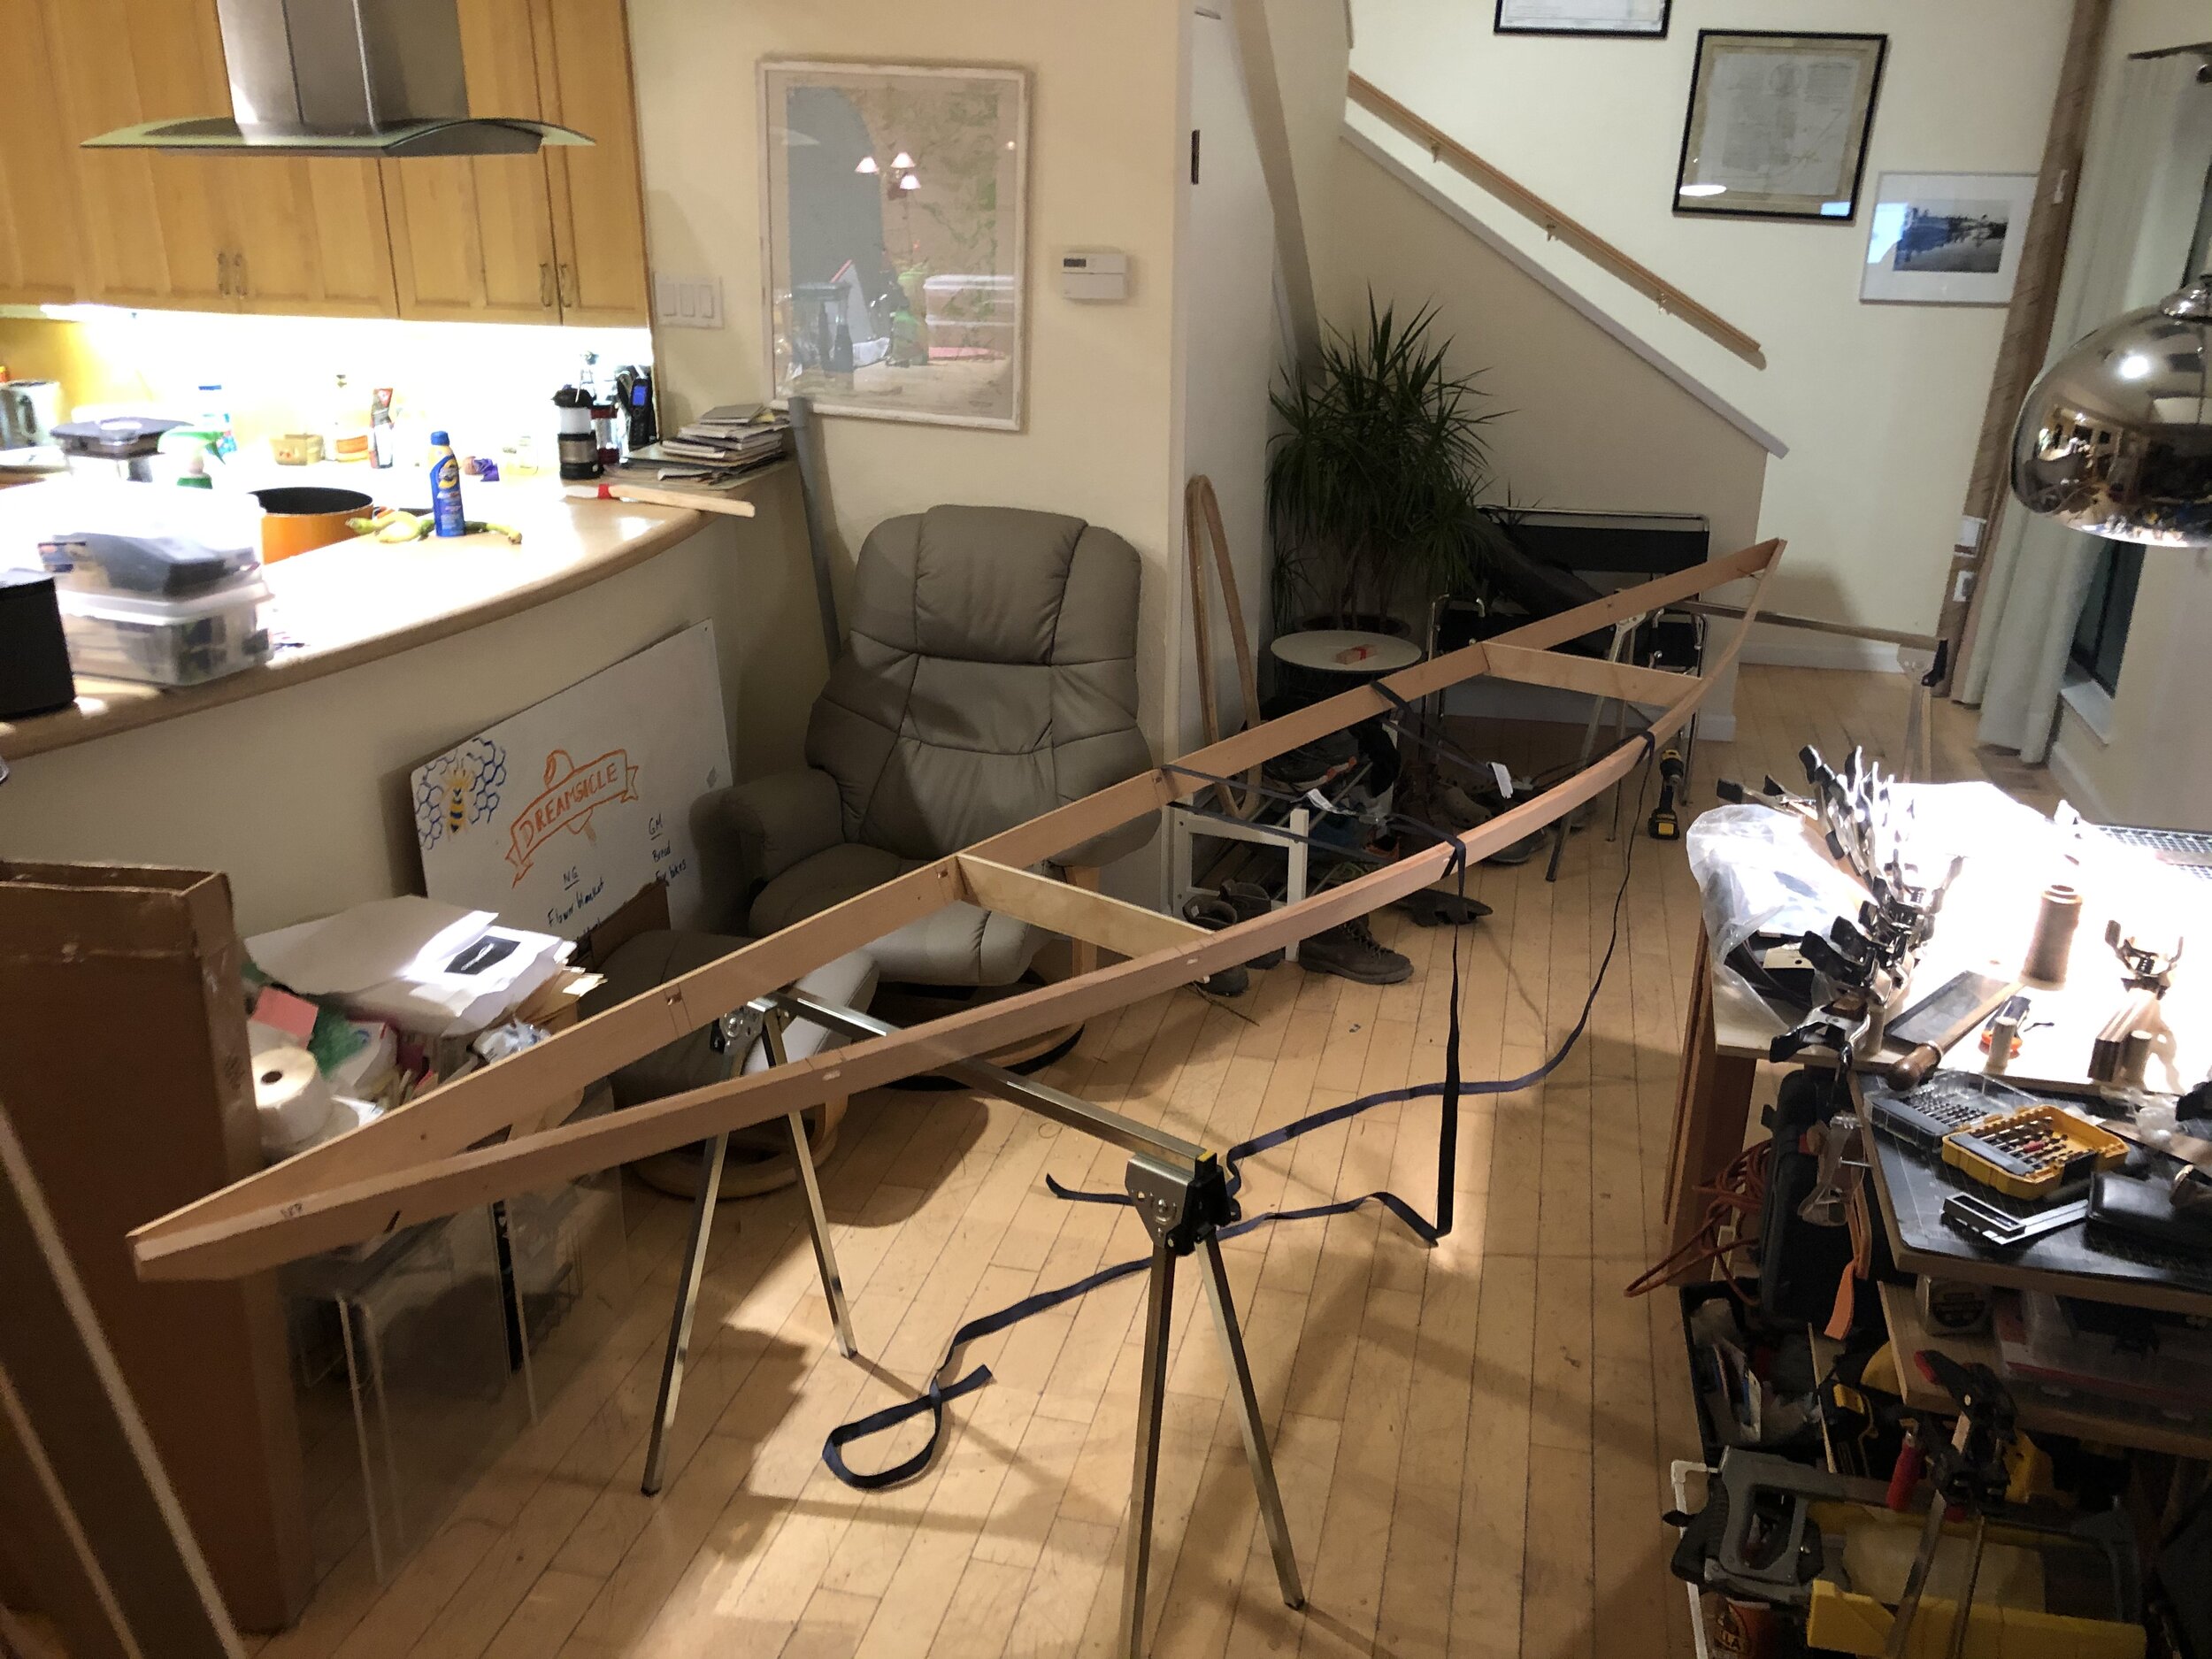
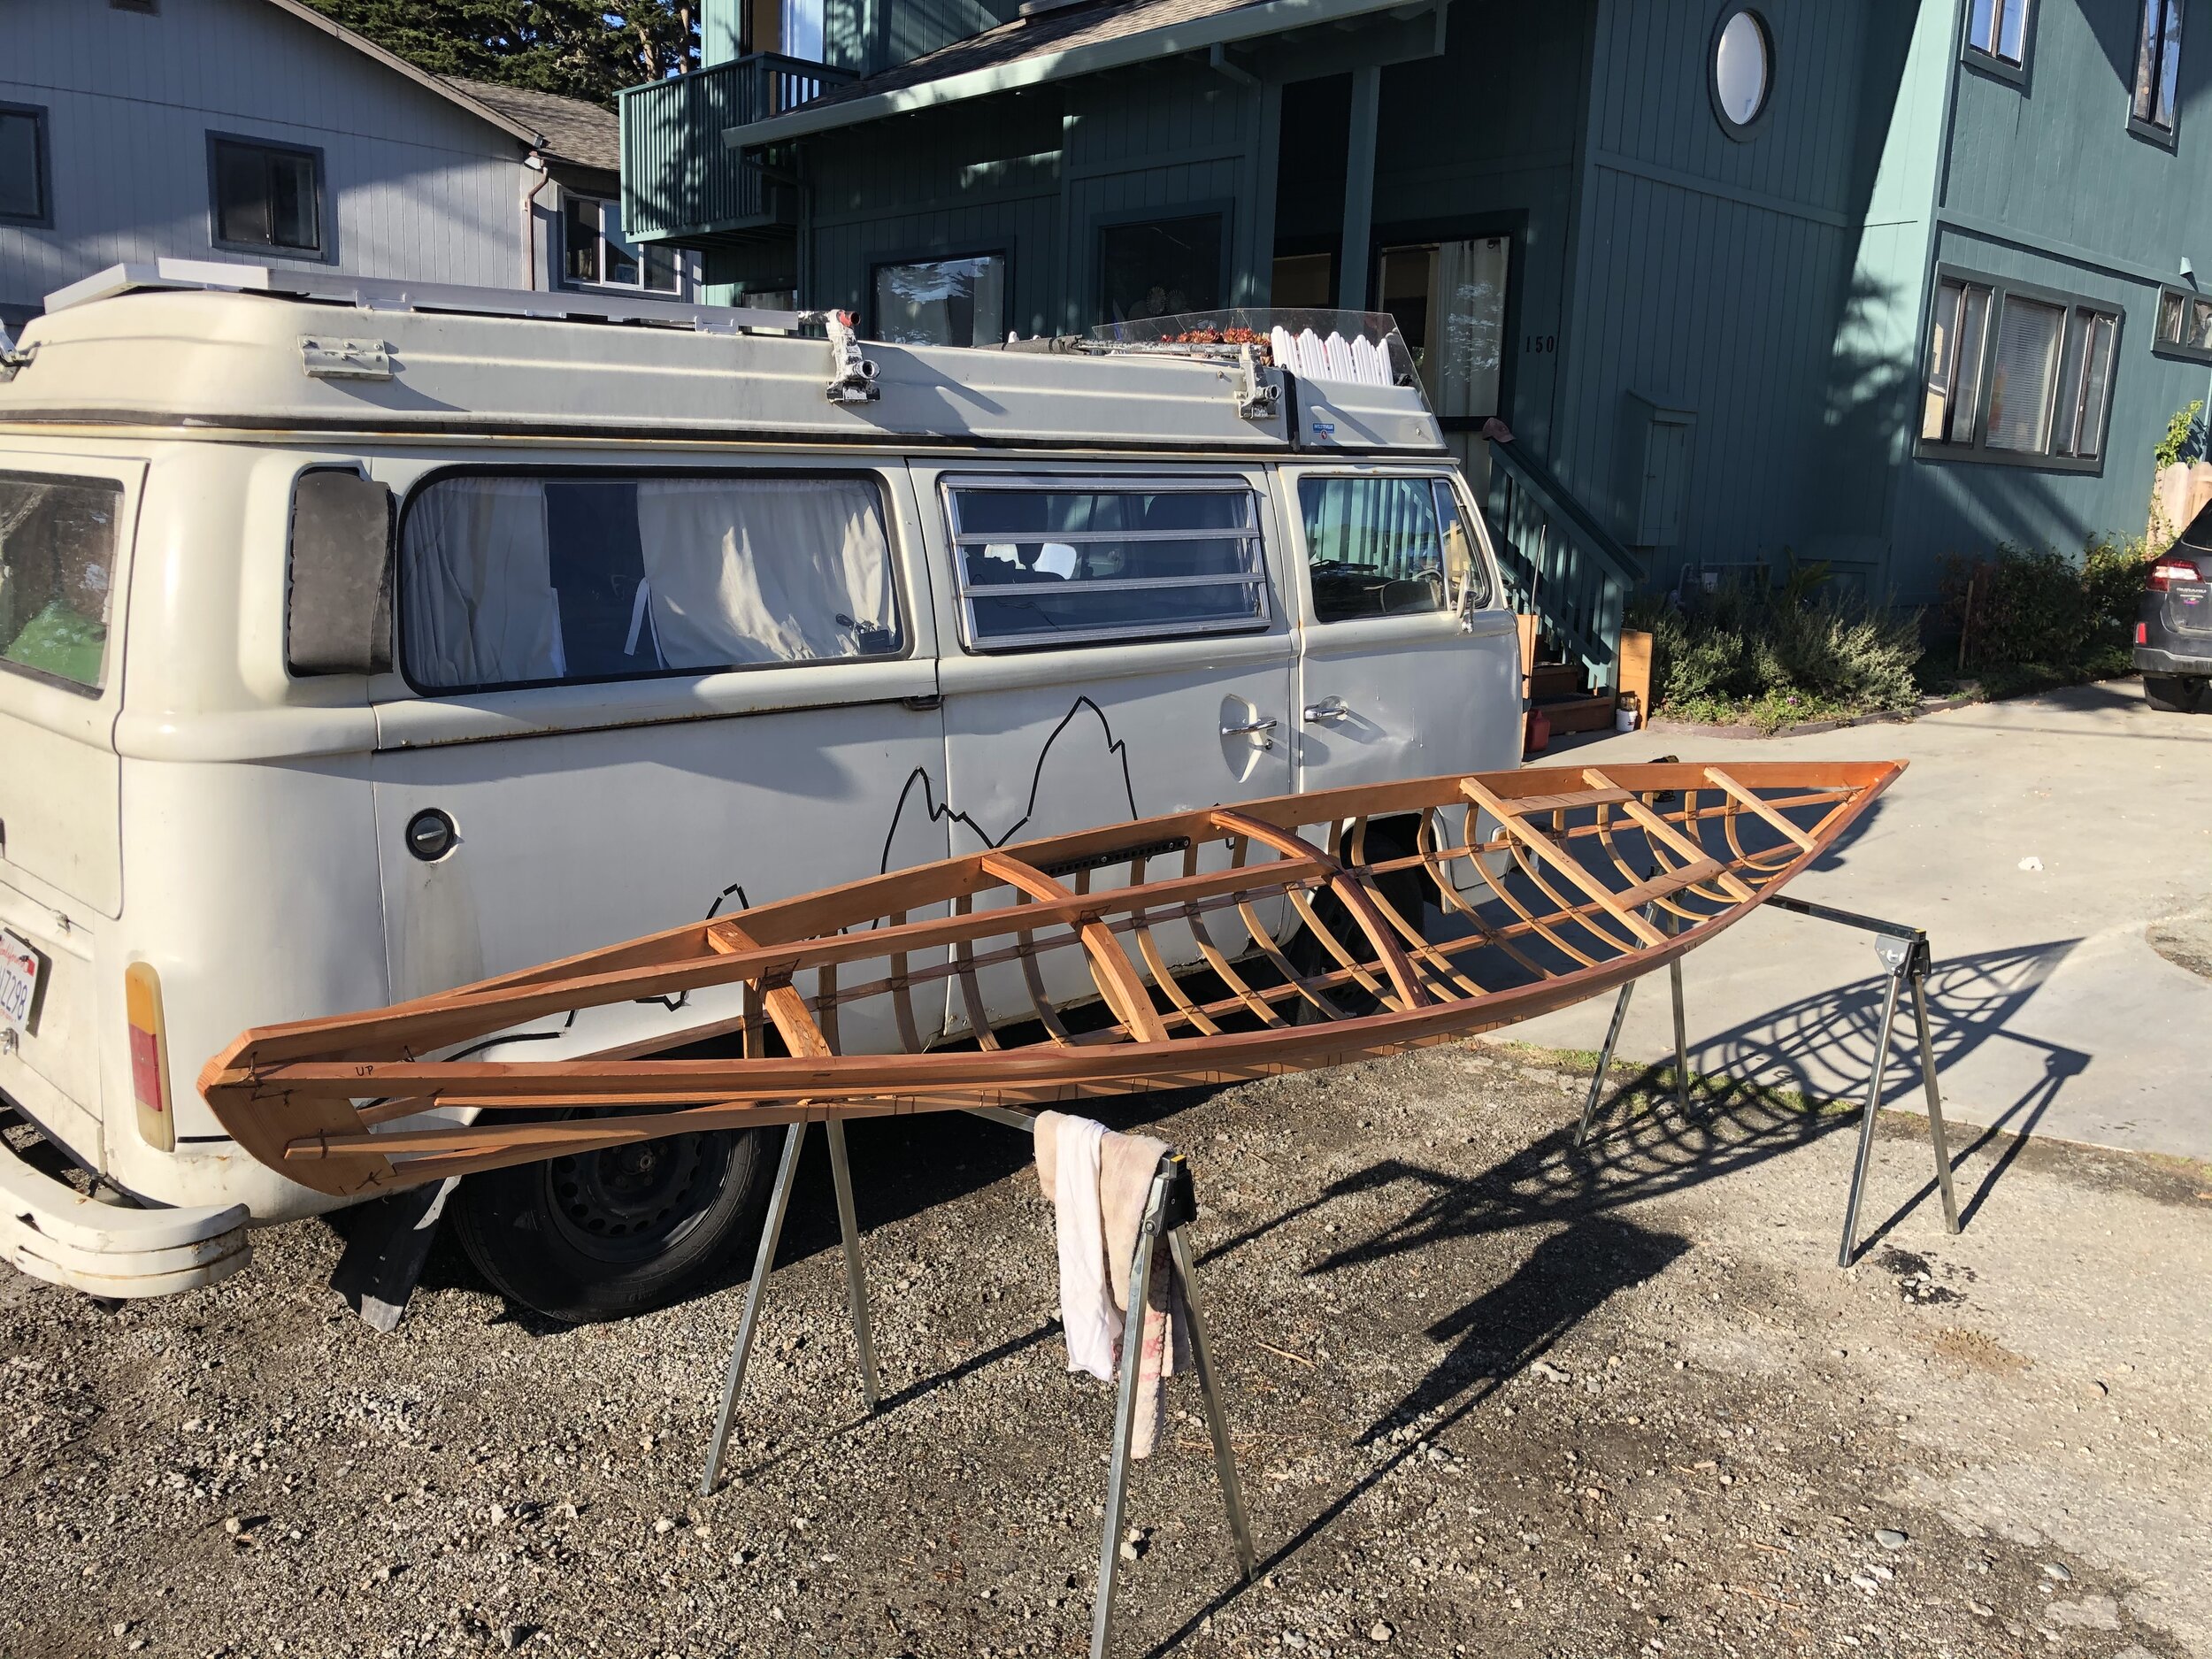
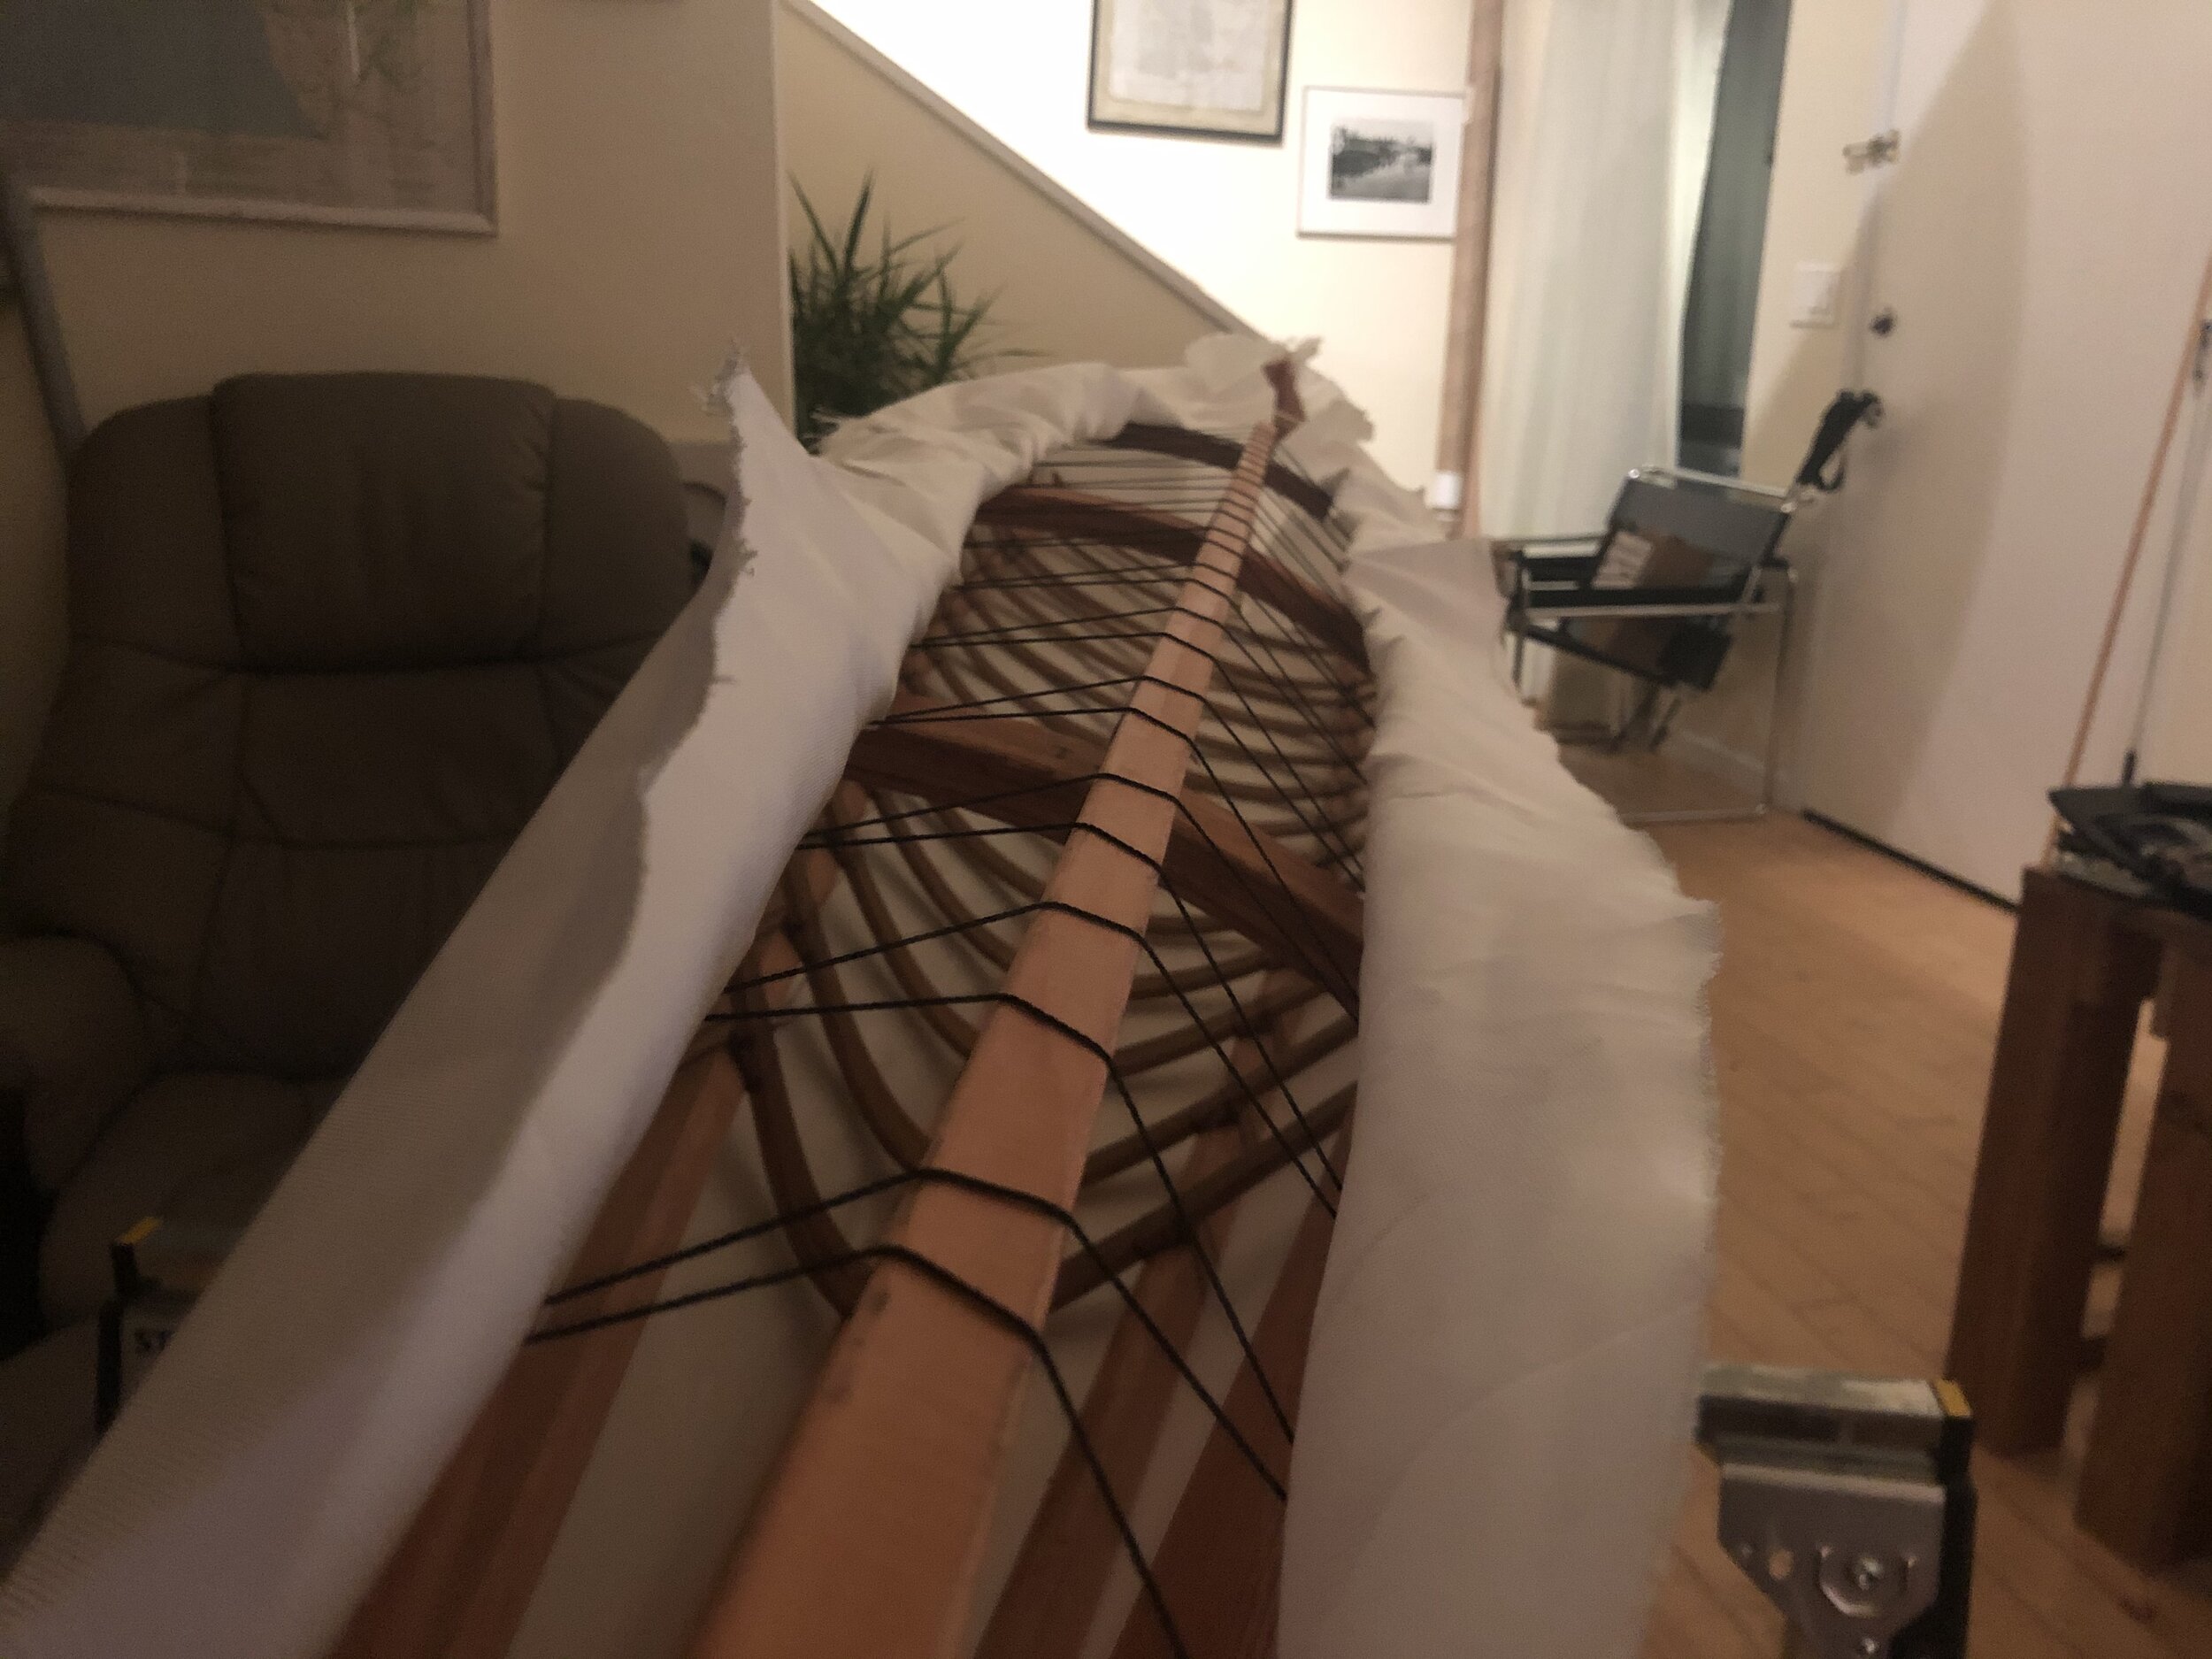
I’d be lying if I said it wasn’t a challenge trying to figure out how to build this in my living room. The weather in Moss Beach is too wet to allow me to leave it out overnight (at least not often), so that meant I was attempted to build a 14’ kayak in our living room. And fortunately for me, there was about 0.25” of clearance that allowed me to remove it from the house once it was assembled.

BUILD LOG
Here are a few of the images that I captured through the process of building the kayak. I was following the sage guidance of Cape Falcon Kayak’s Brian Schulz and Stanford’s Product Realization Lab’s Craig Milroy.
LAYOUT & PREP //
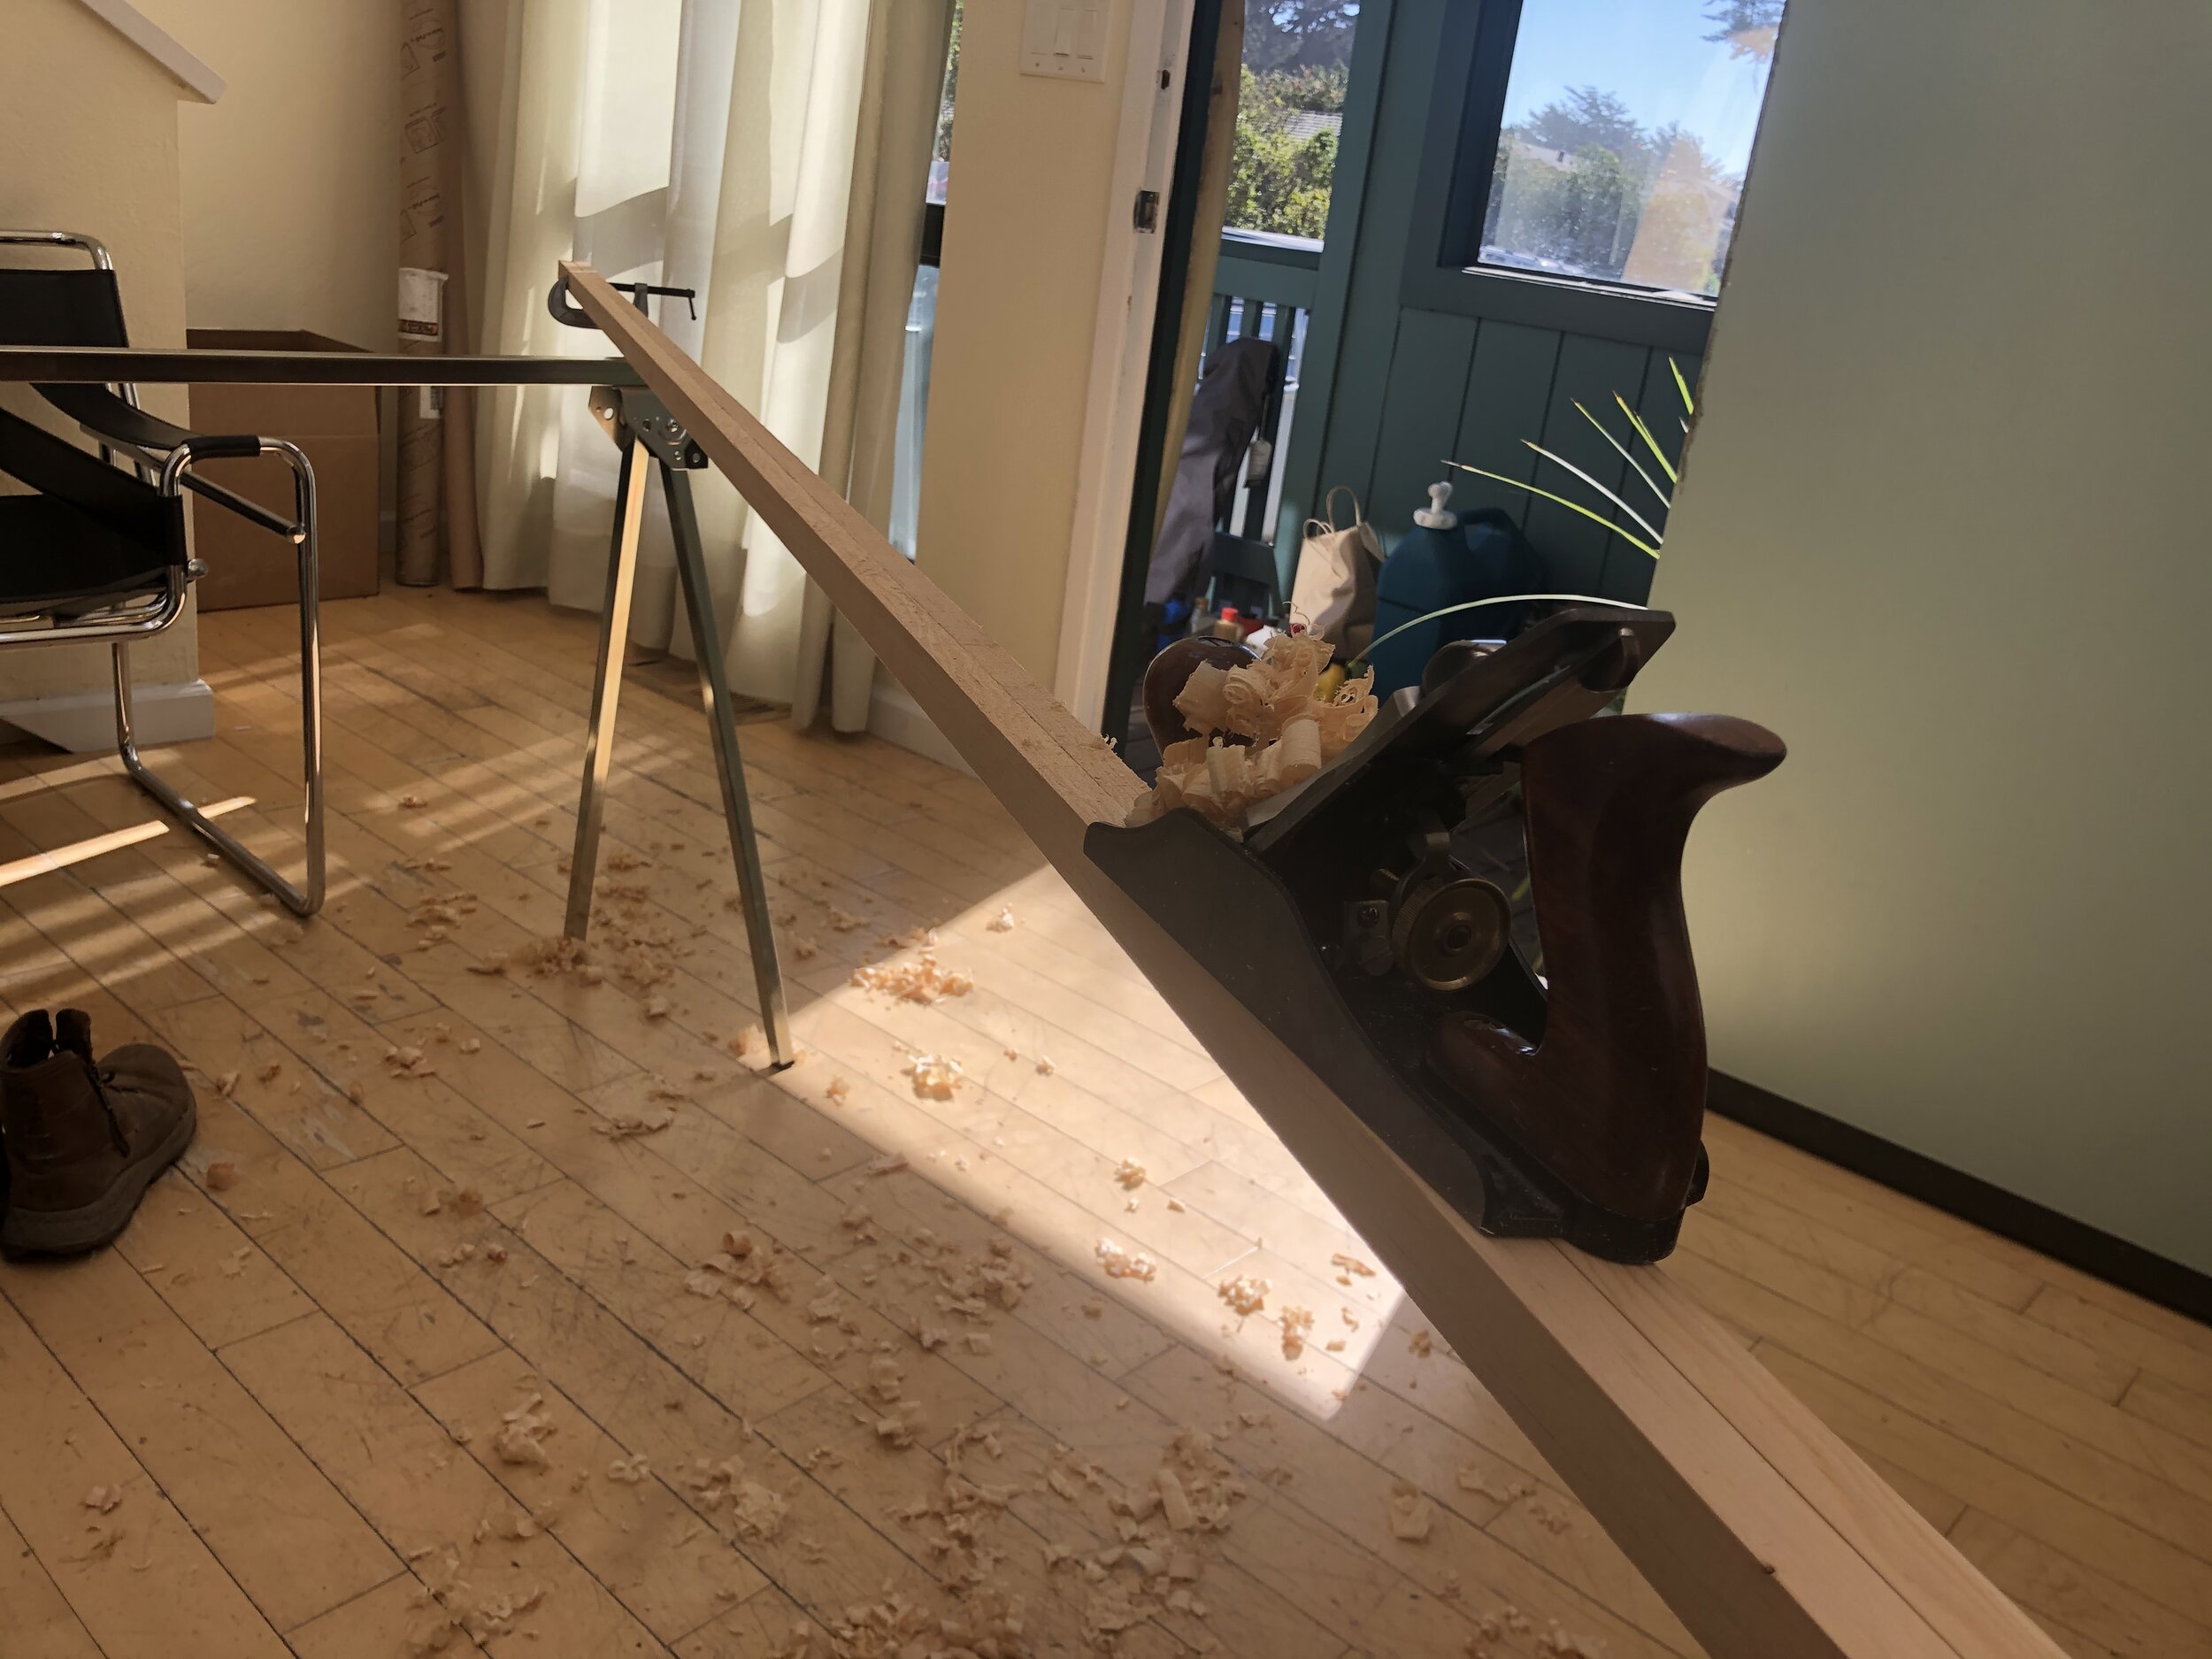
The project started by prepping all of the wood. I purchased my wood from MacBeath Hardwood in Oakland where I only had one option for 14’ lengths of wood and decided that I would rather not try to scarf multiple pieces of wood together for the gunwales. I decided to go with the Douglas Fir that was available, and even though it is a bit heavier, it was still rot resistant.
I had limited access to power tools so I had to do the majority of this in one go and get everything planed and ripped to the right dimensions. Because the boards were so long, I wasn’t able to fit them on the table saw that I was using so I had to use a bandsaw to cut all my 14’ pieces. This meant that I had to hand plane everything.
I opted to purchase the coaming from Cape Falcon for the cockpit as Brian described it as the most challenging part and I was concerned about being able to accomplish this kayak in the timeframe I had given myself.
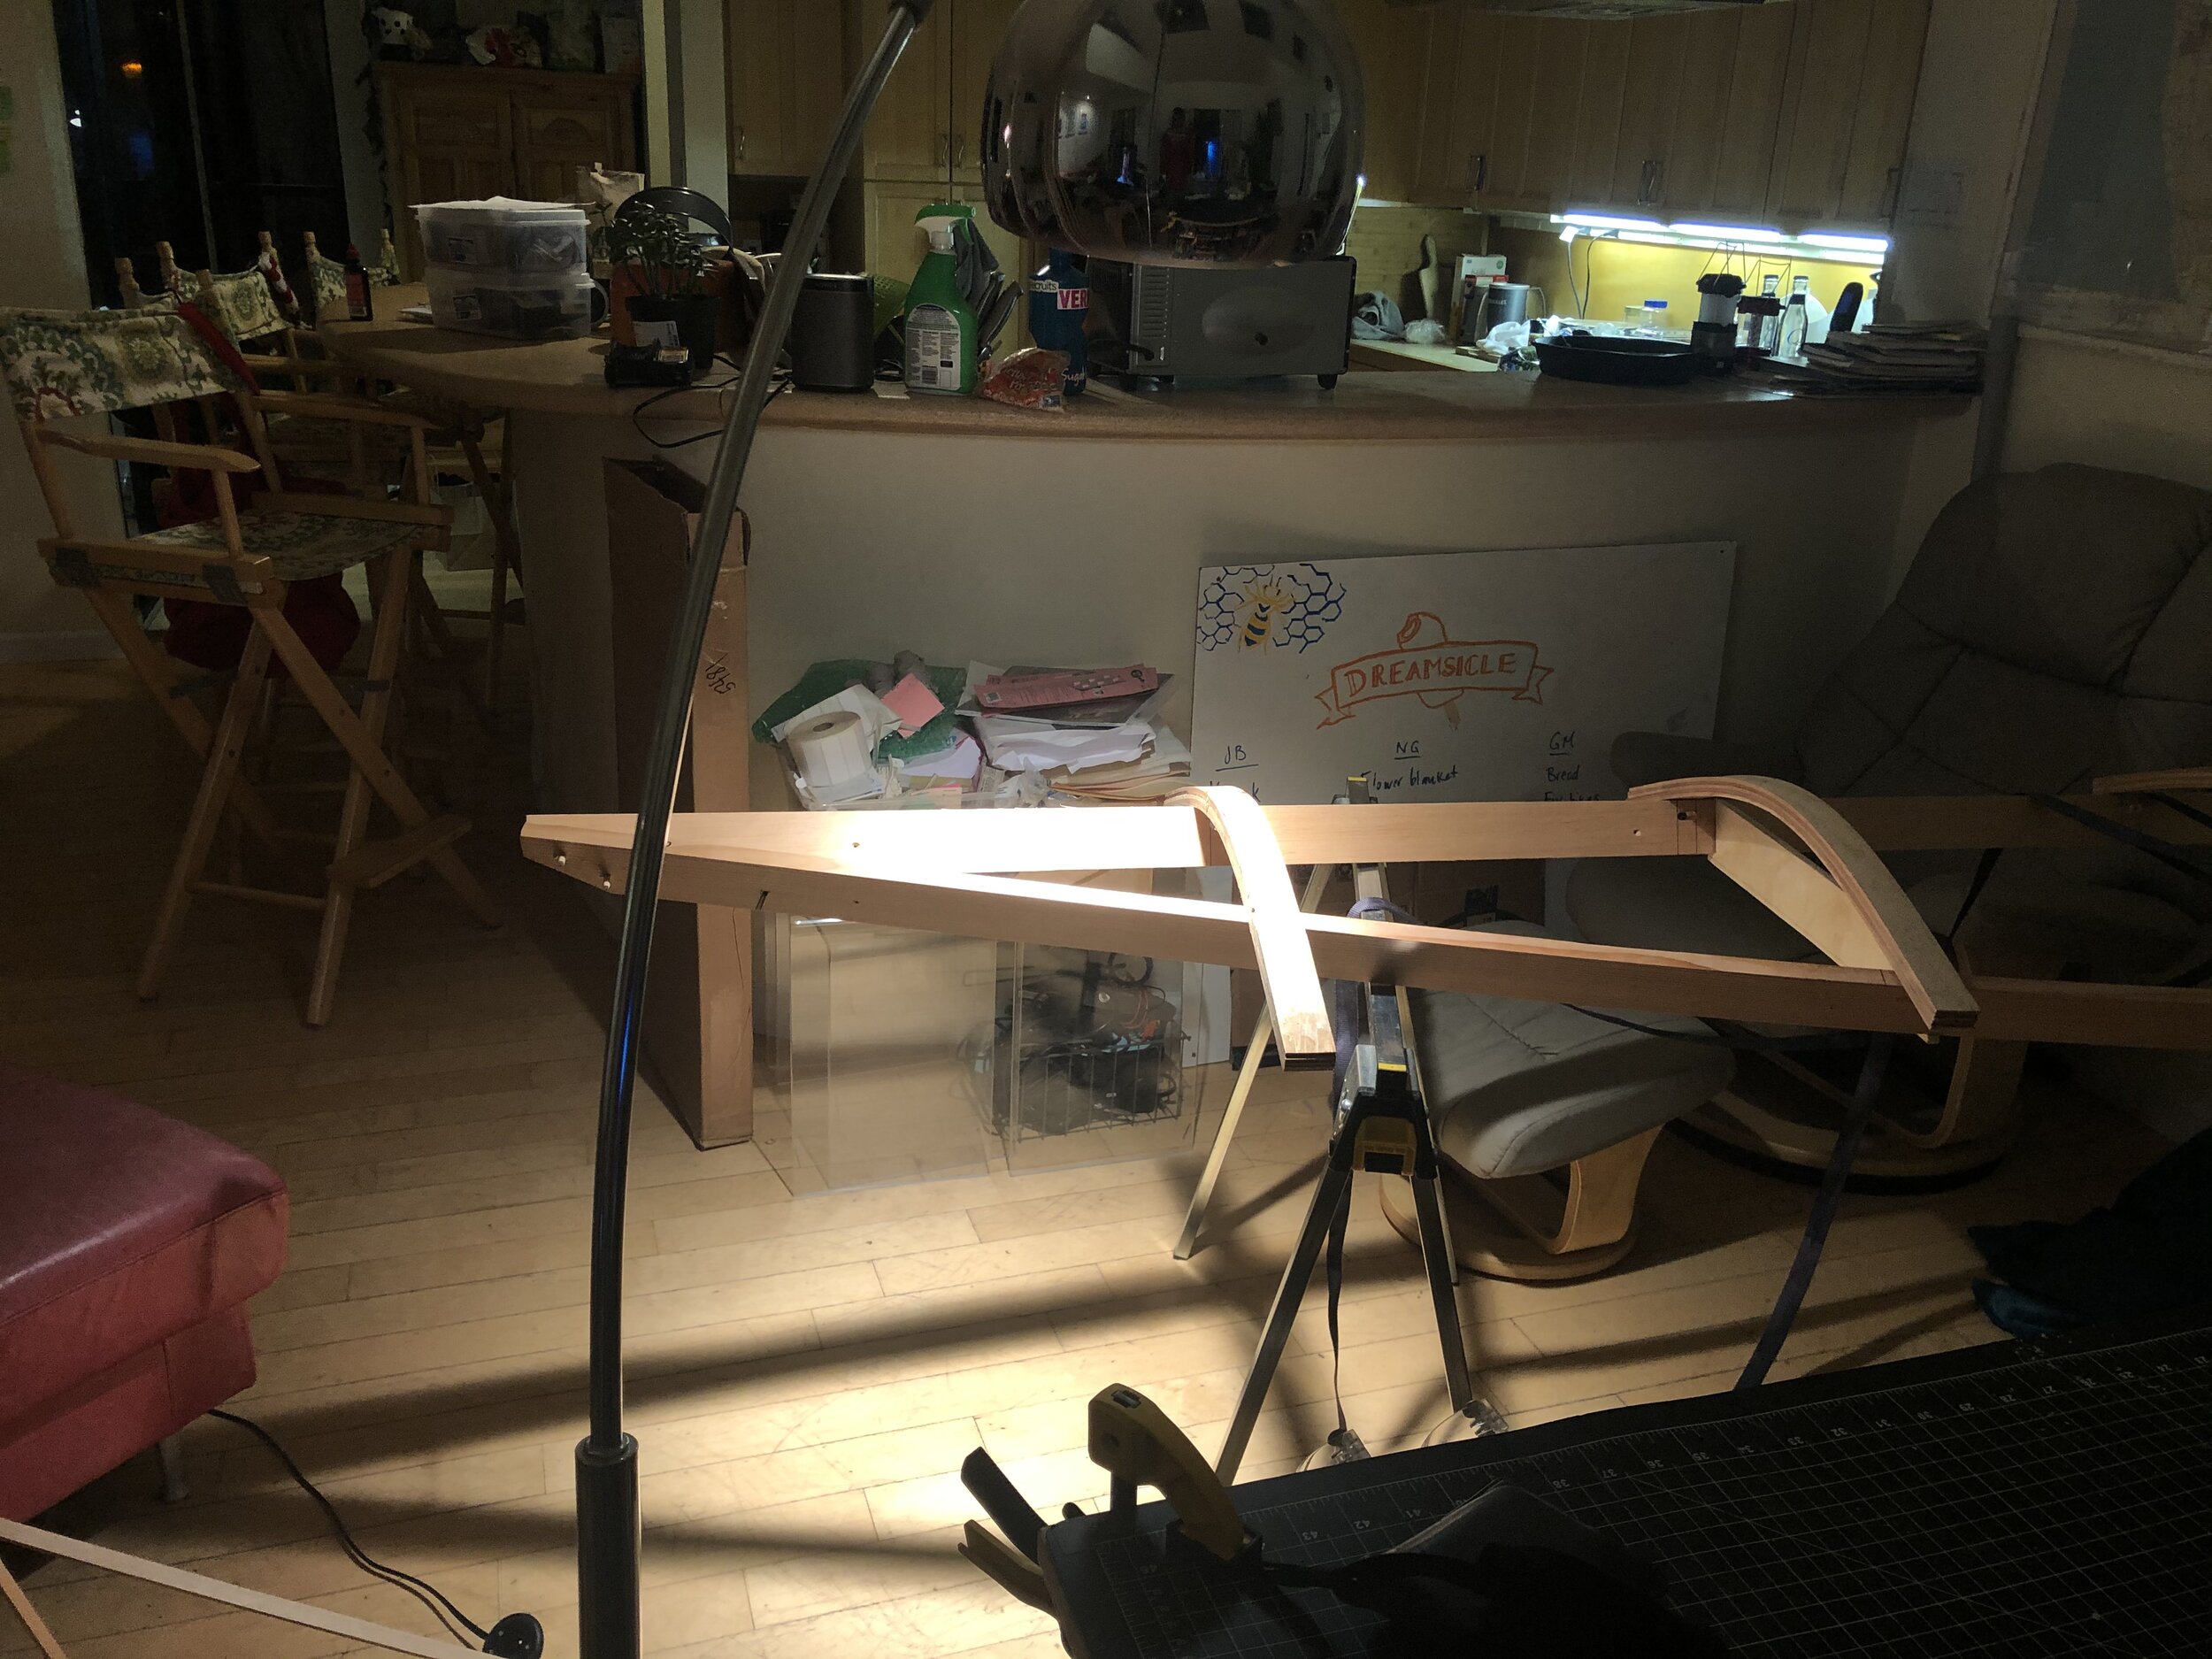
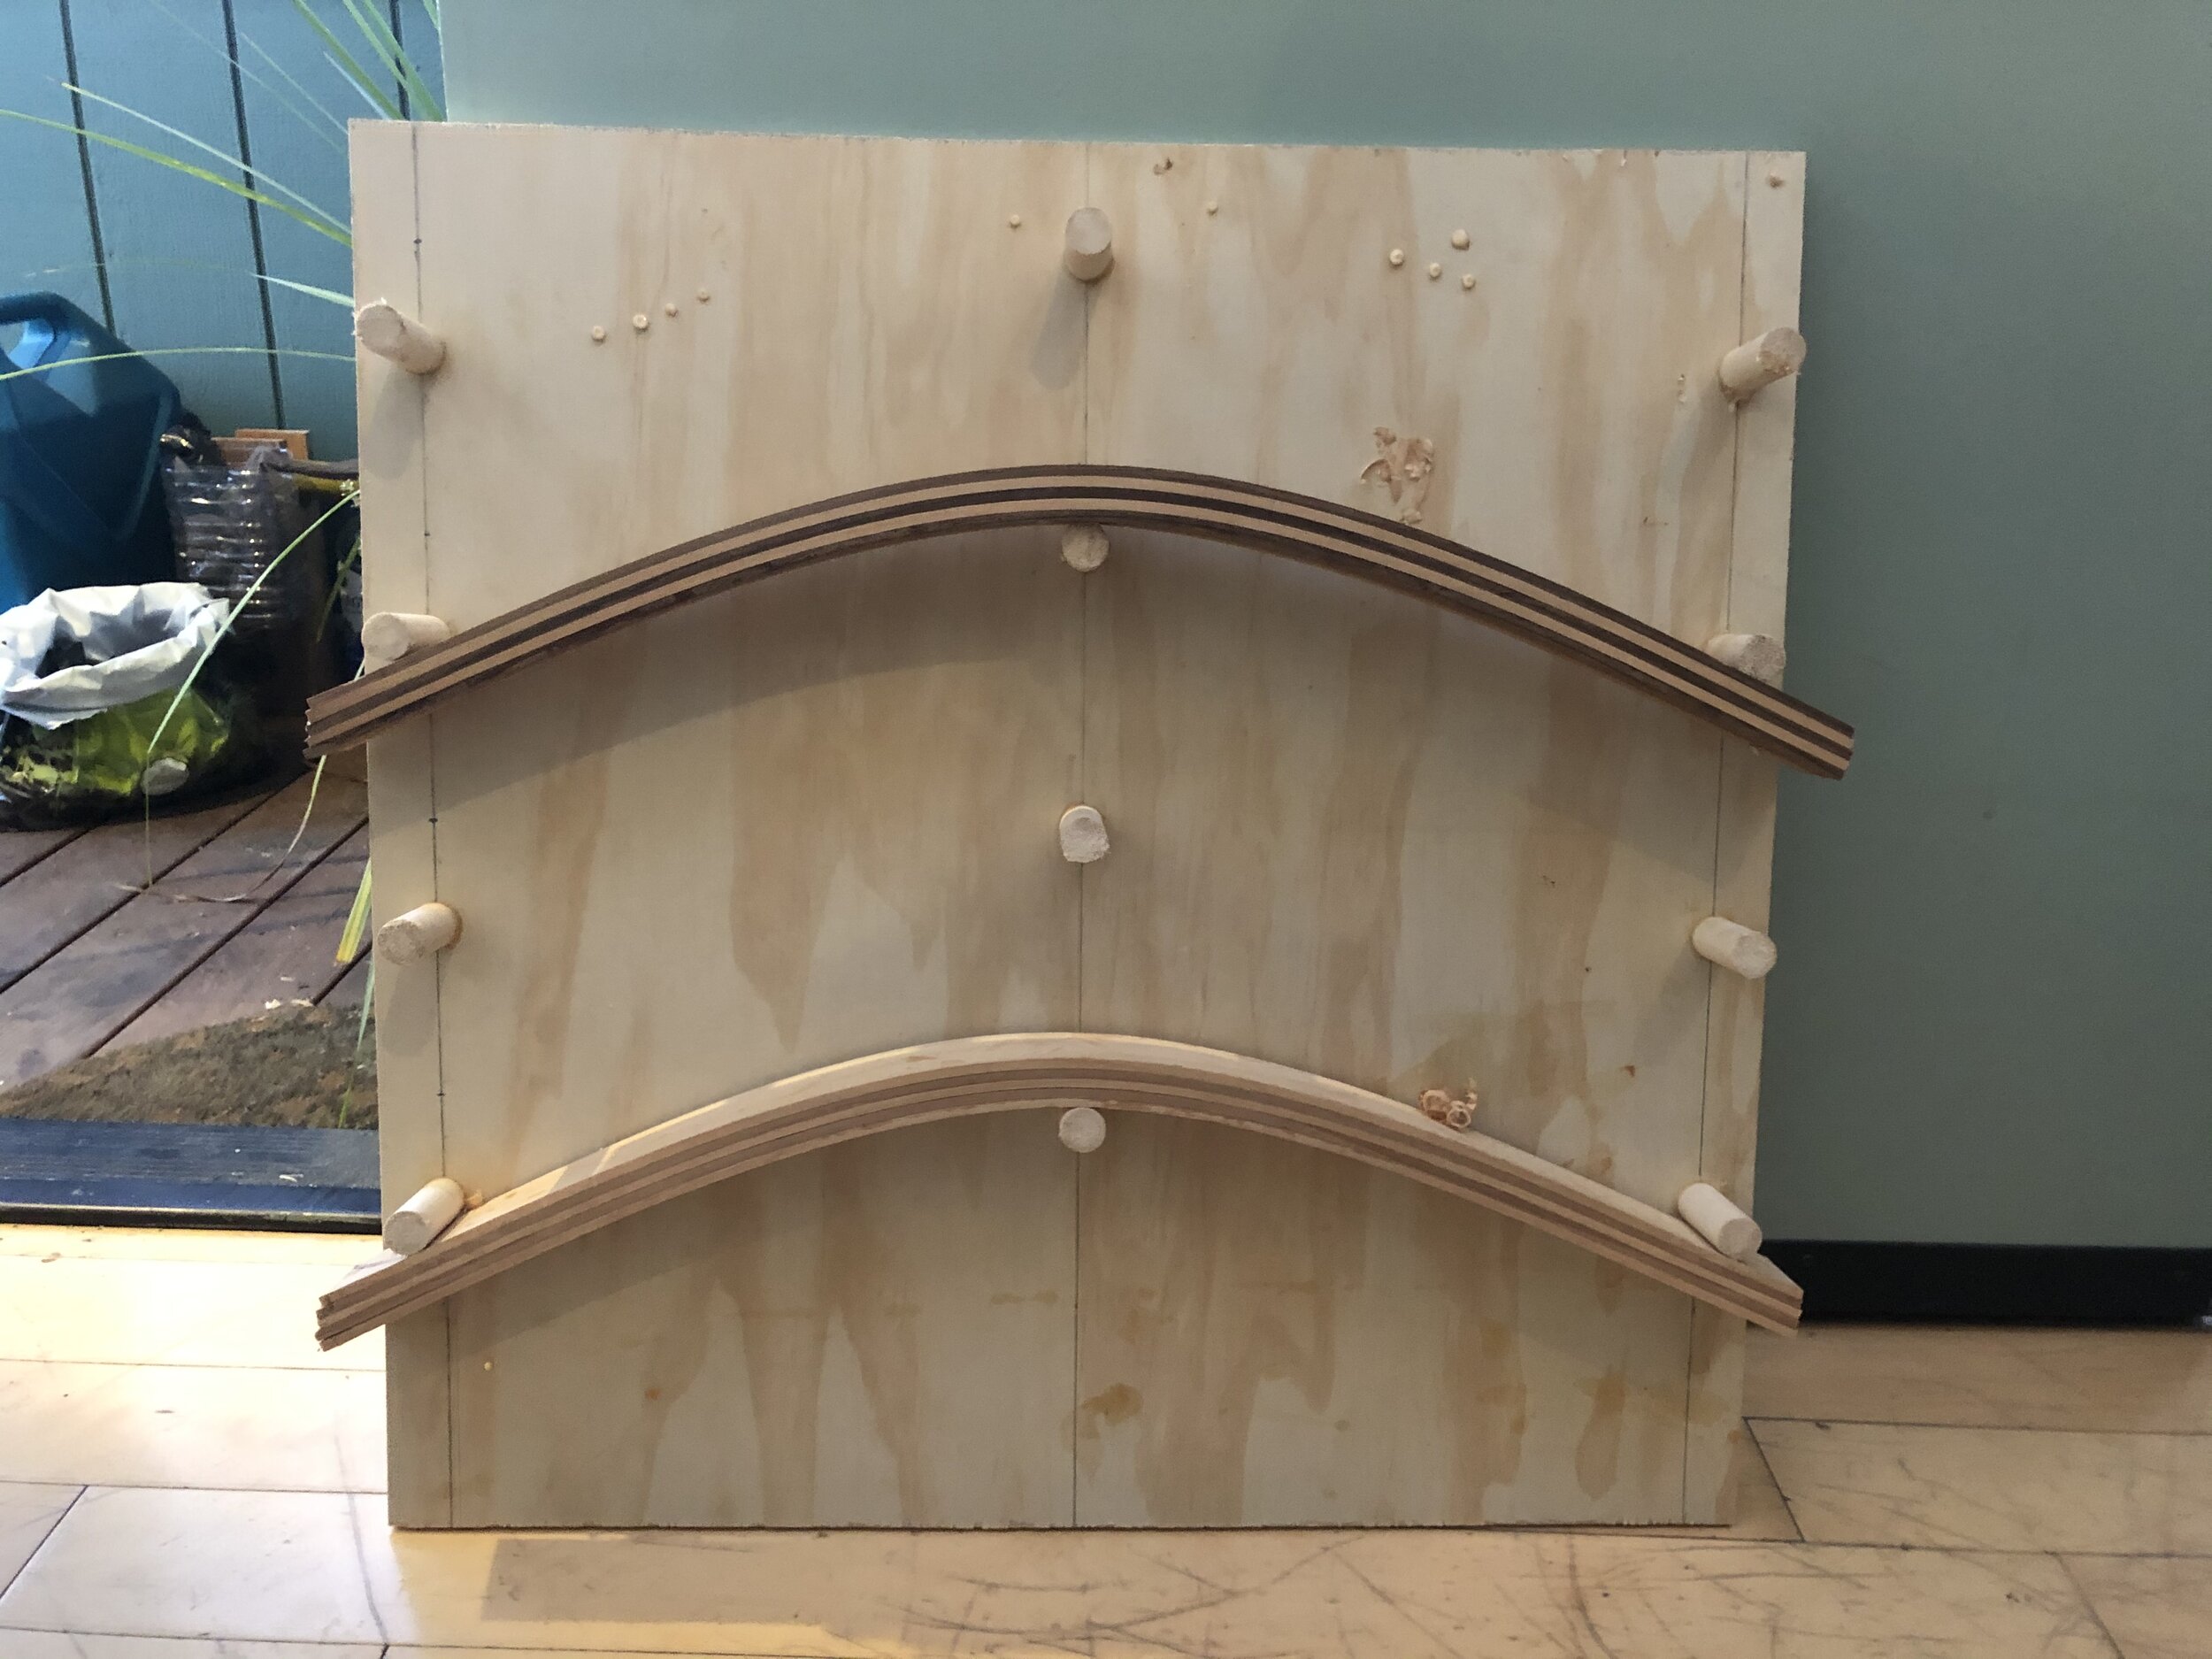
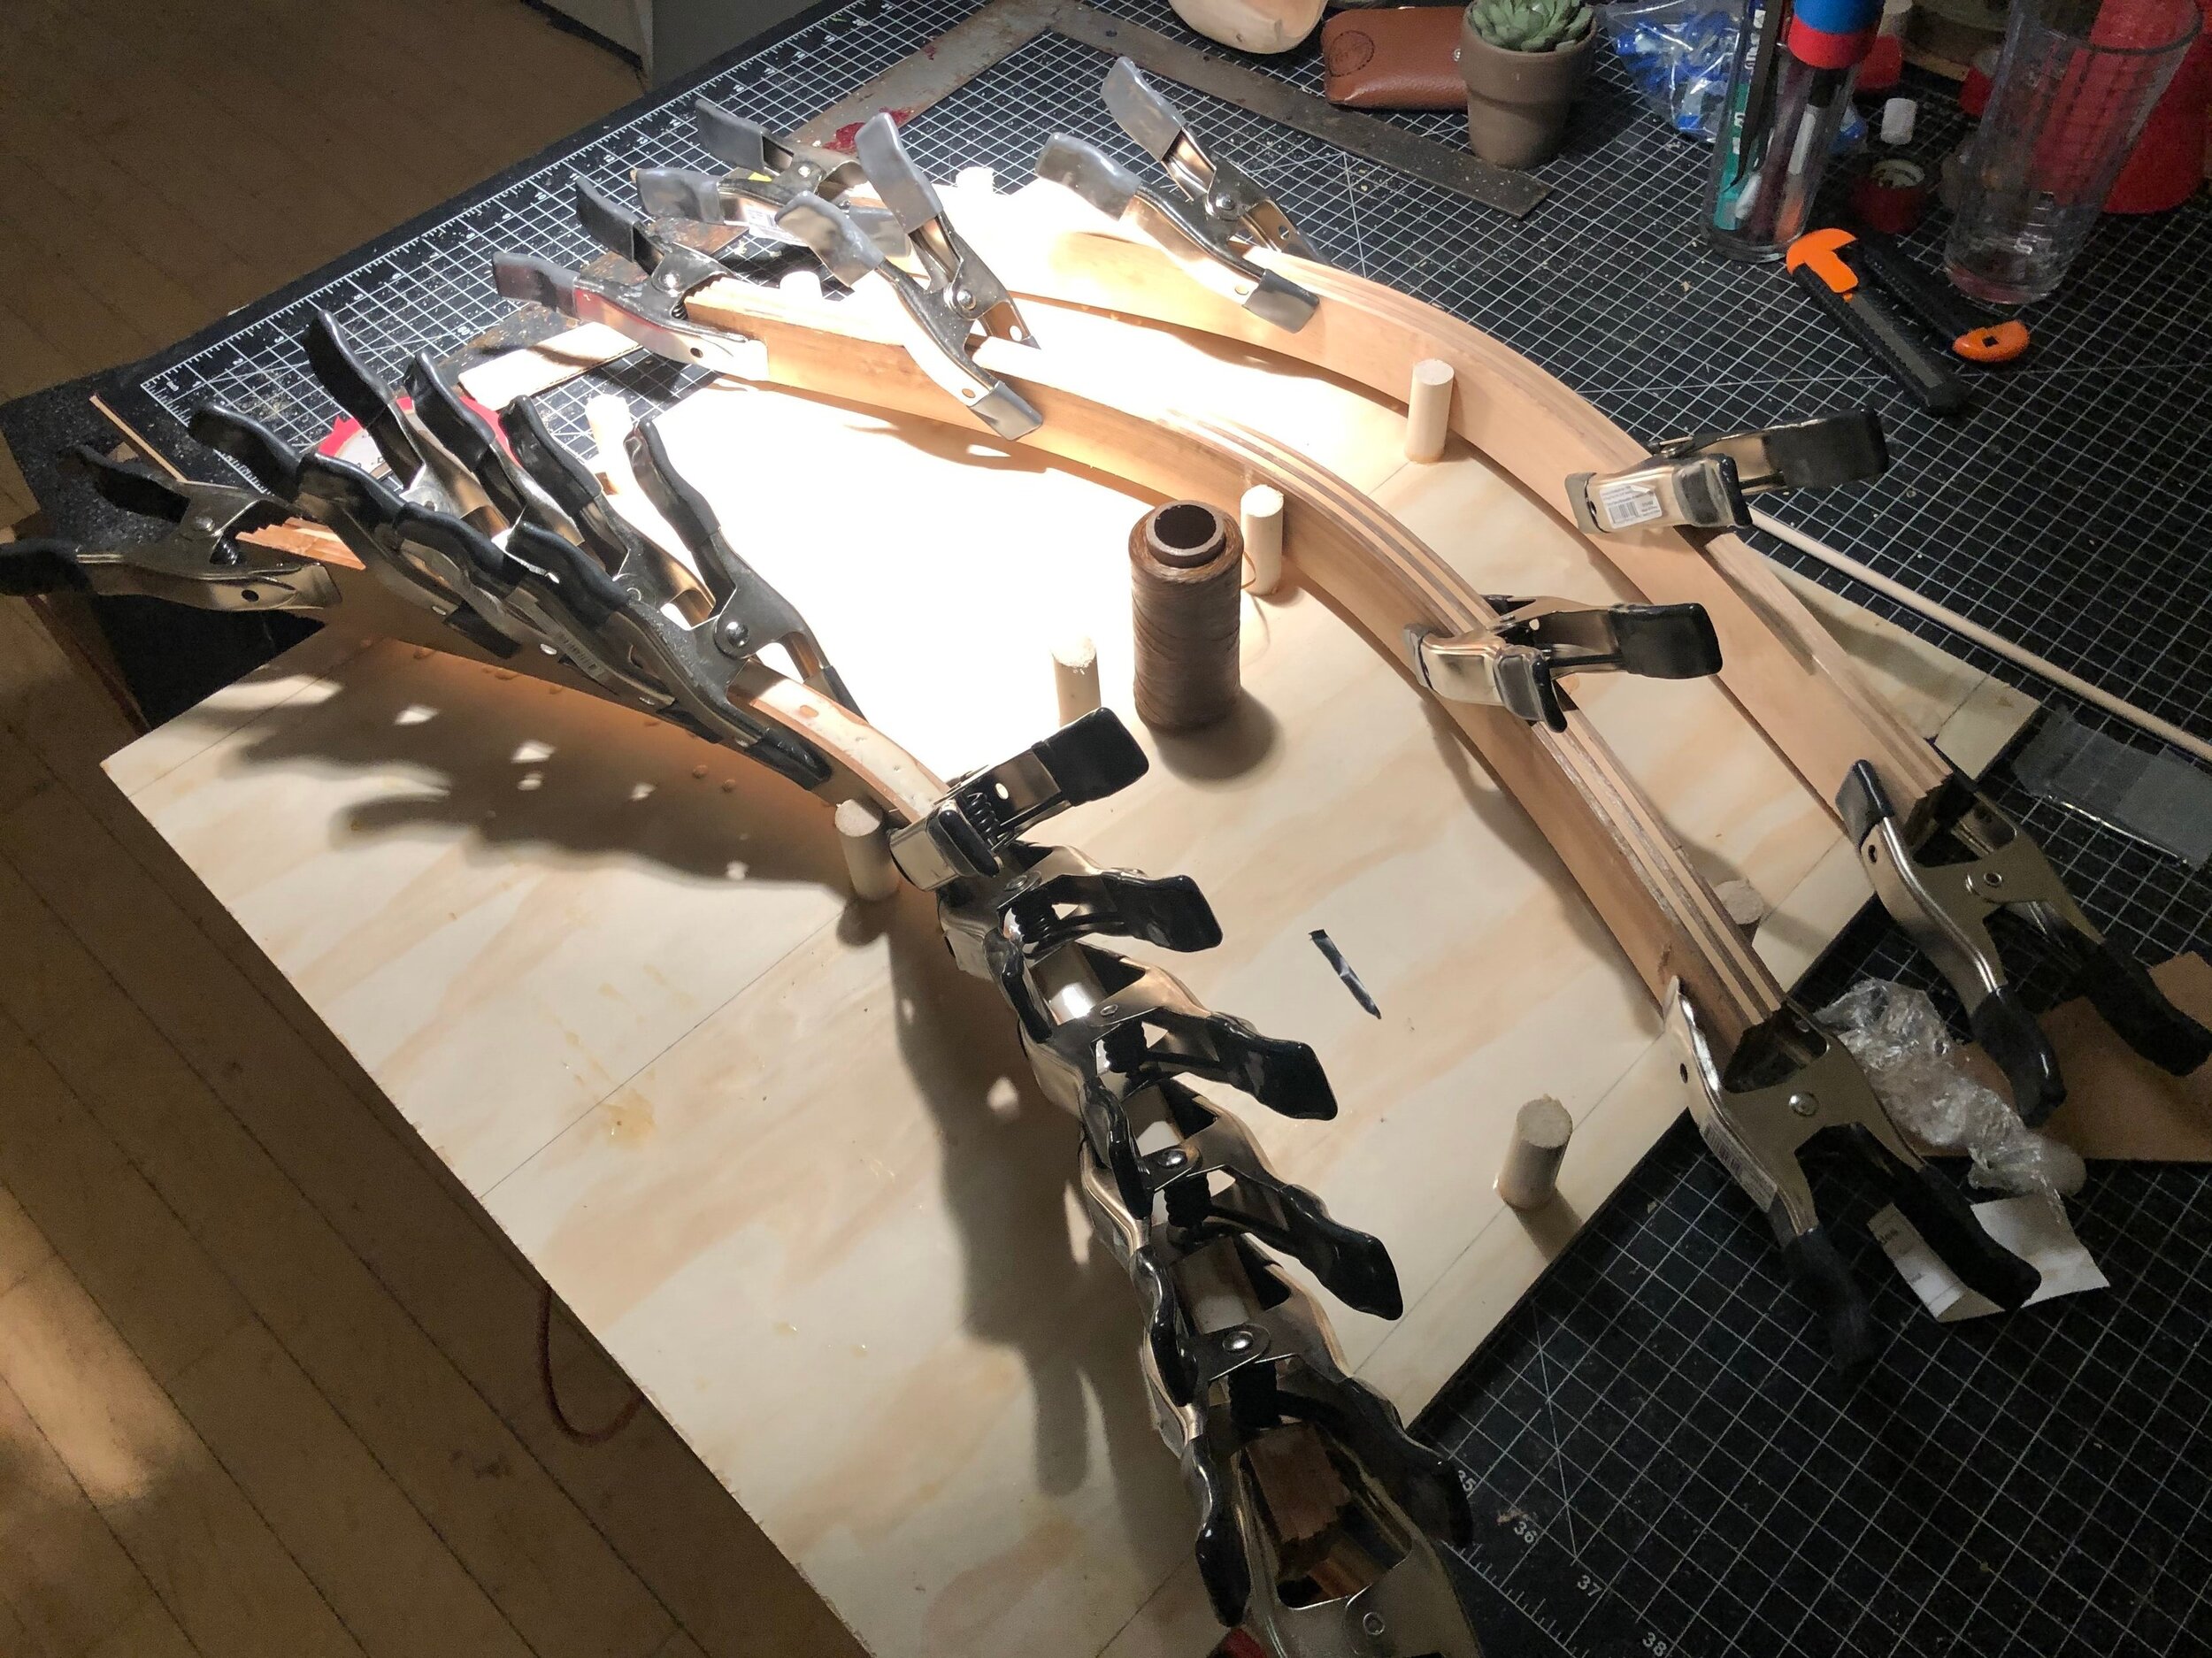
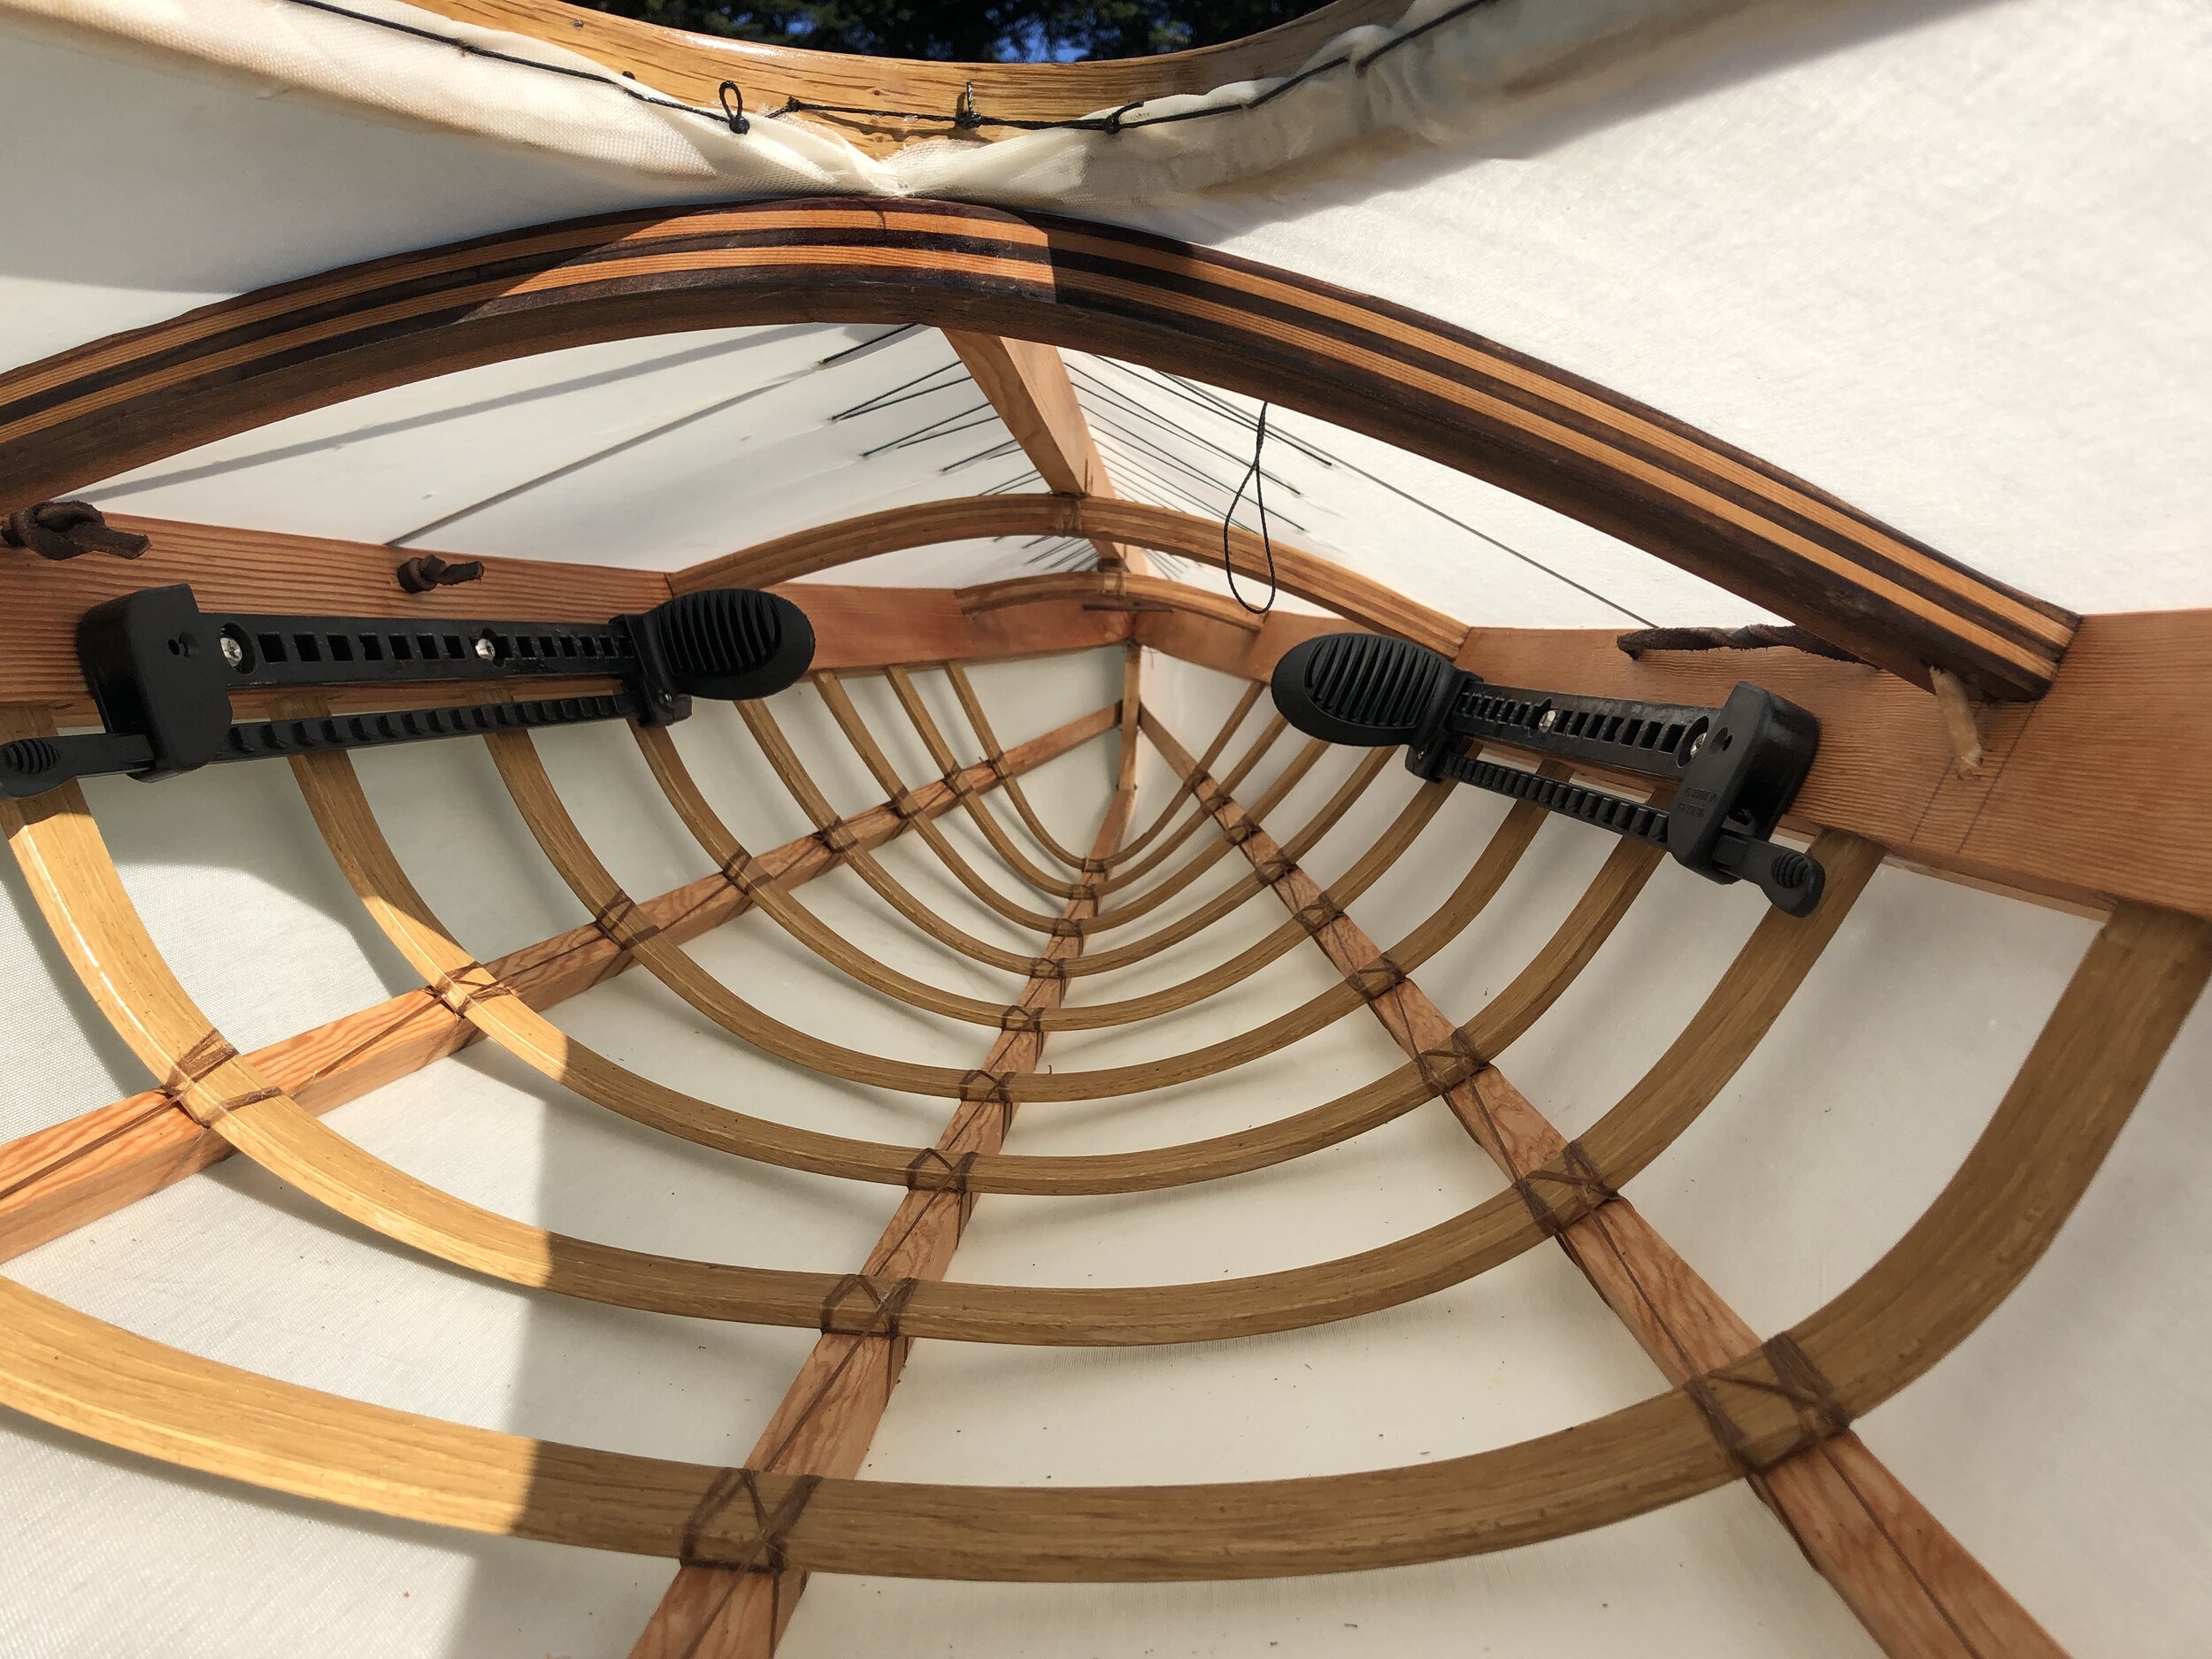
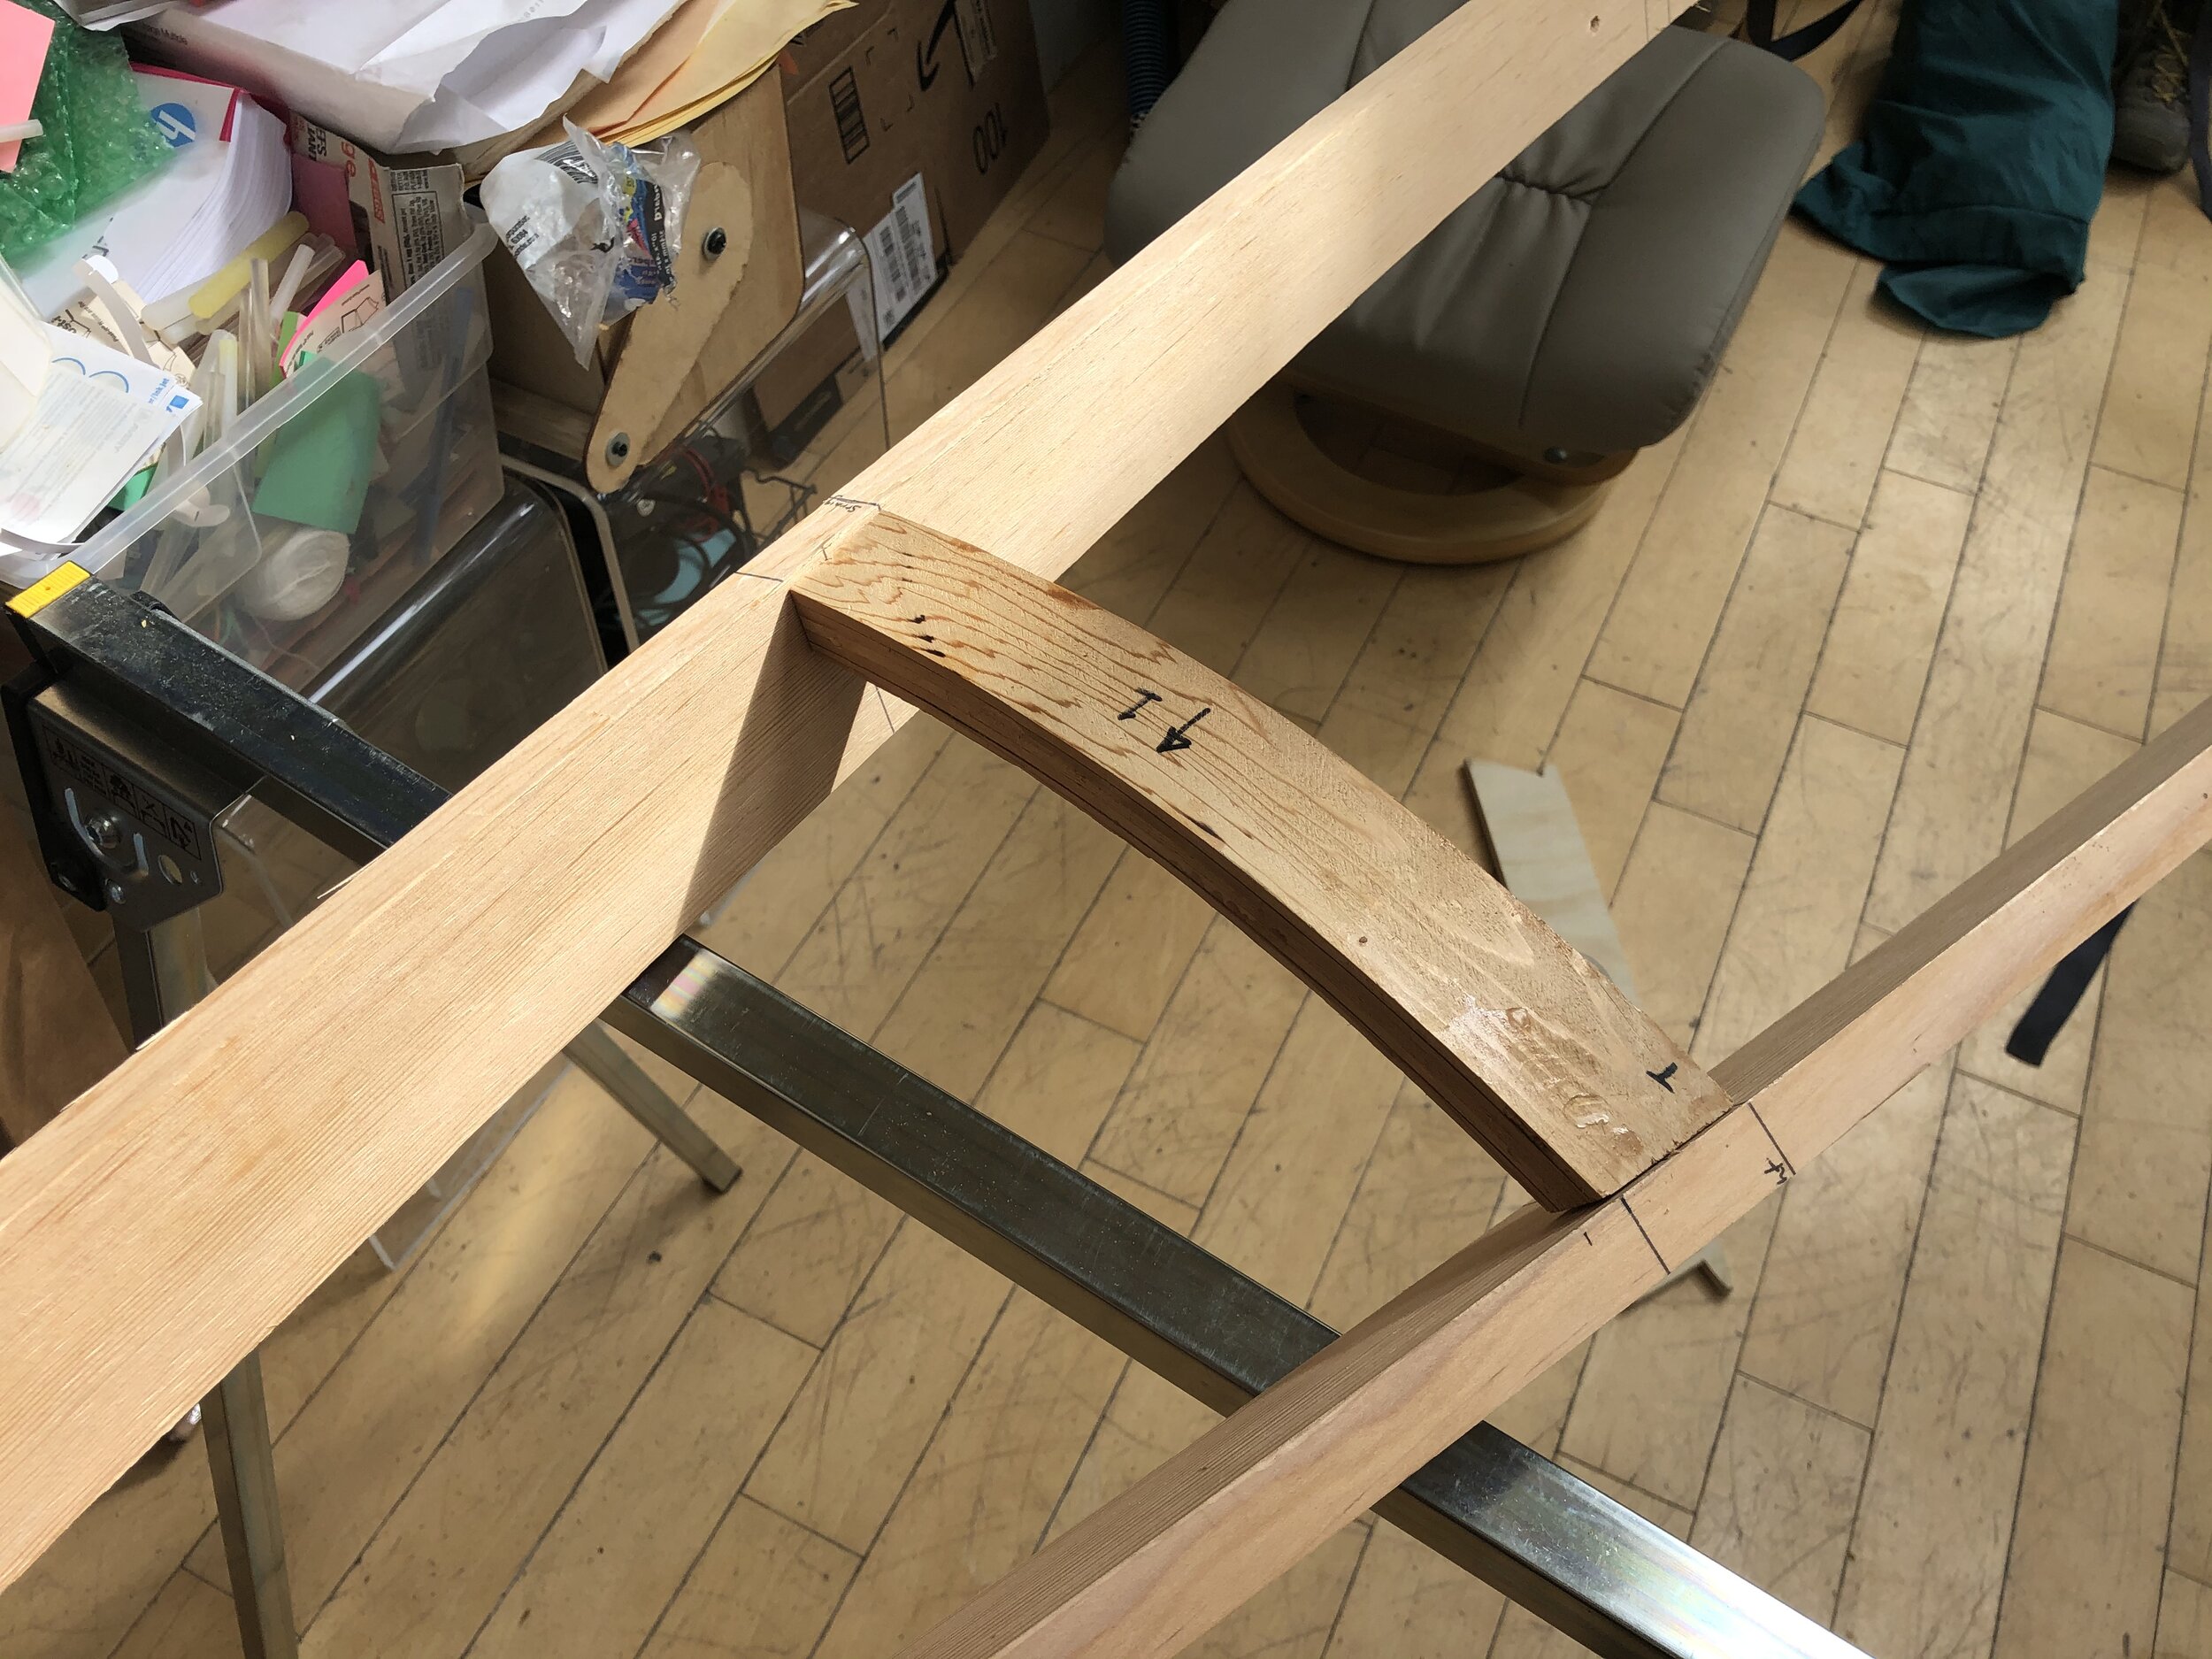
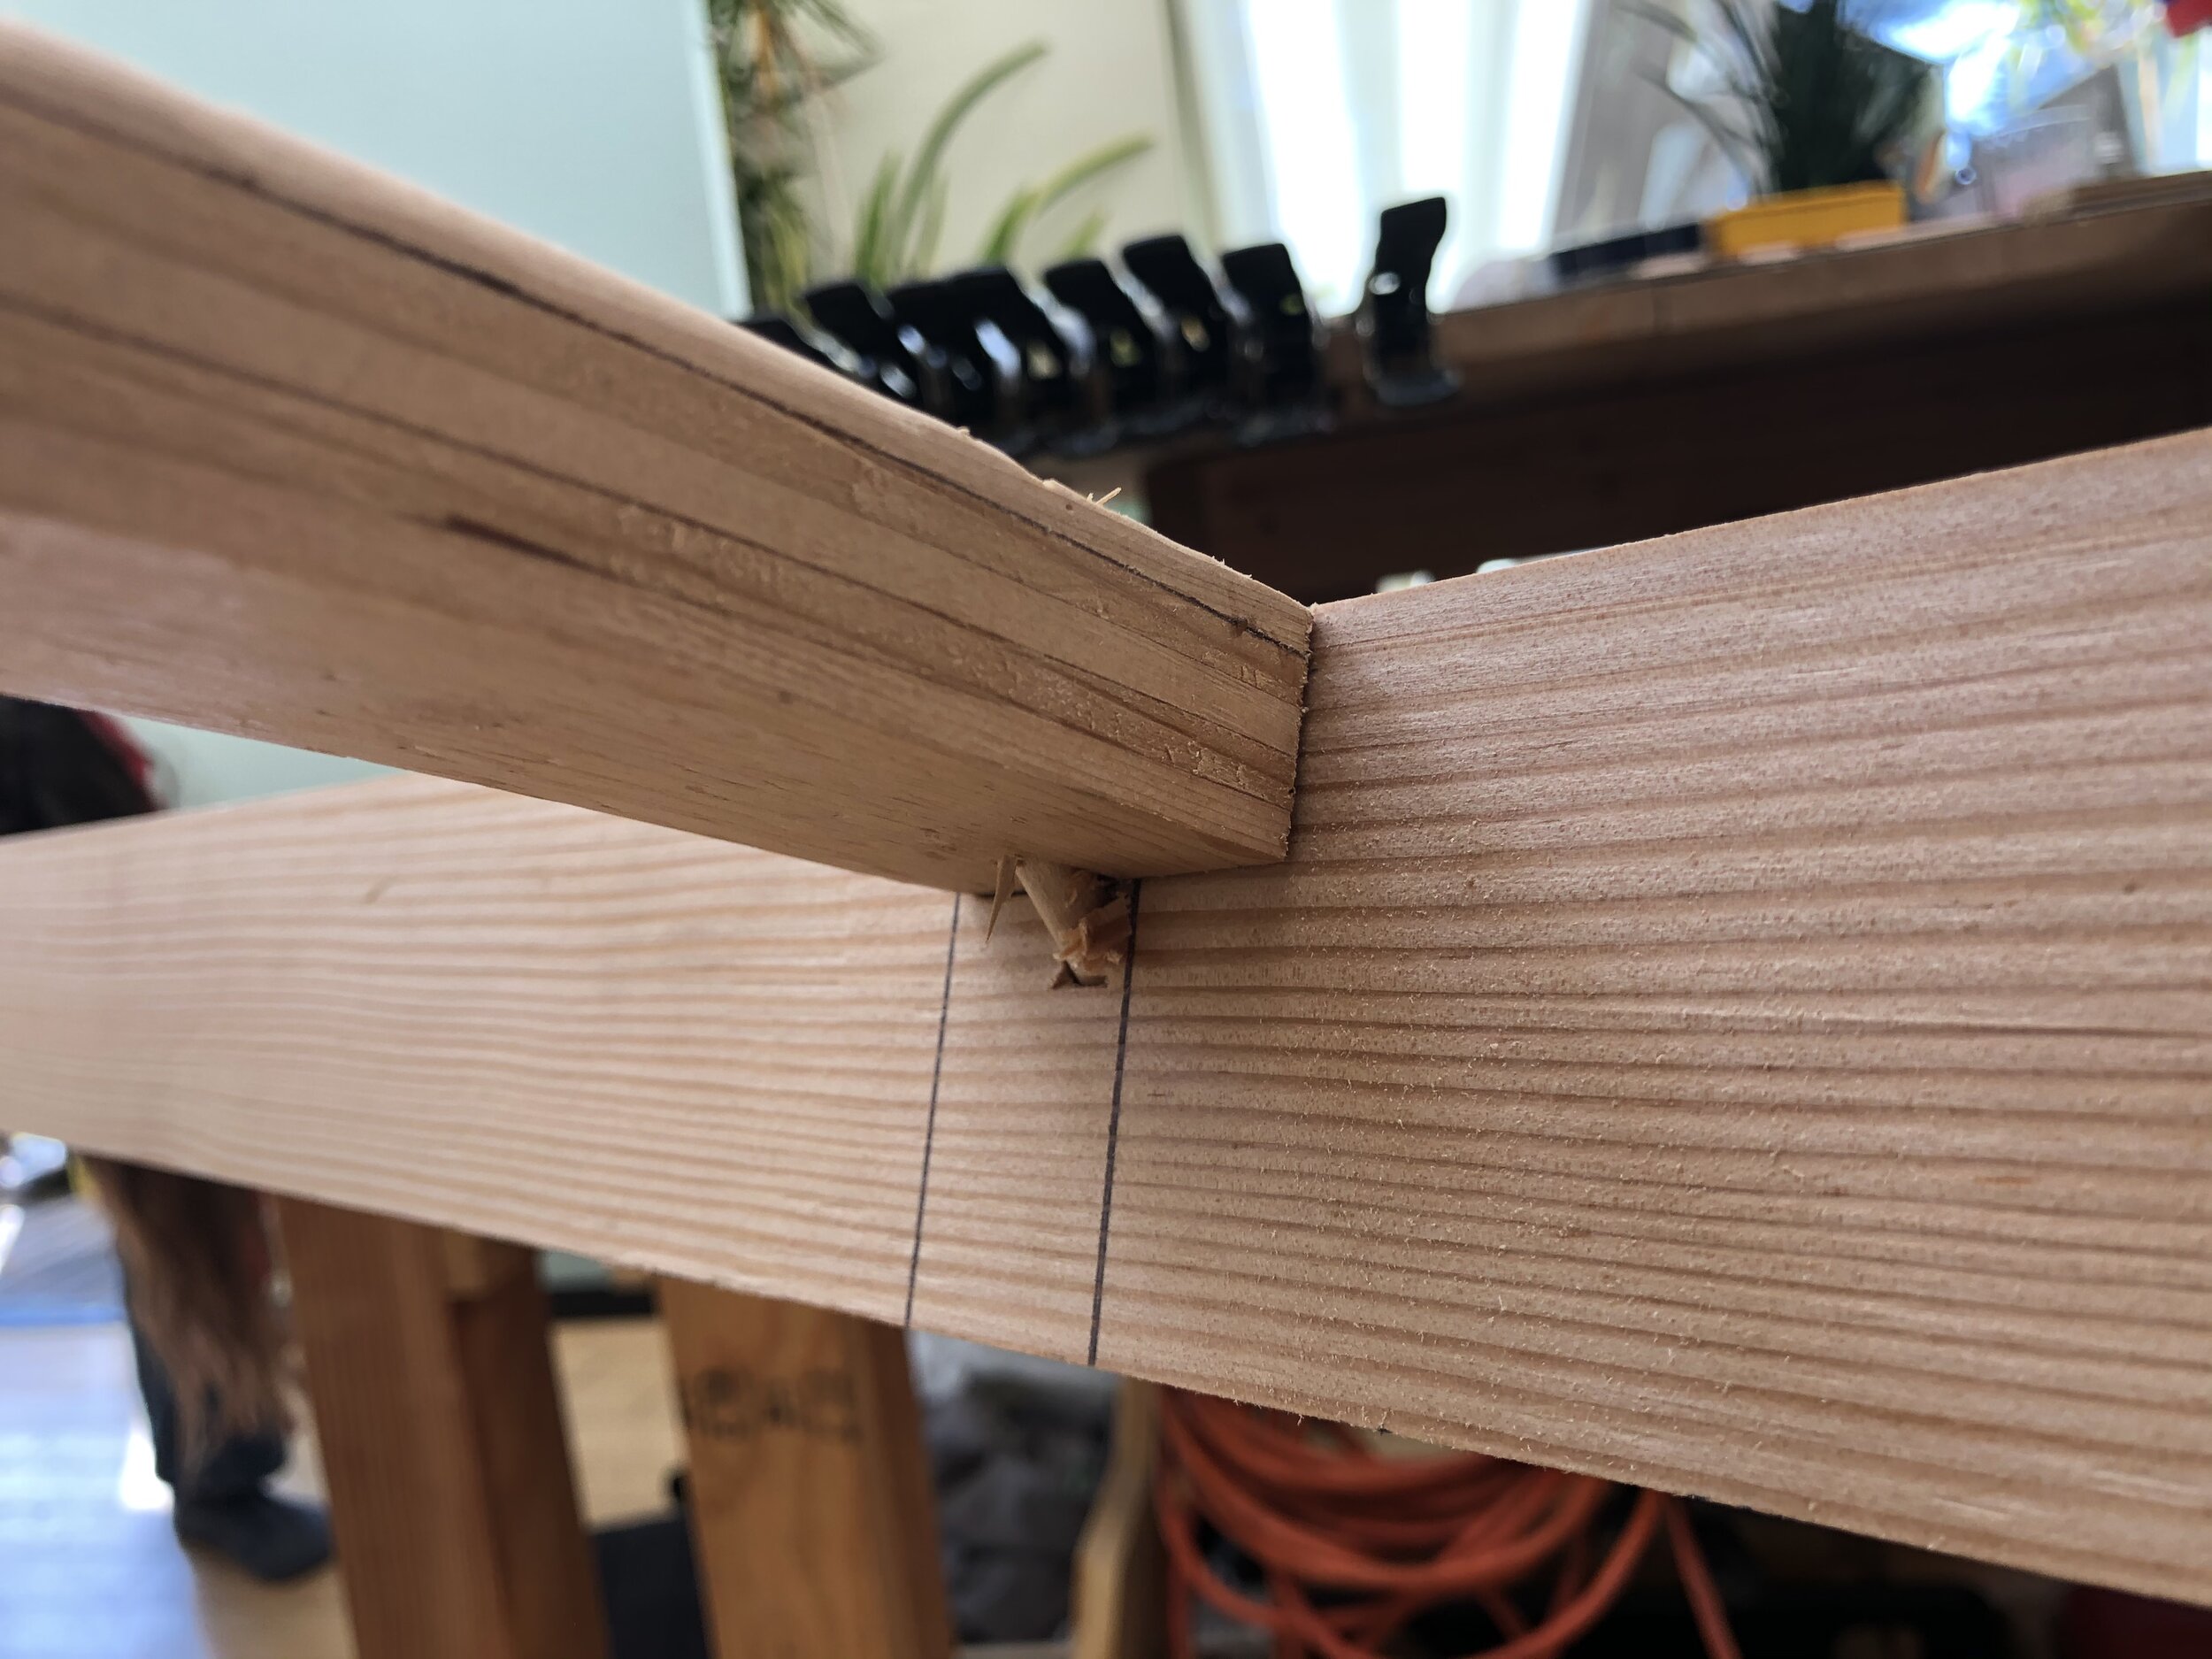
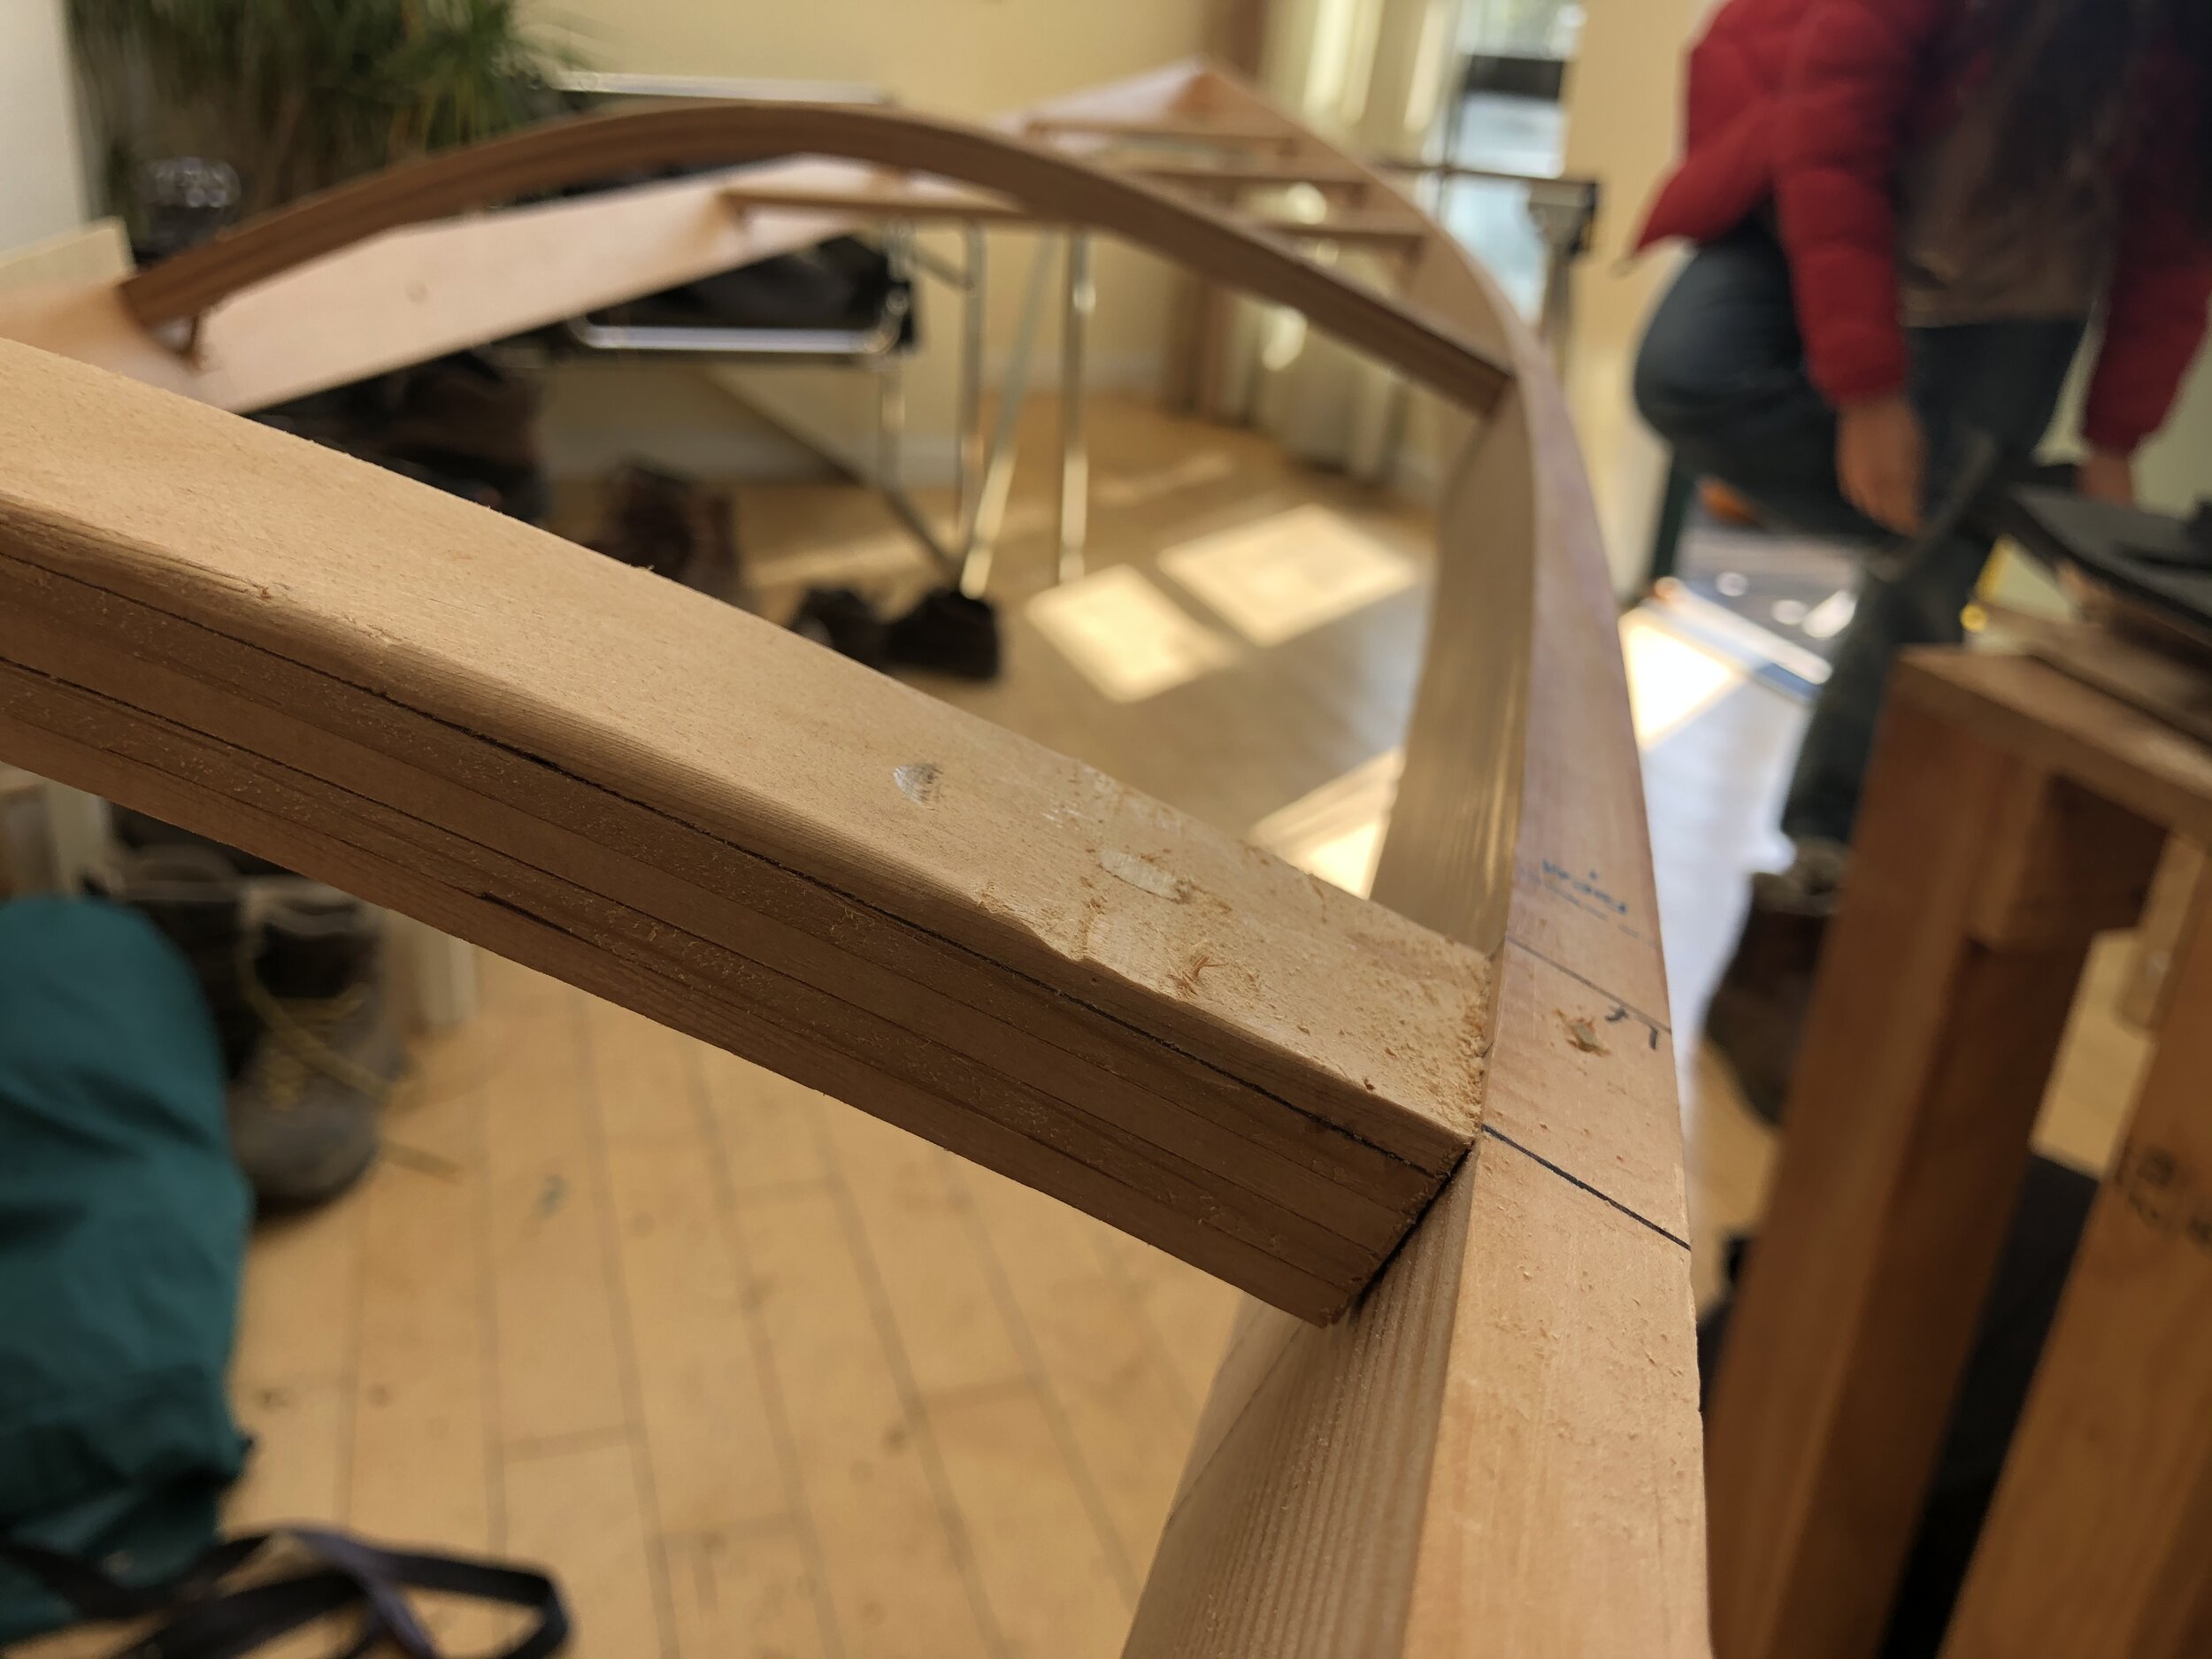
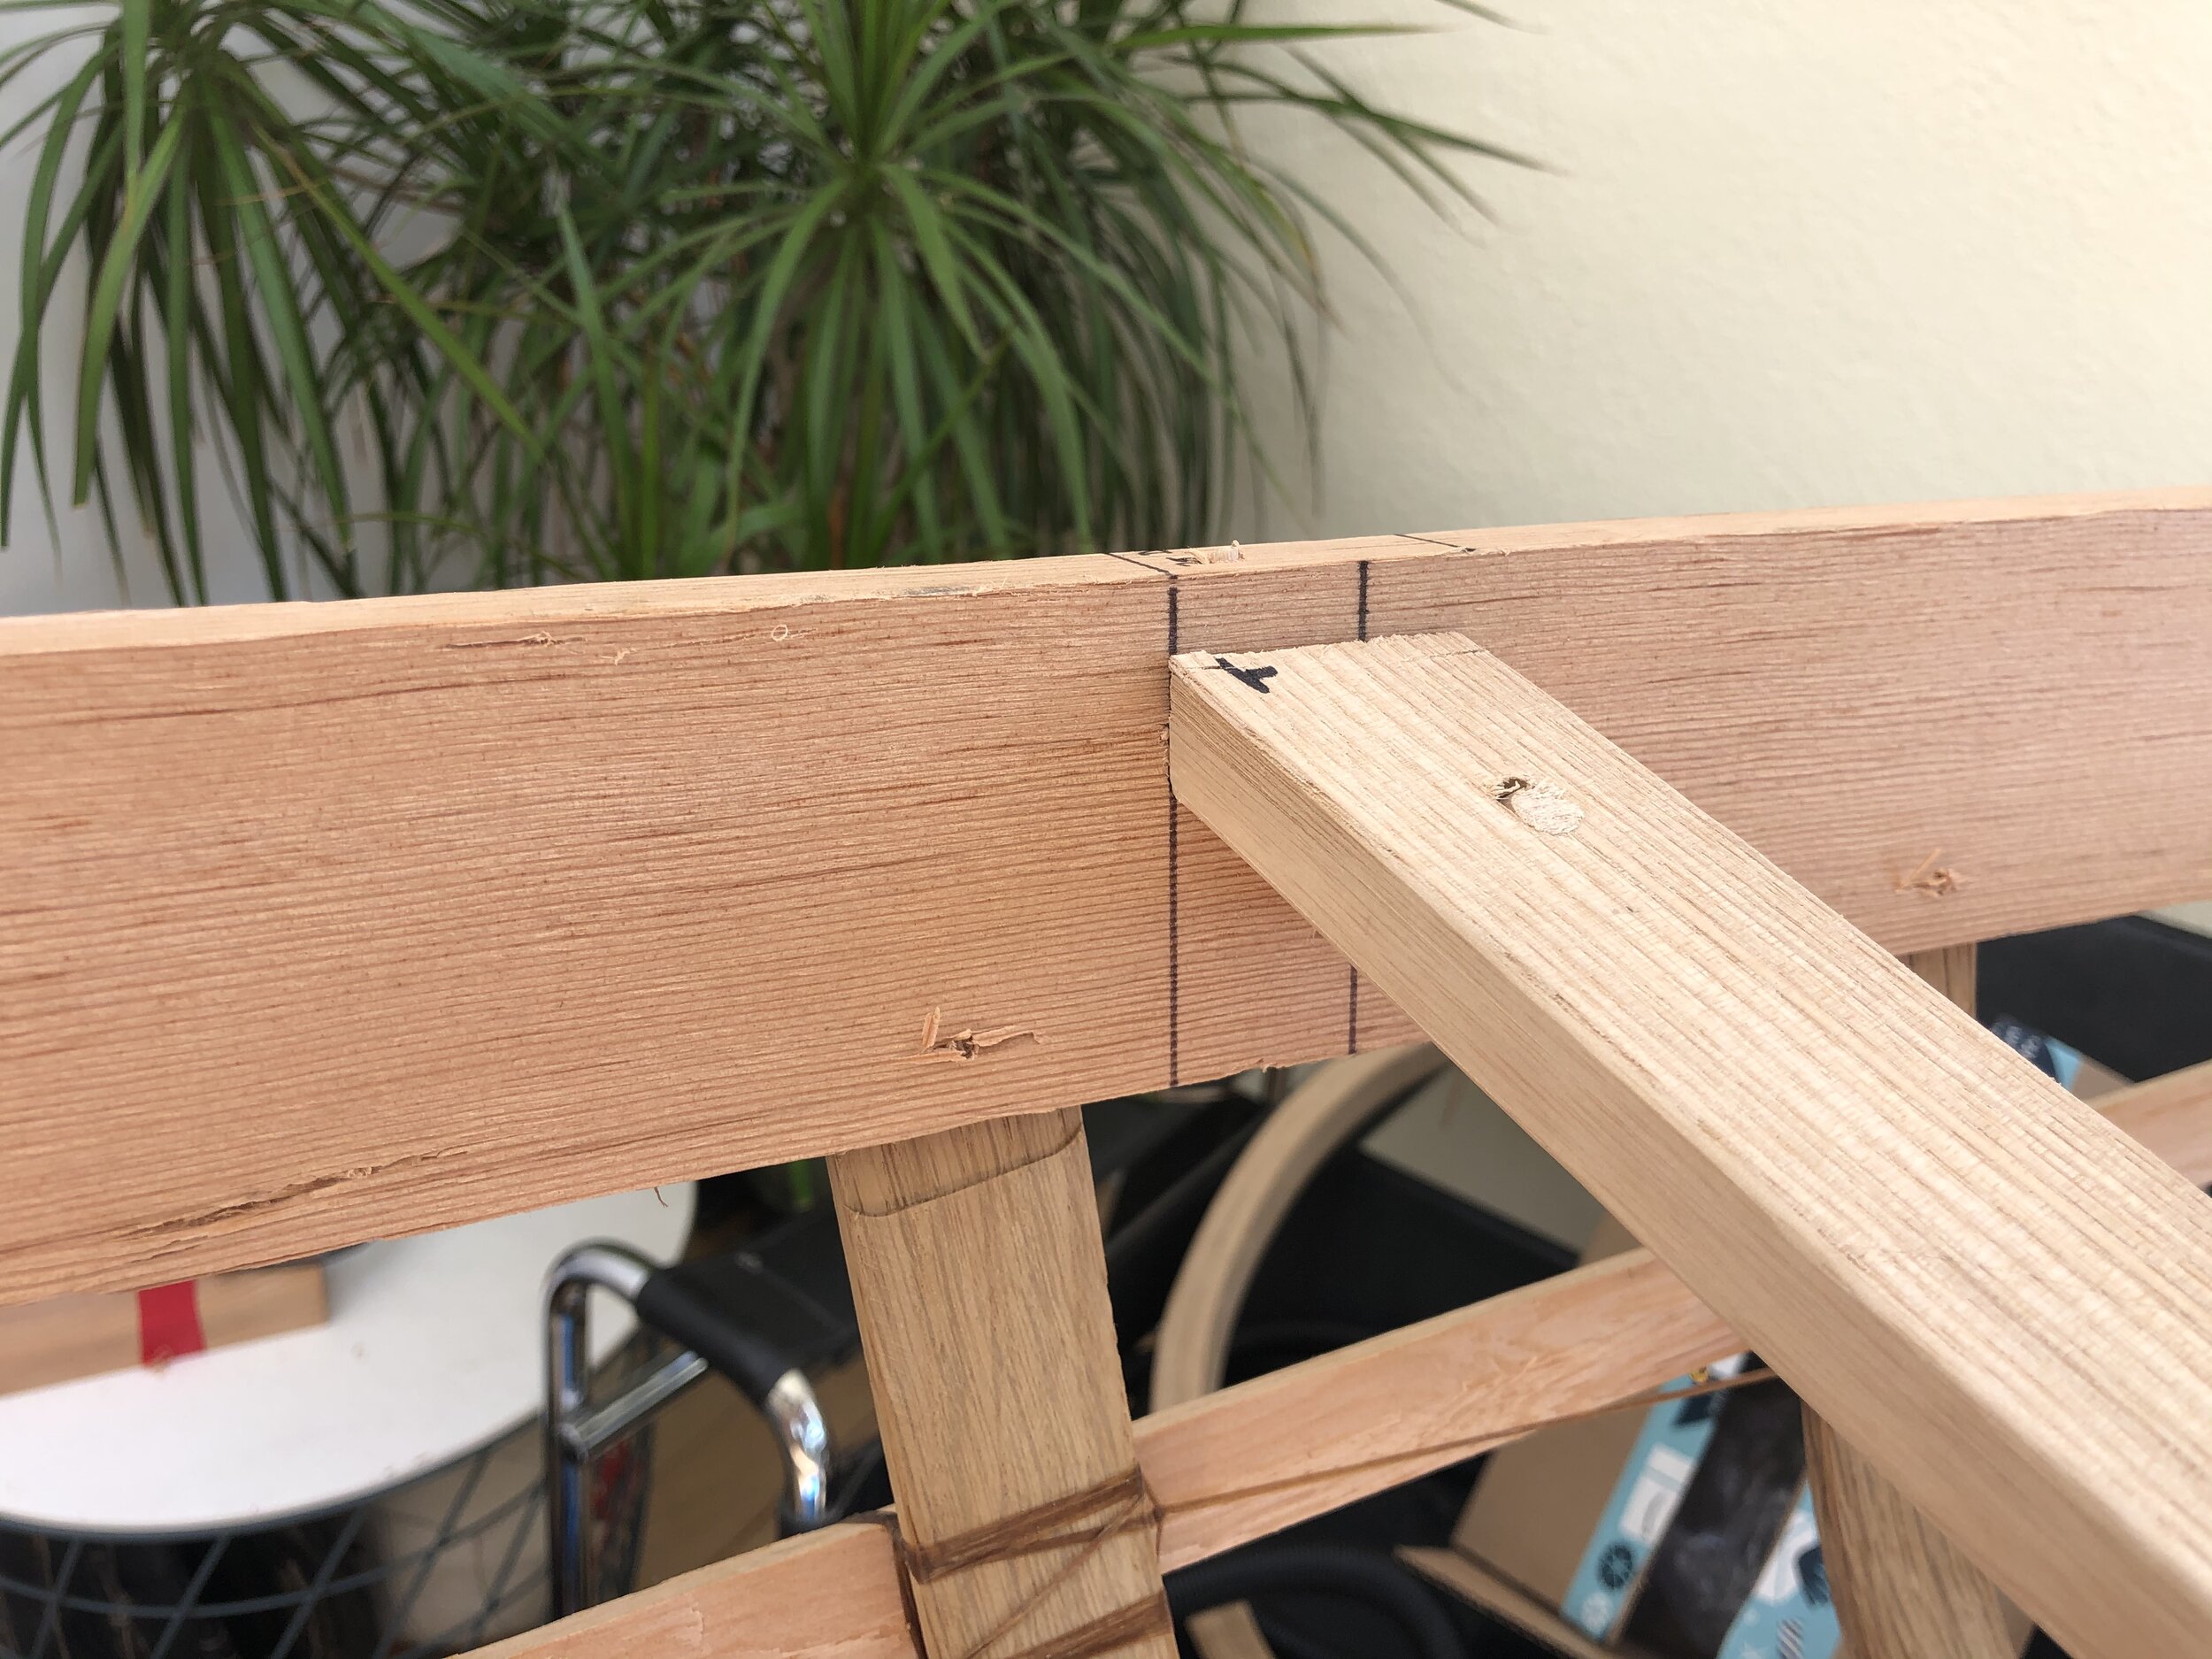
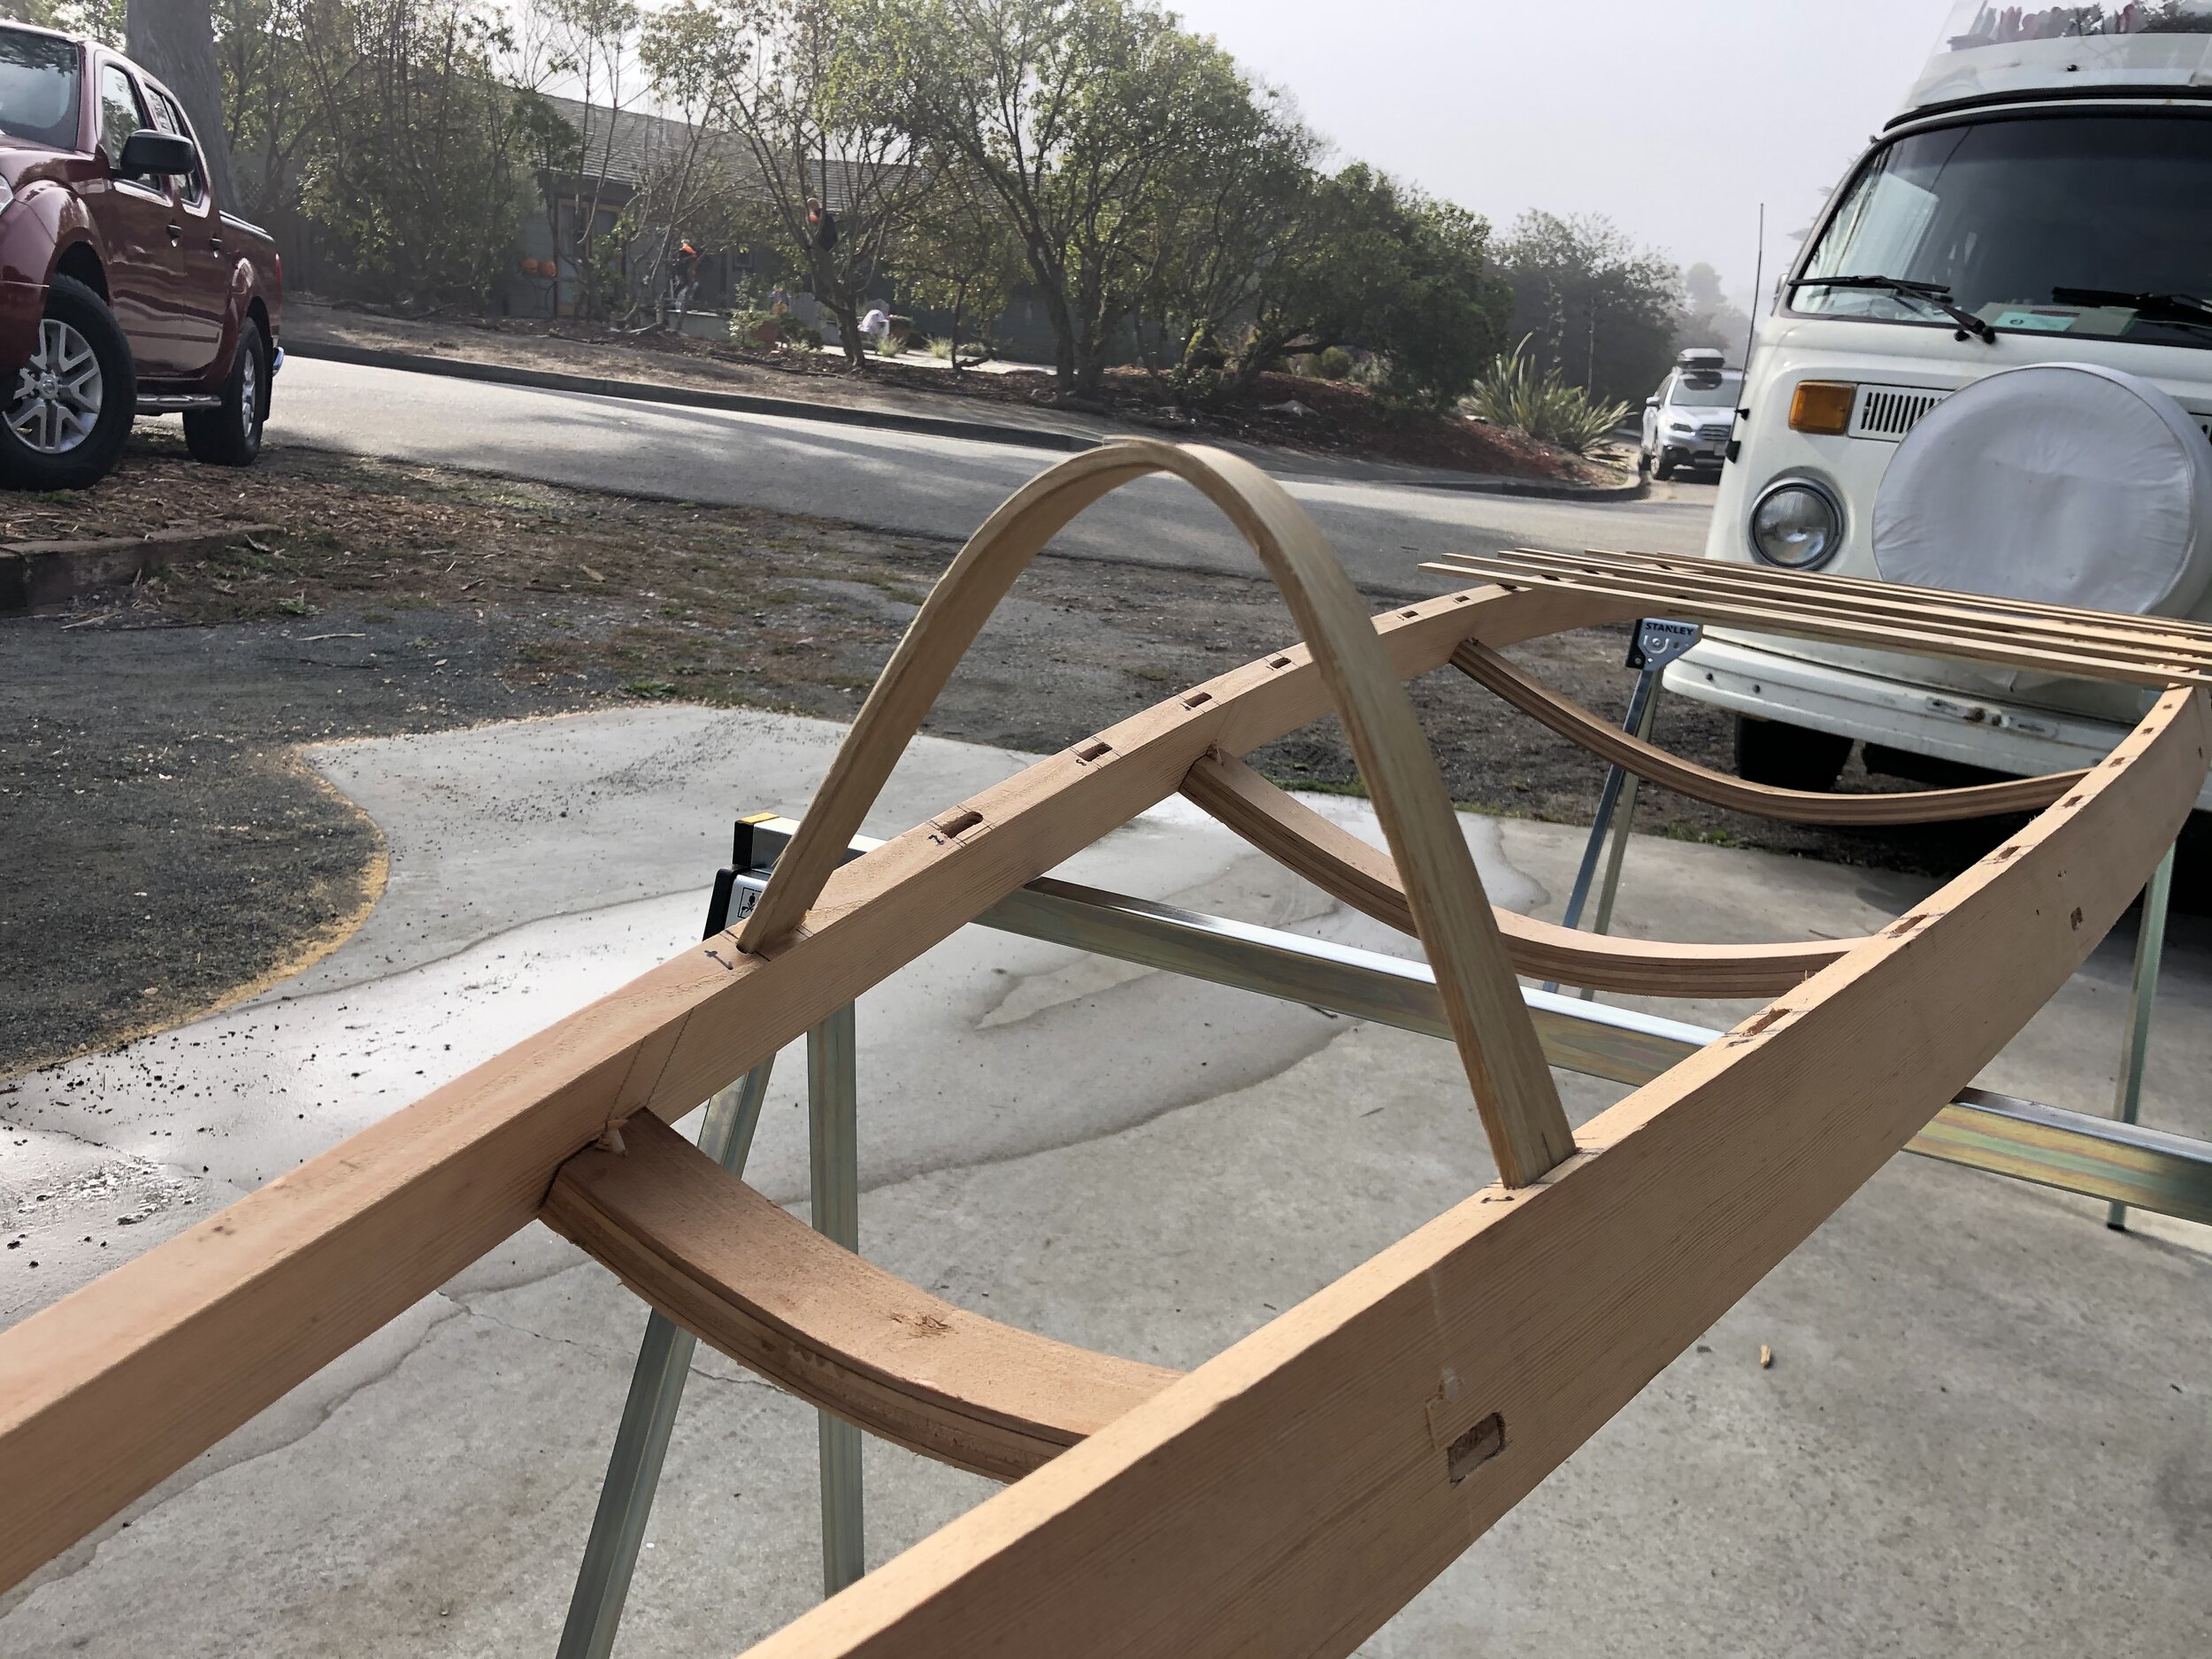
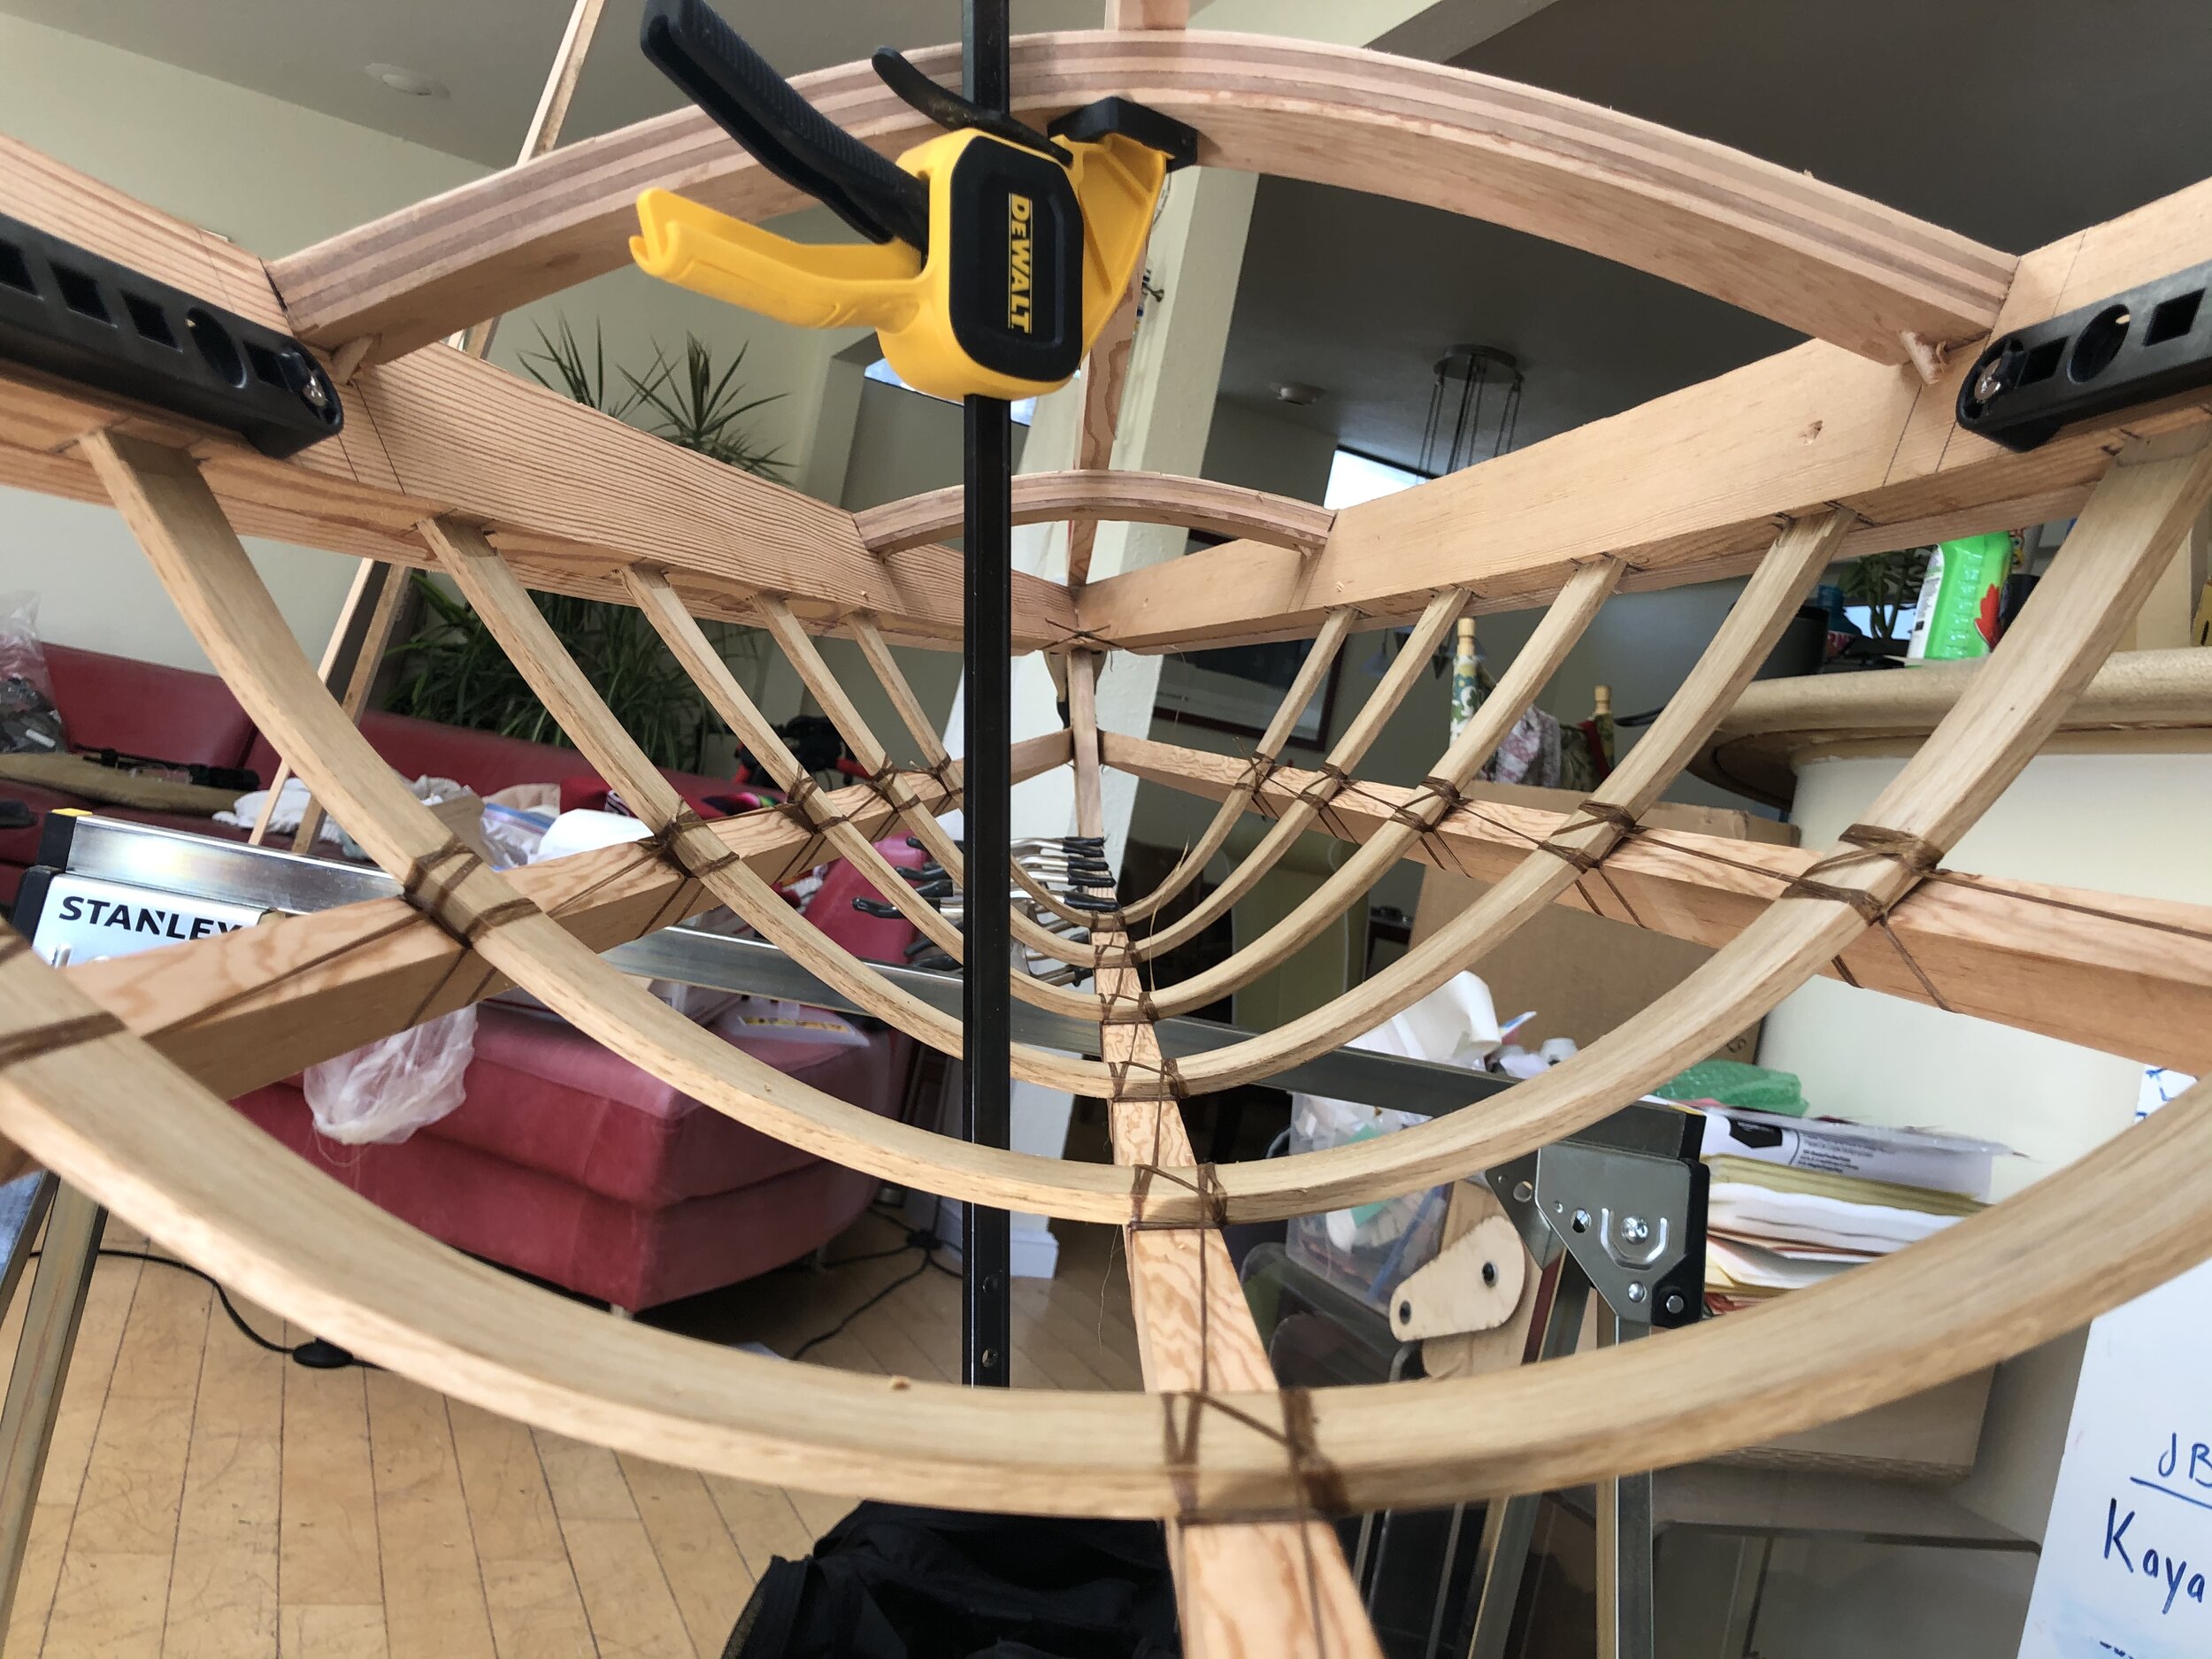
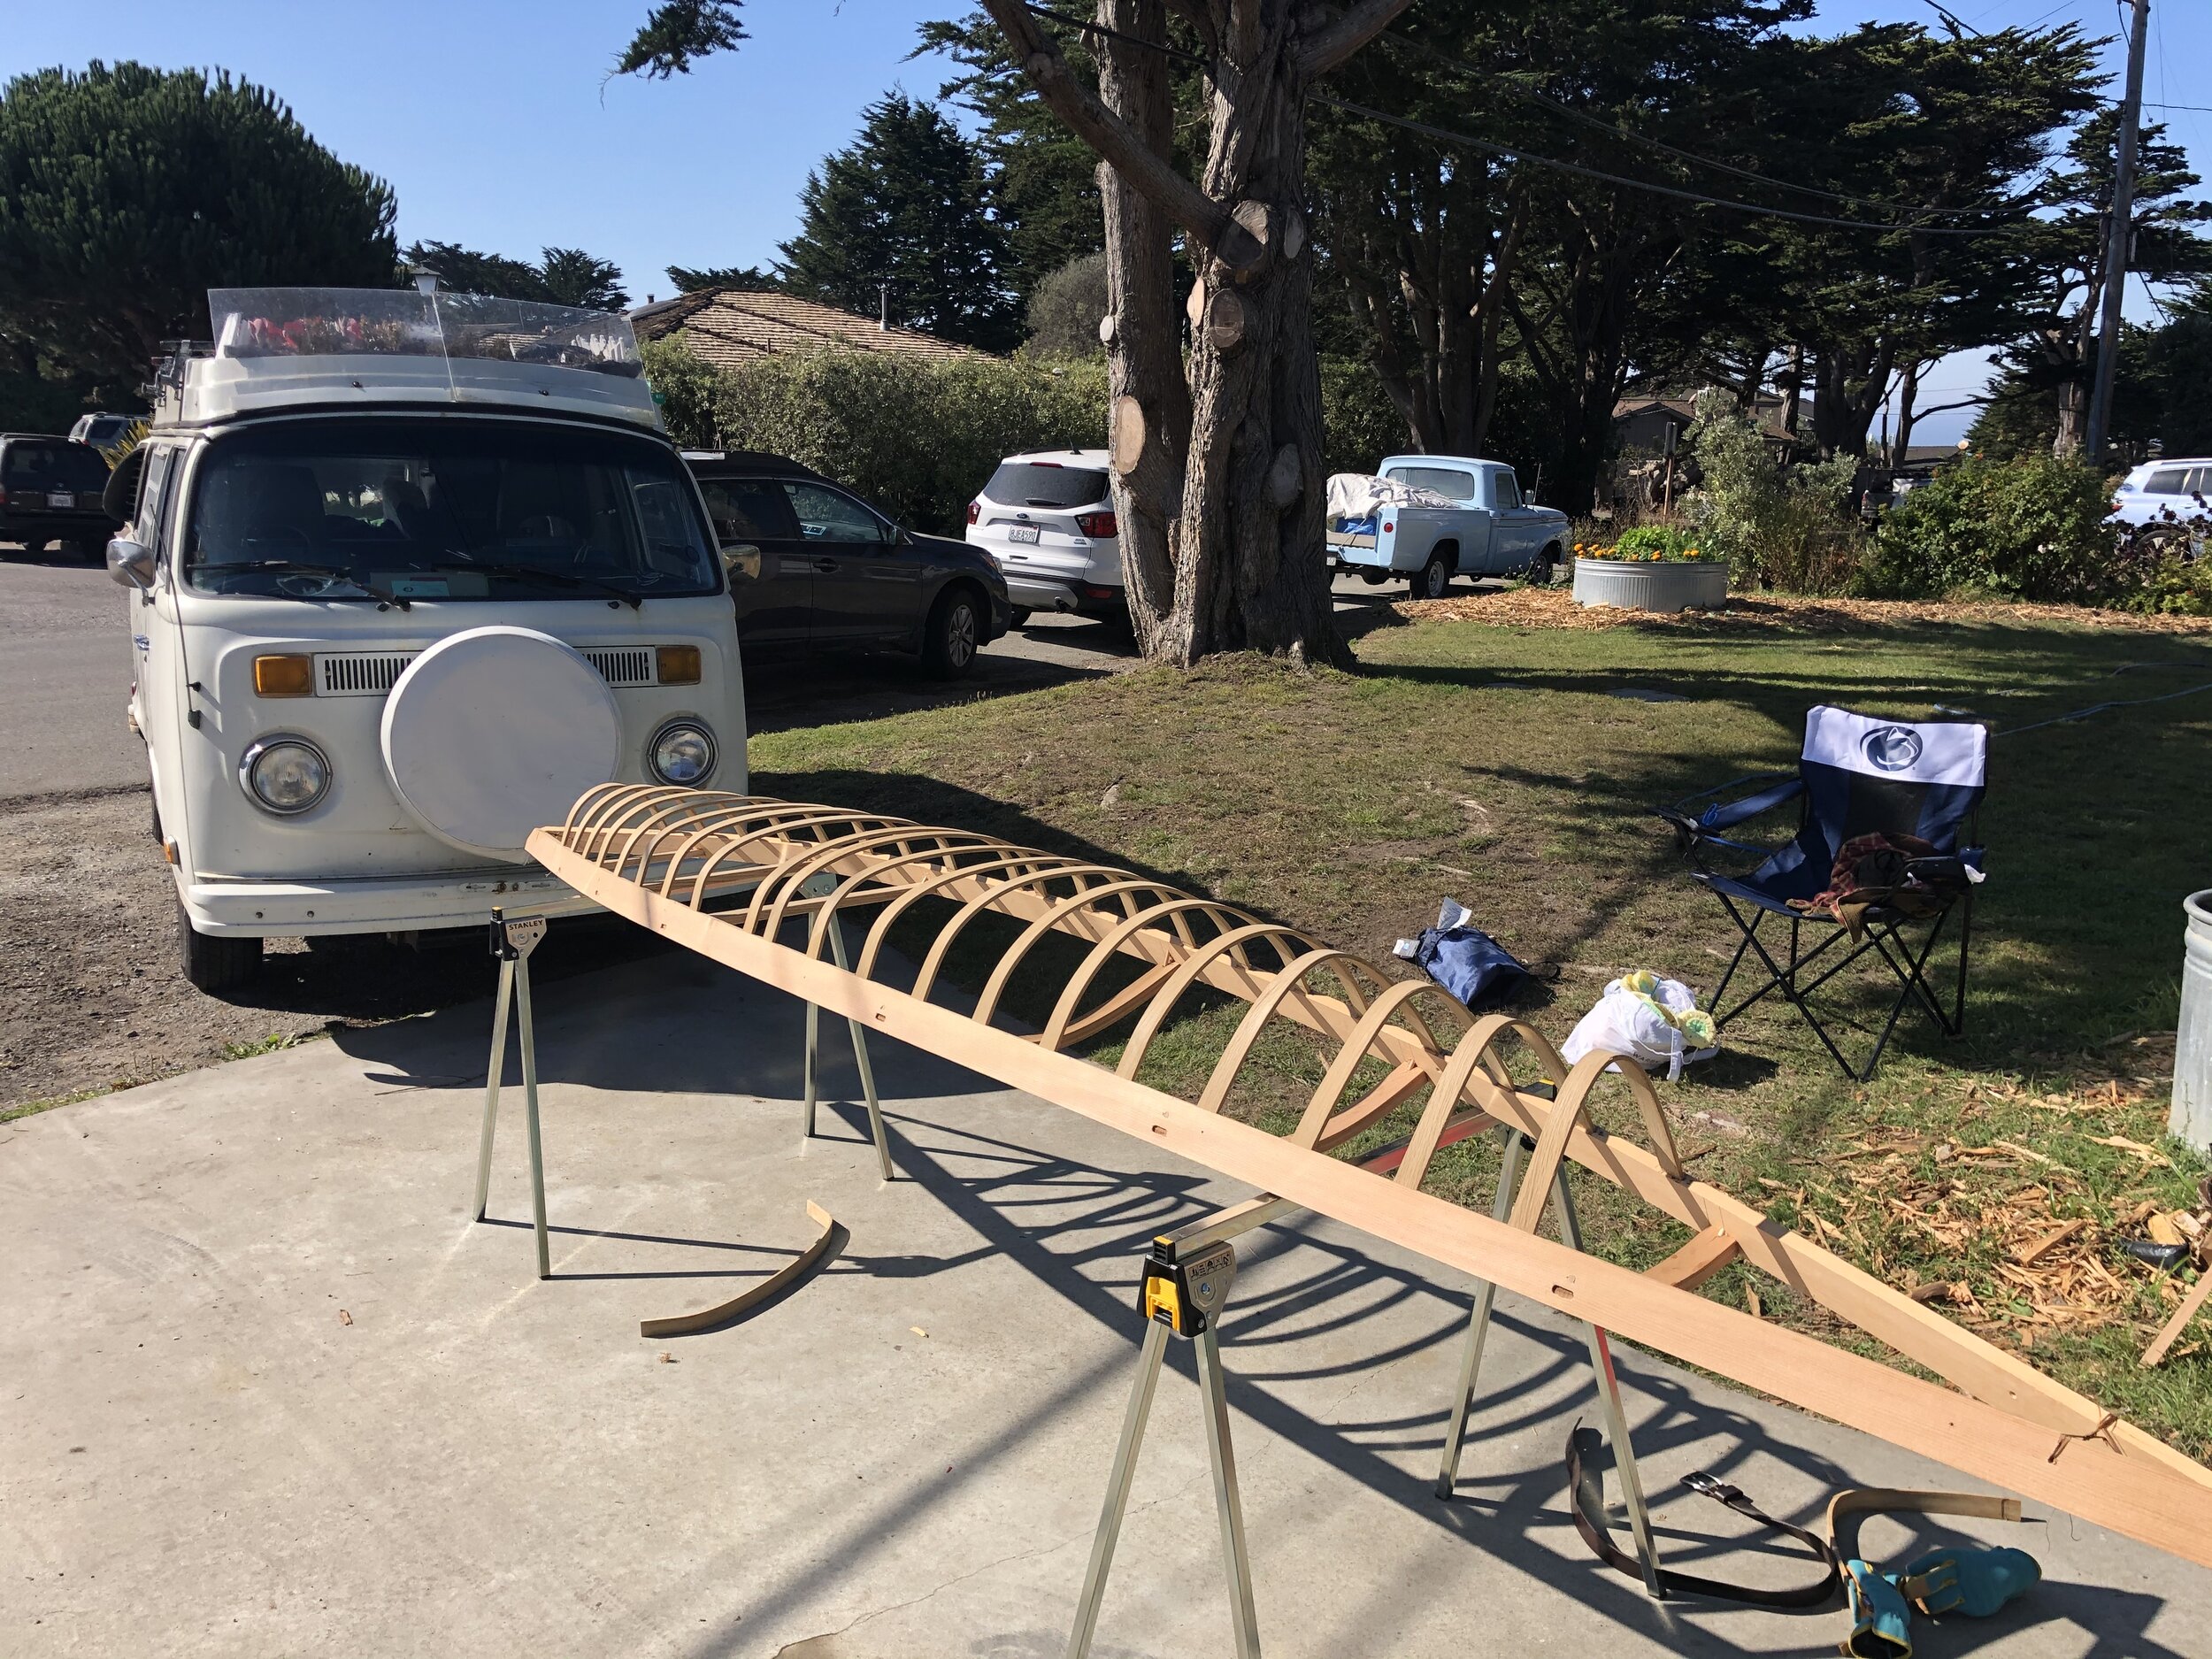
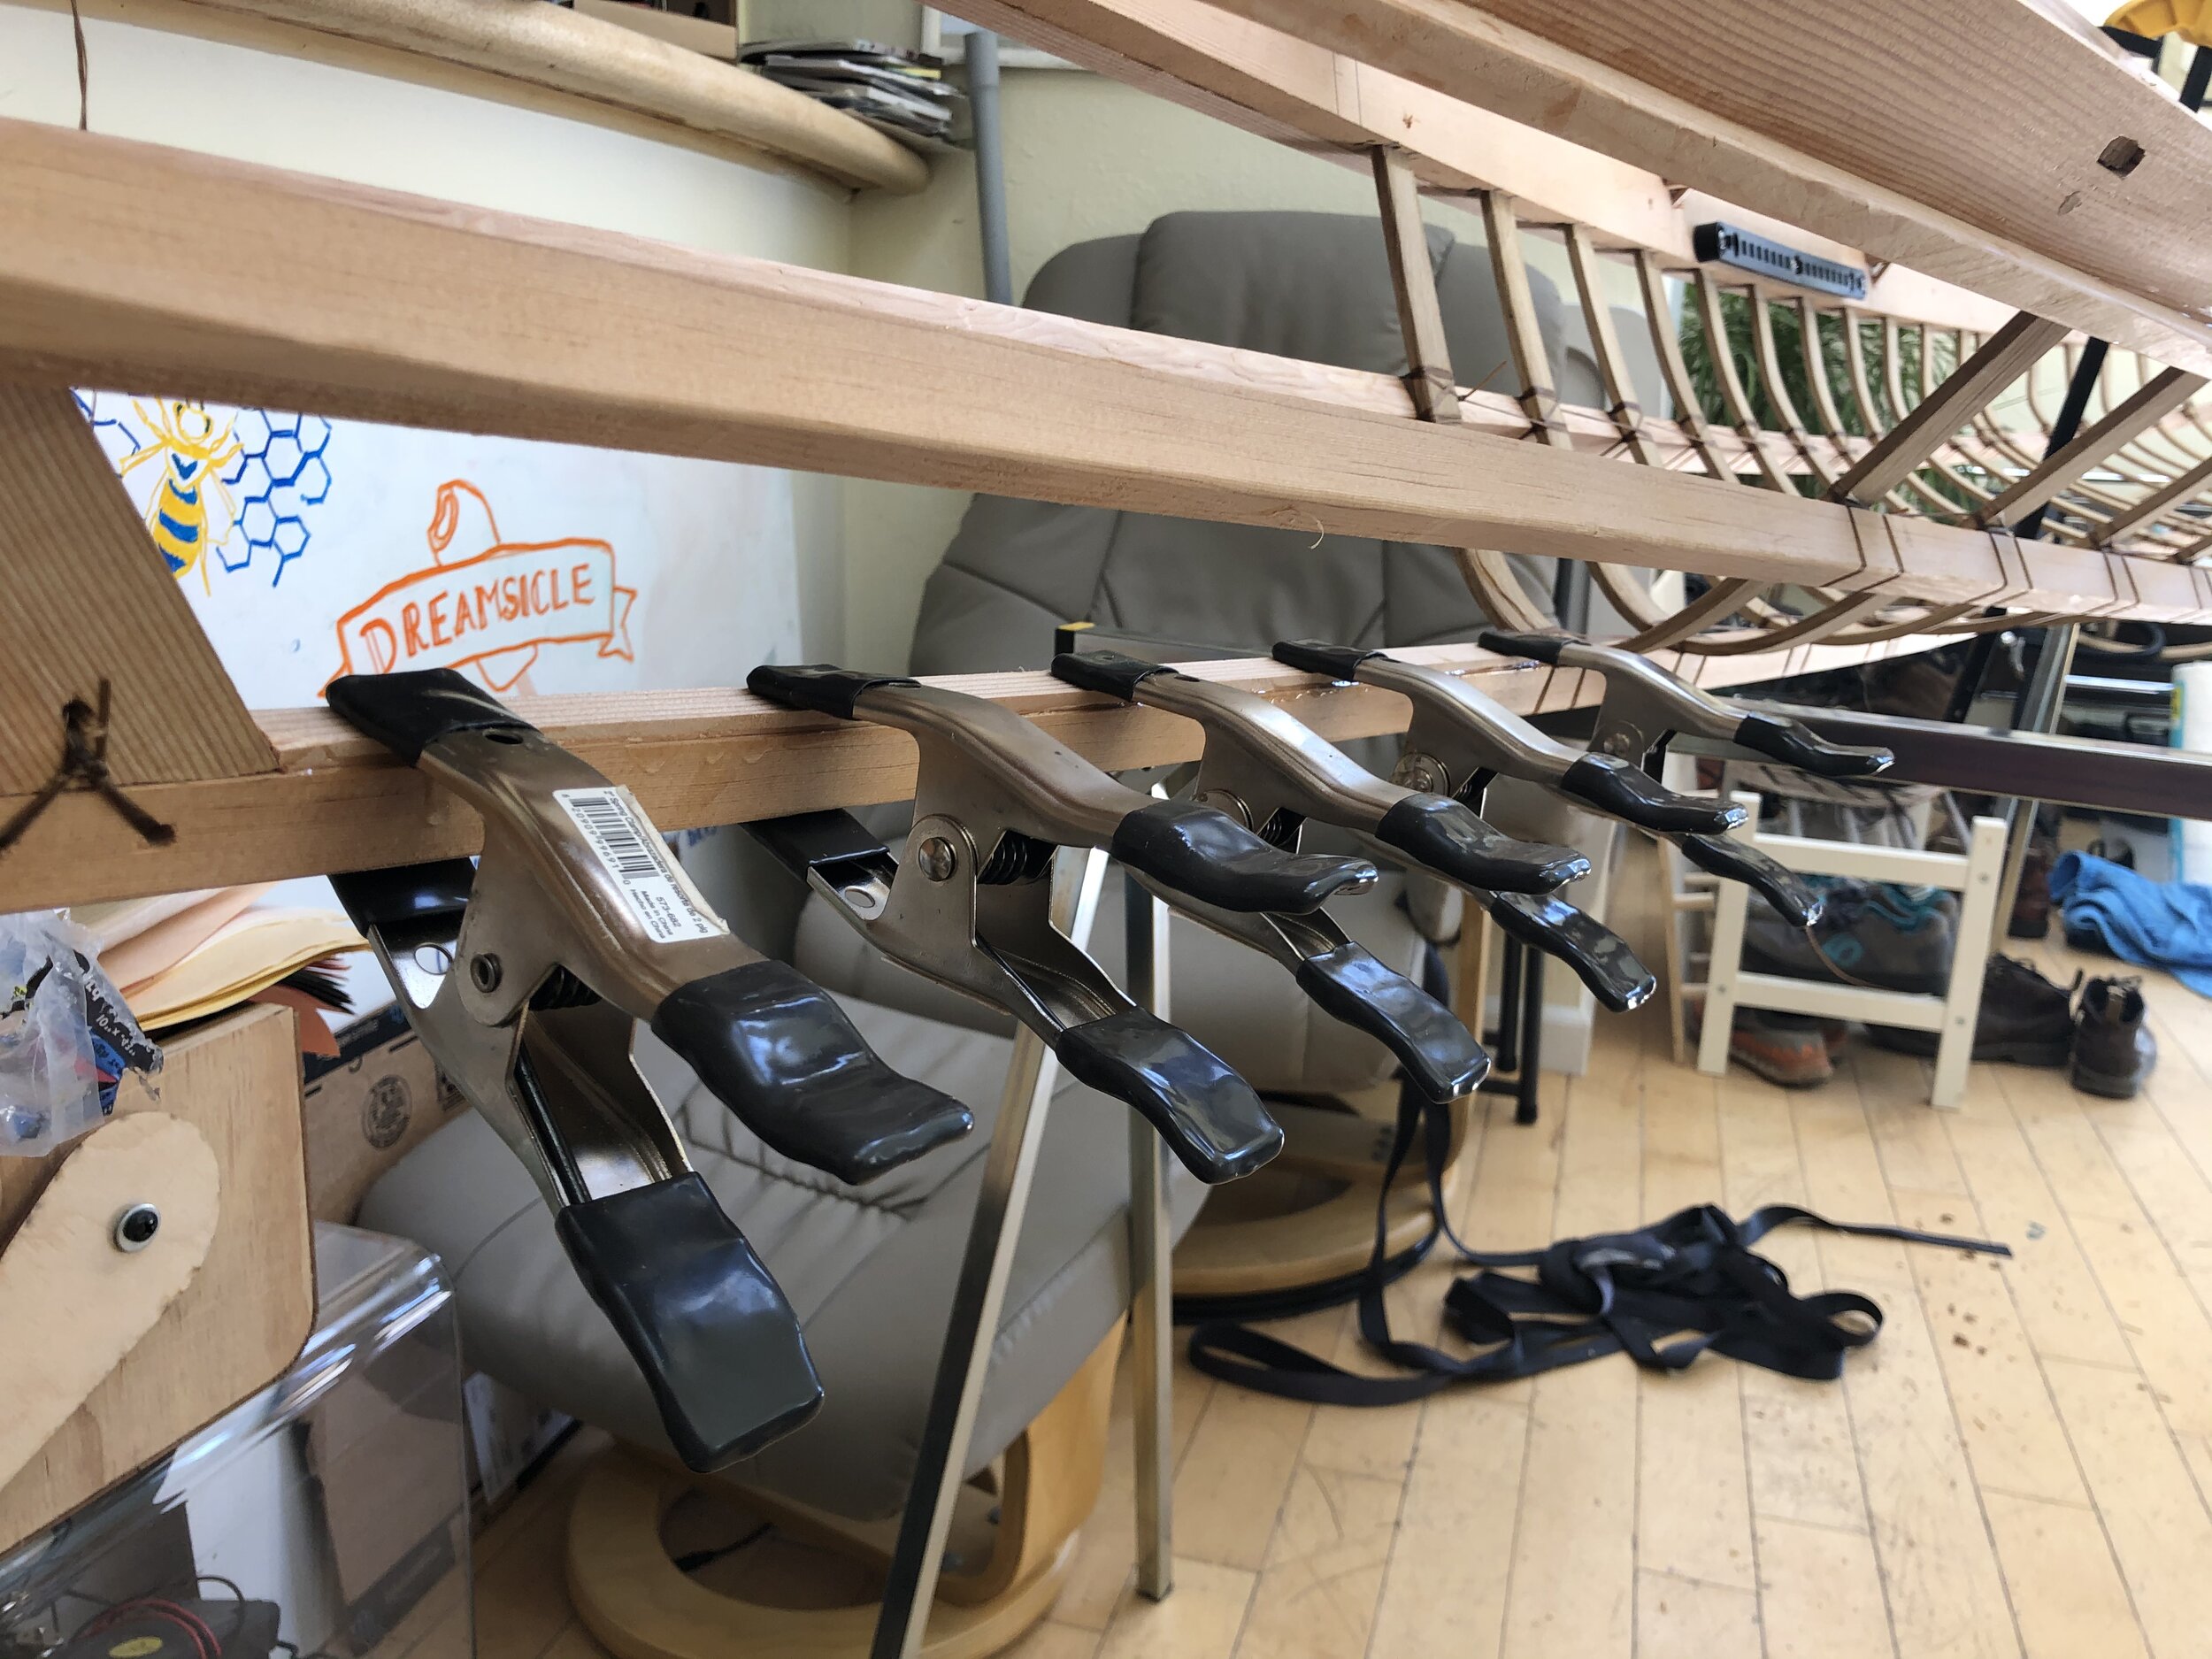
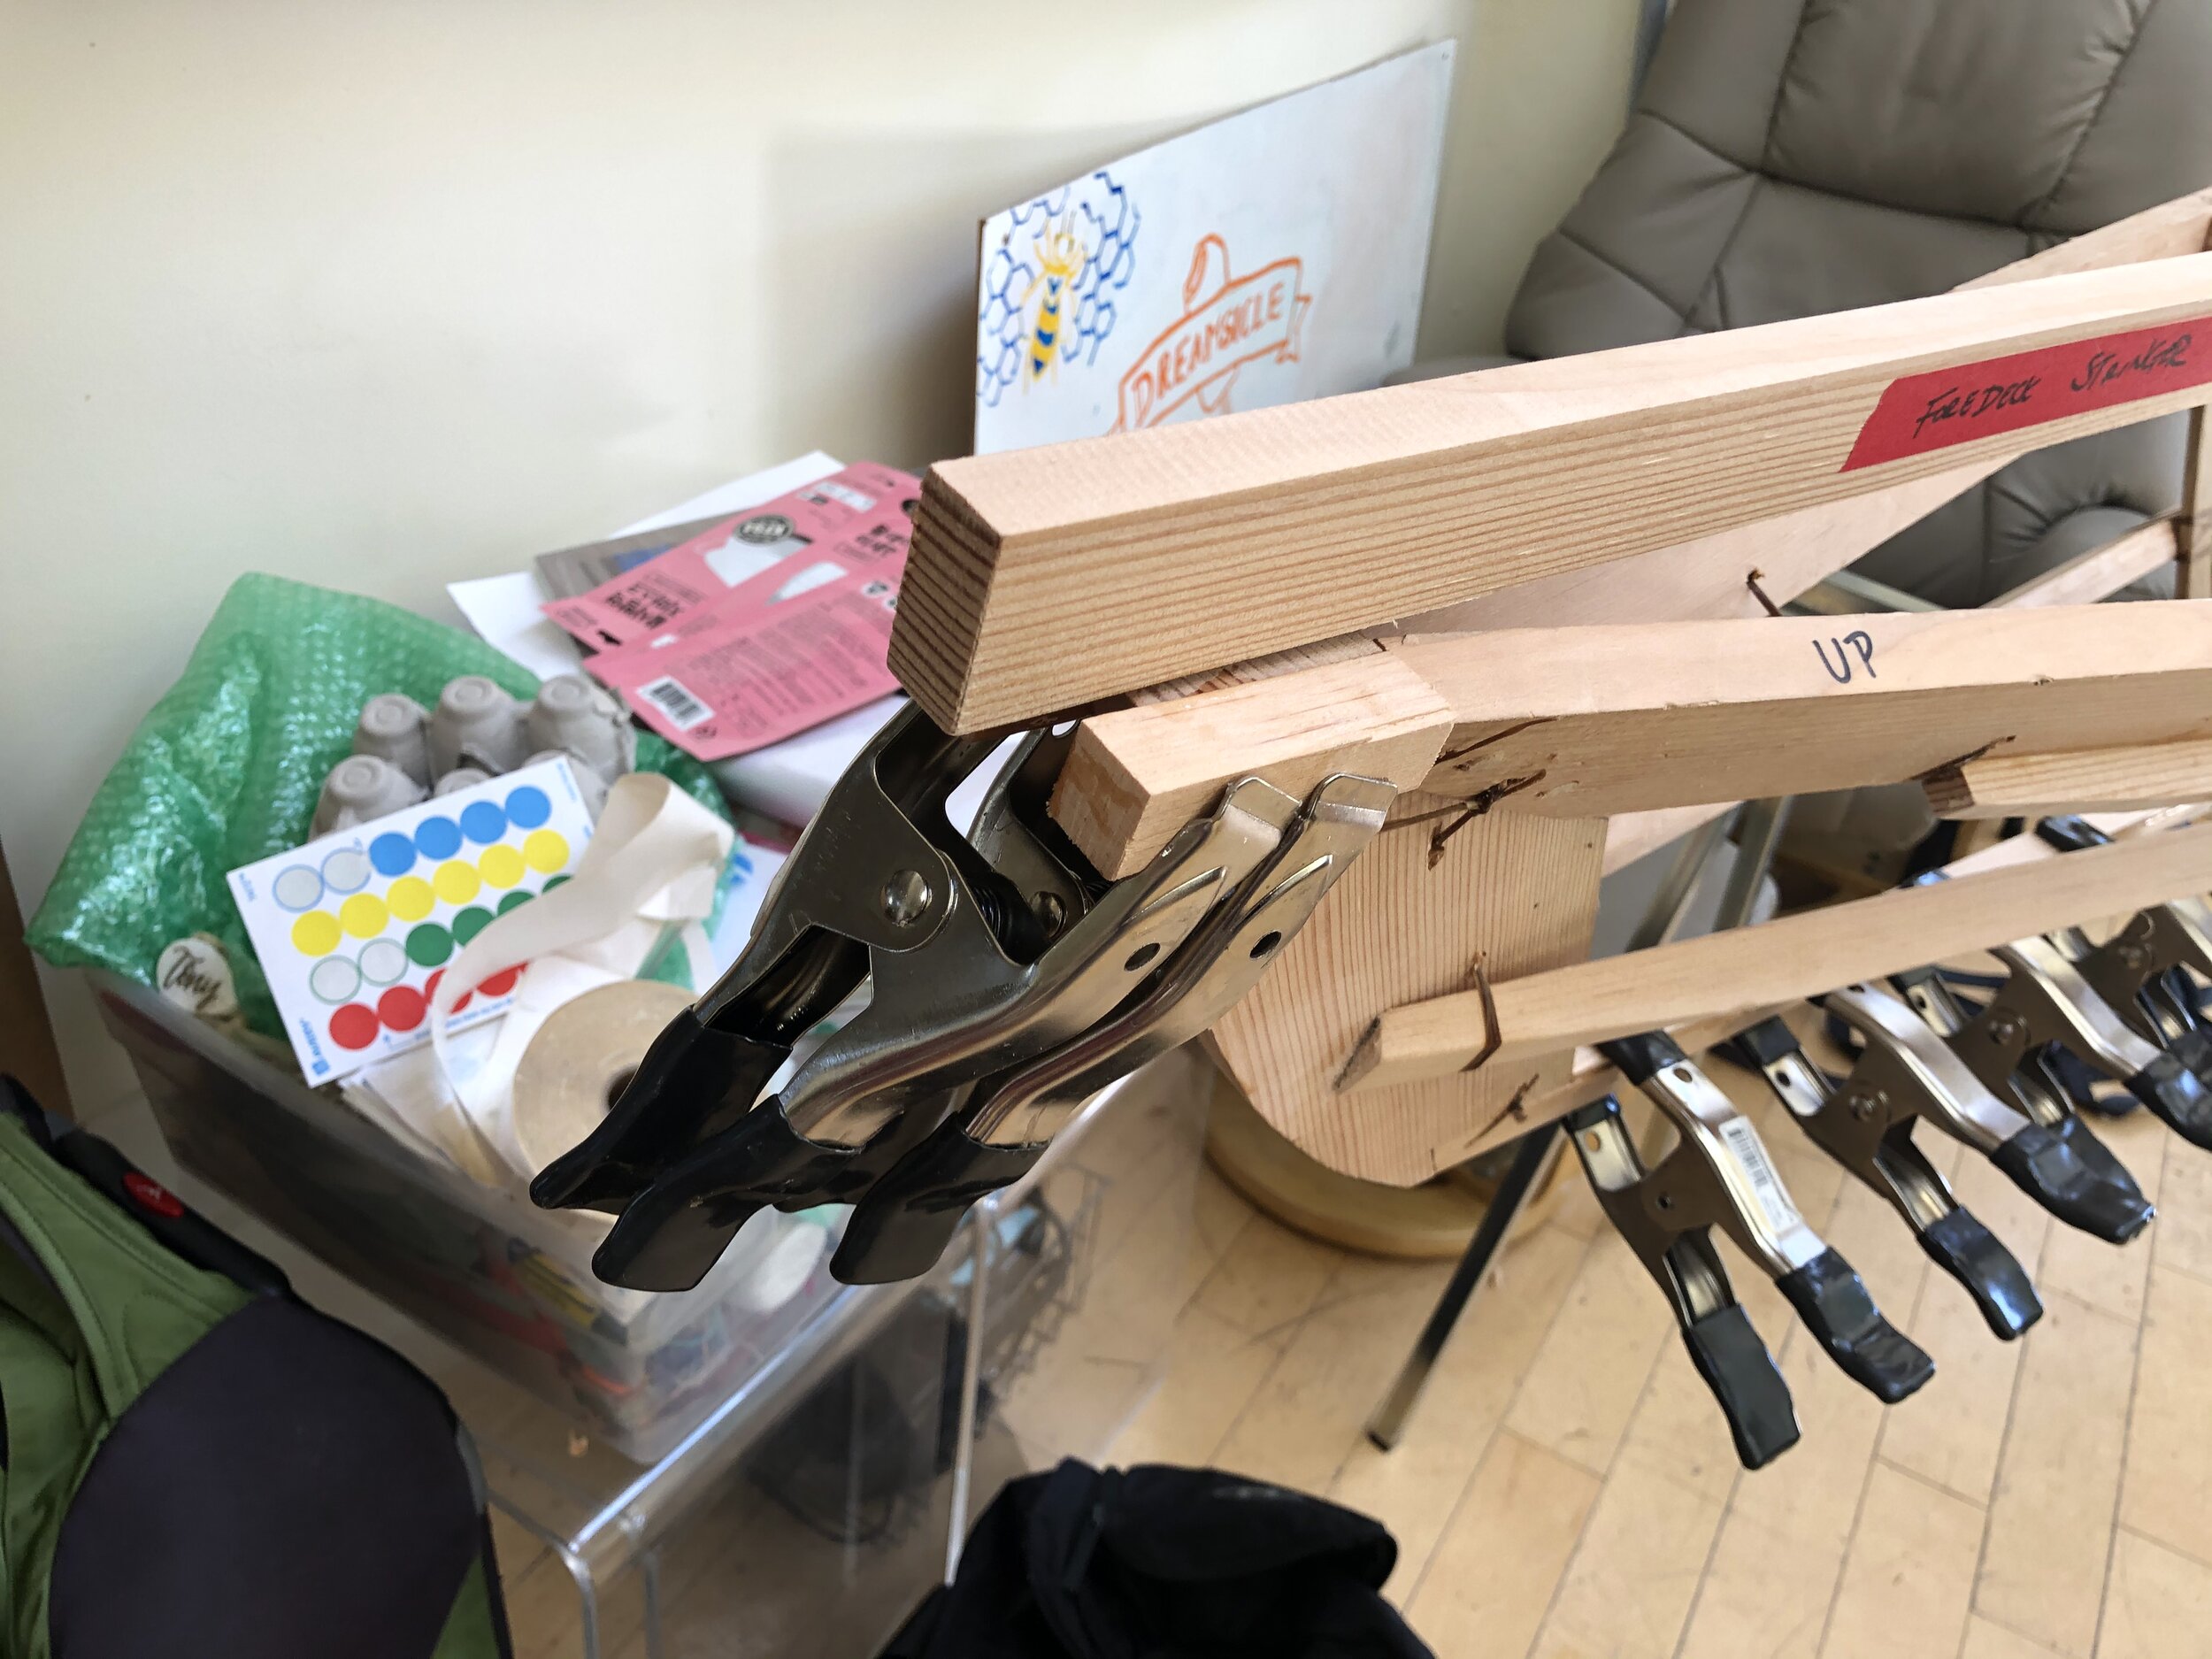
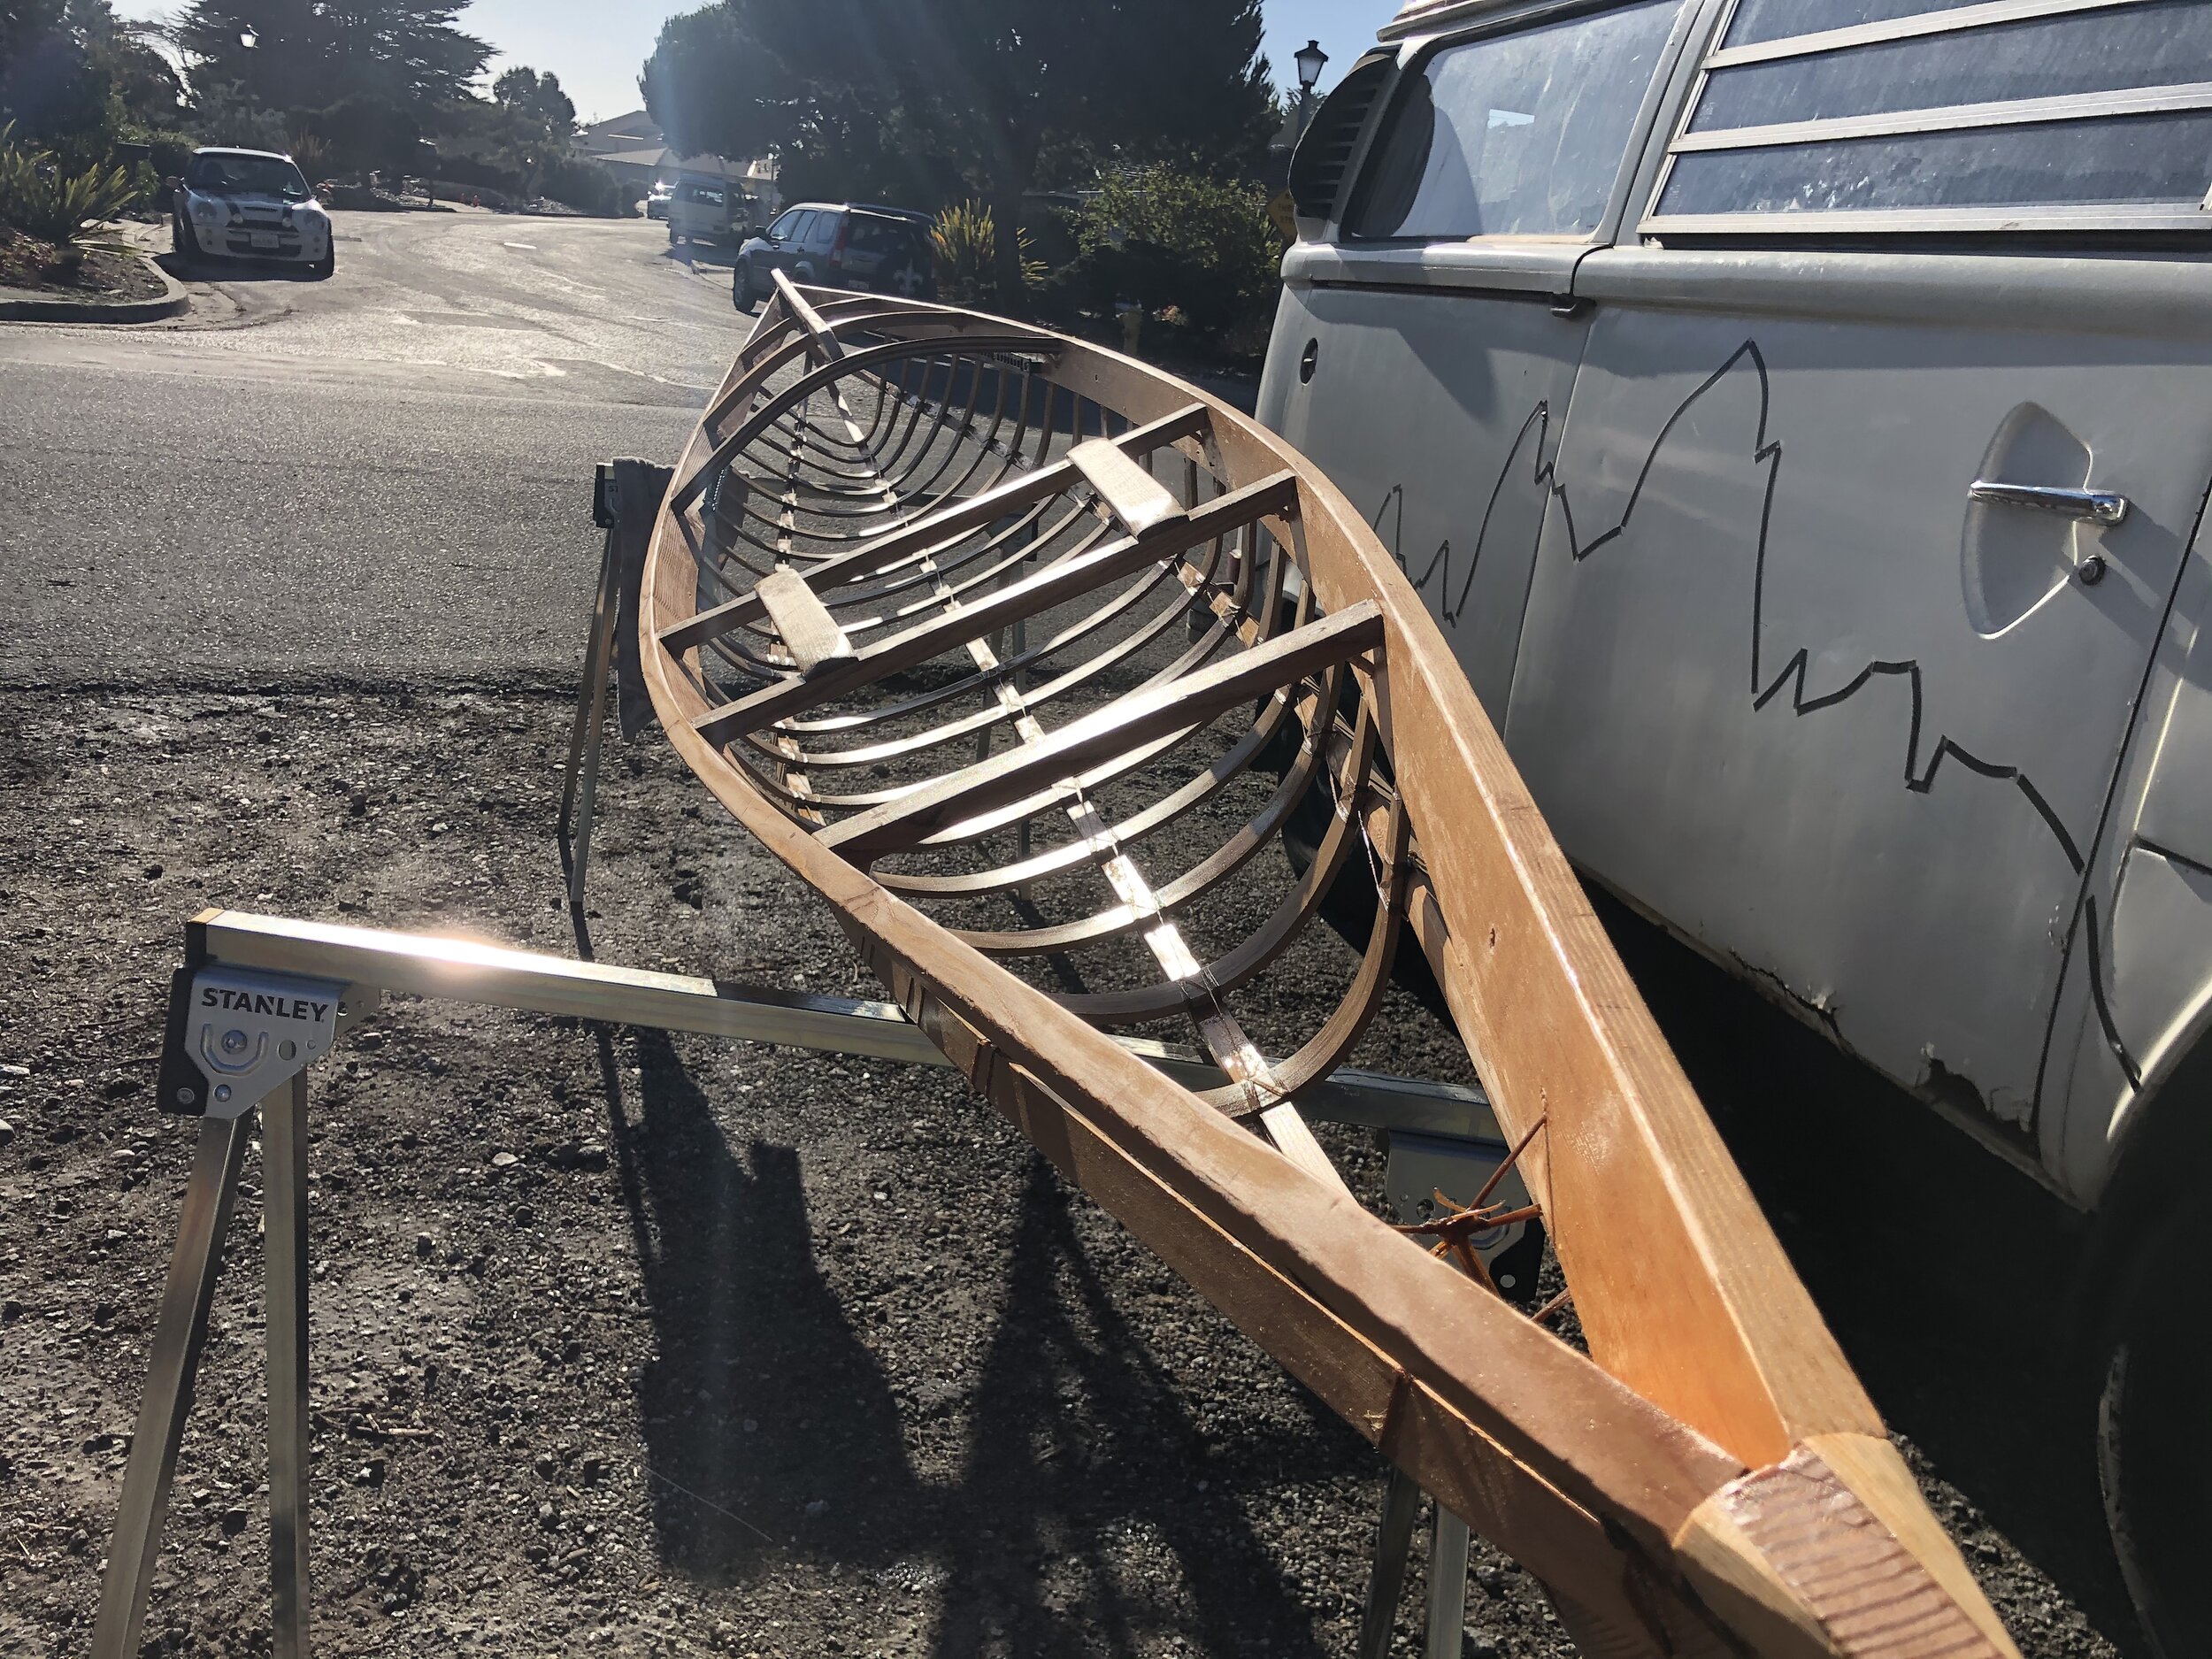
There are two types of deck beams on the modern F1 style kayak I was building: curved (in the bow) and flat (in the stern). These result in two different types of mortise/tenon joints, as shown below. Unlike the ribs that constitute the bottom of the boat, the curved deck beams are made from laminations of thin strips of wood instead of steam bent wood since the angles aren’t nearly as steep with these sections. I was certainly glad that I had purchased extra clamps for this part of the process. I was able to get away with about 14 spring clamps and only 1 Quick Grip, though it would have been helpful to have an additional of the latter.
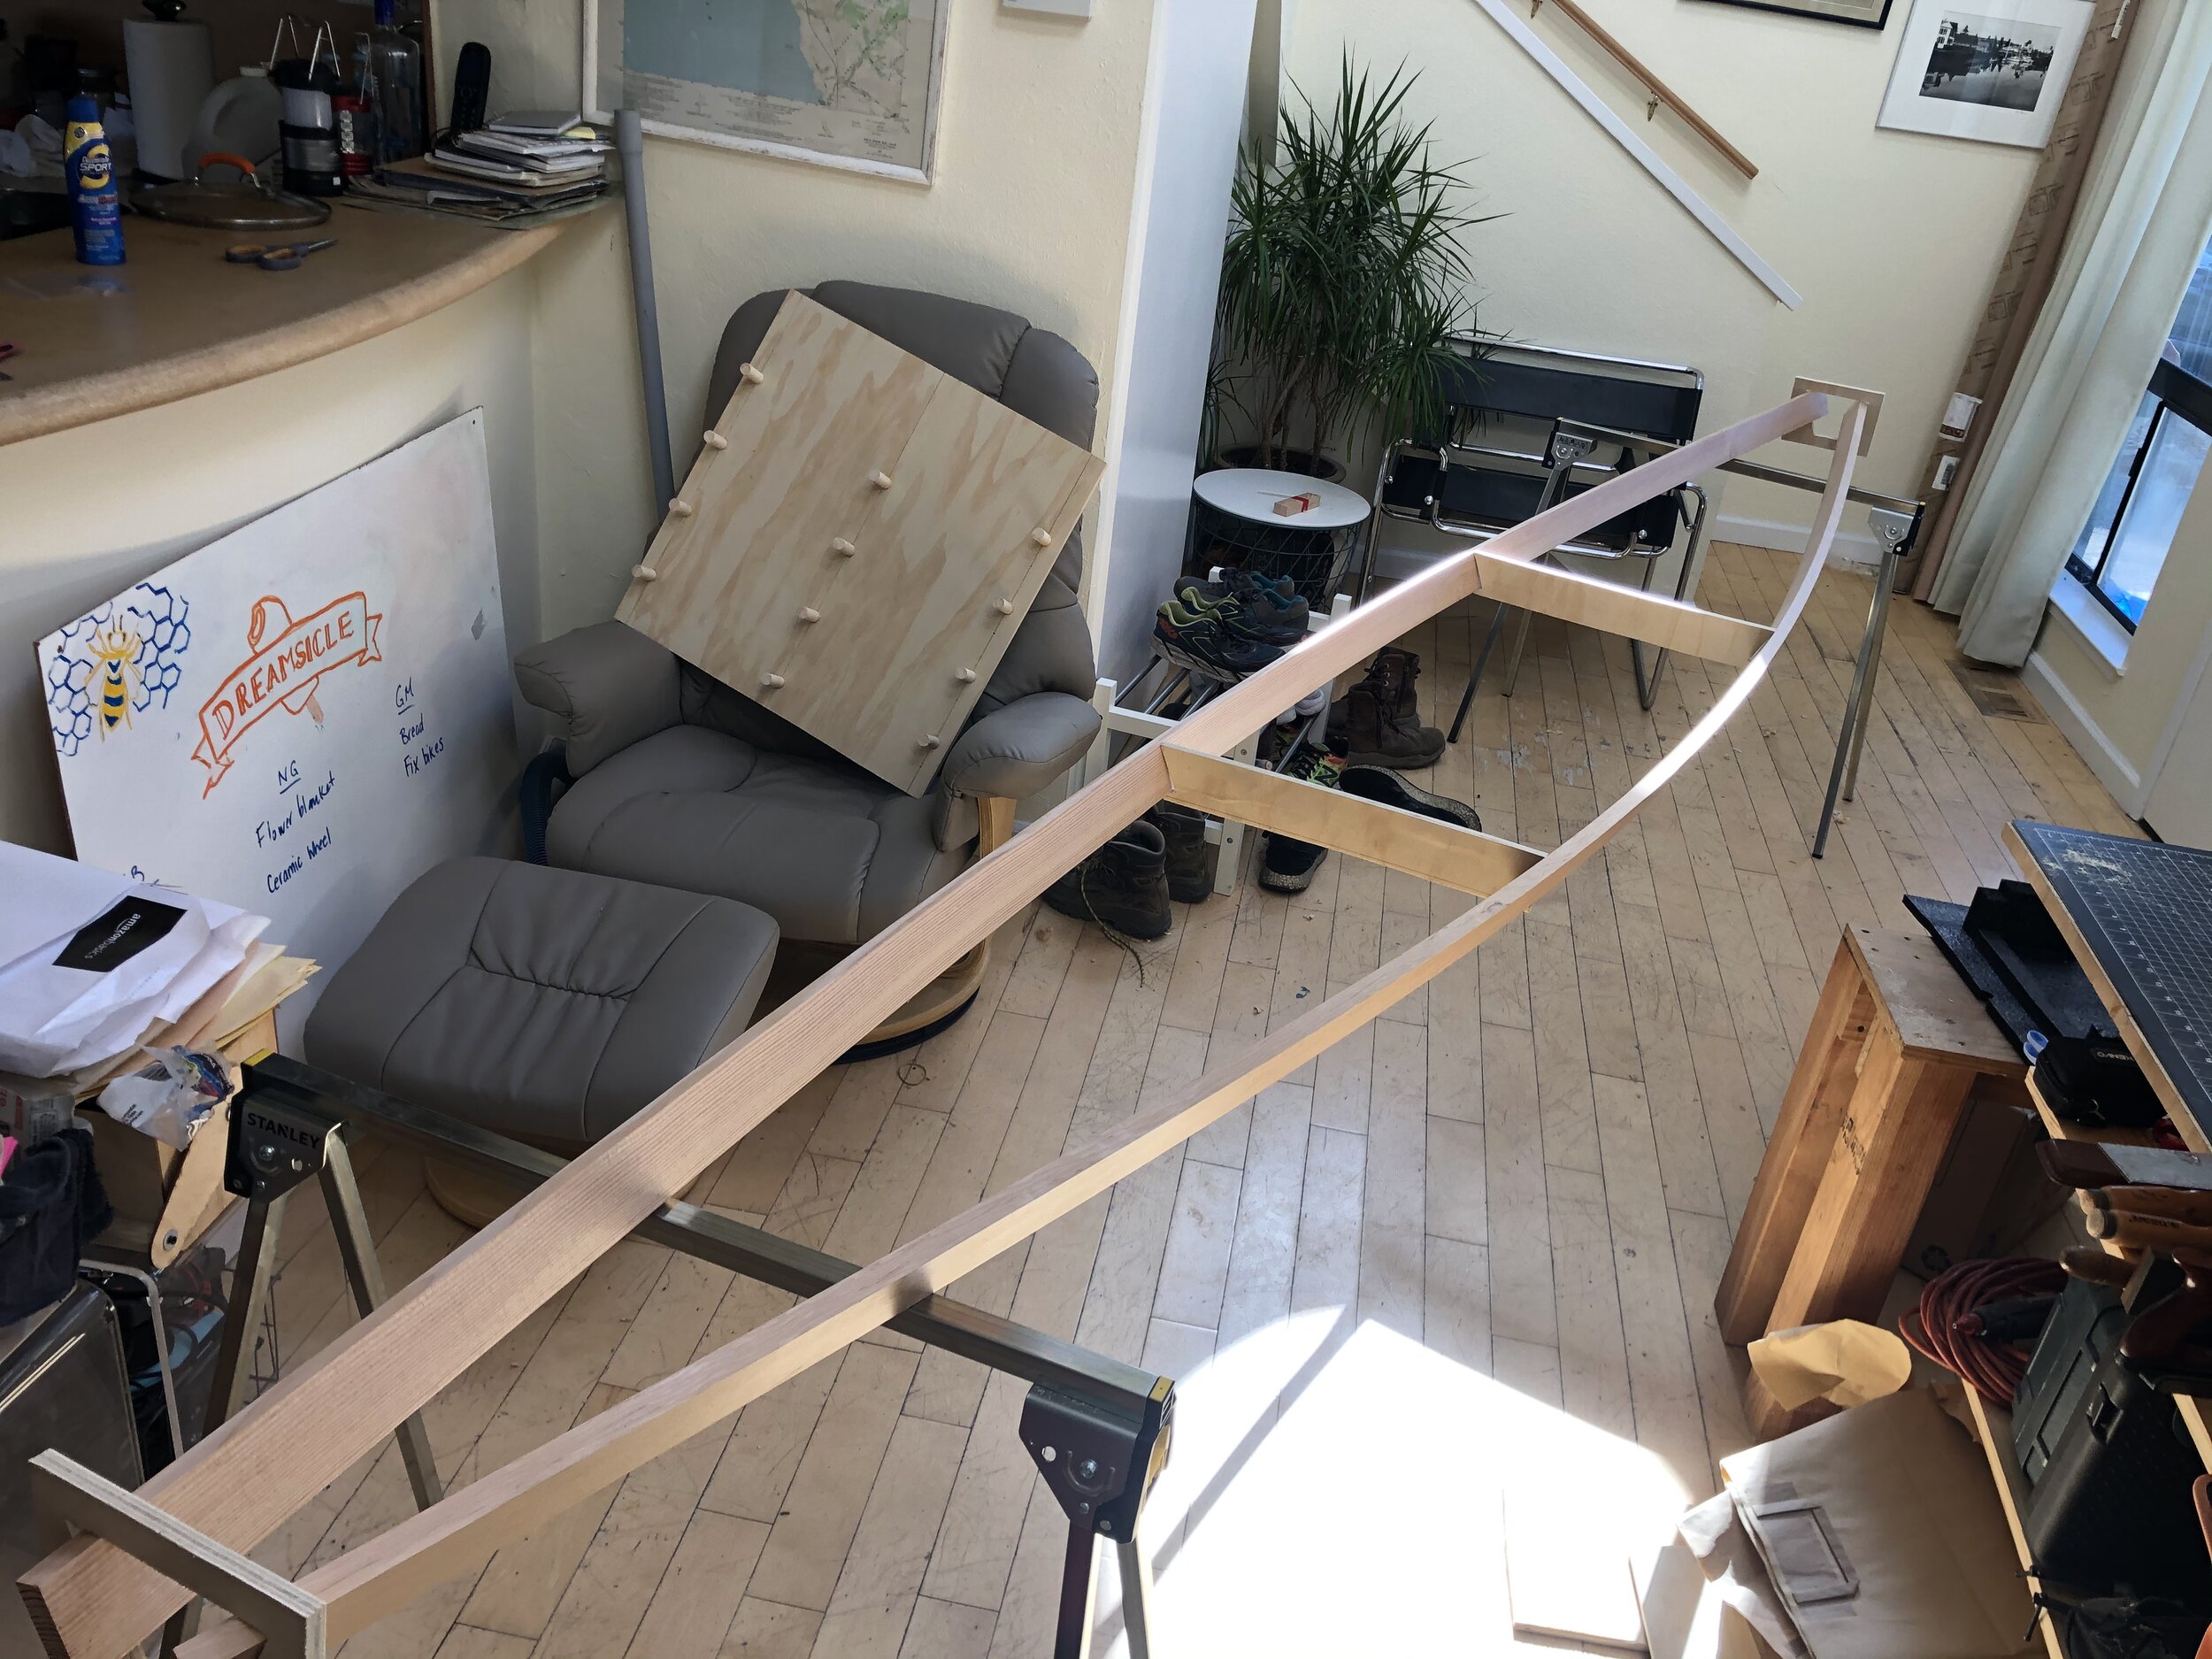
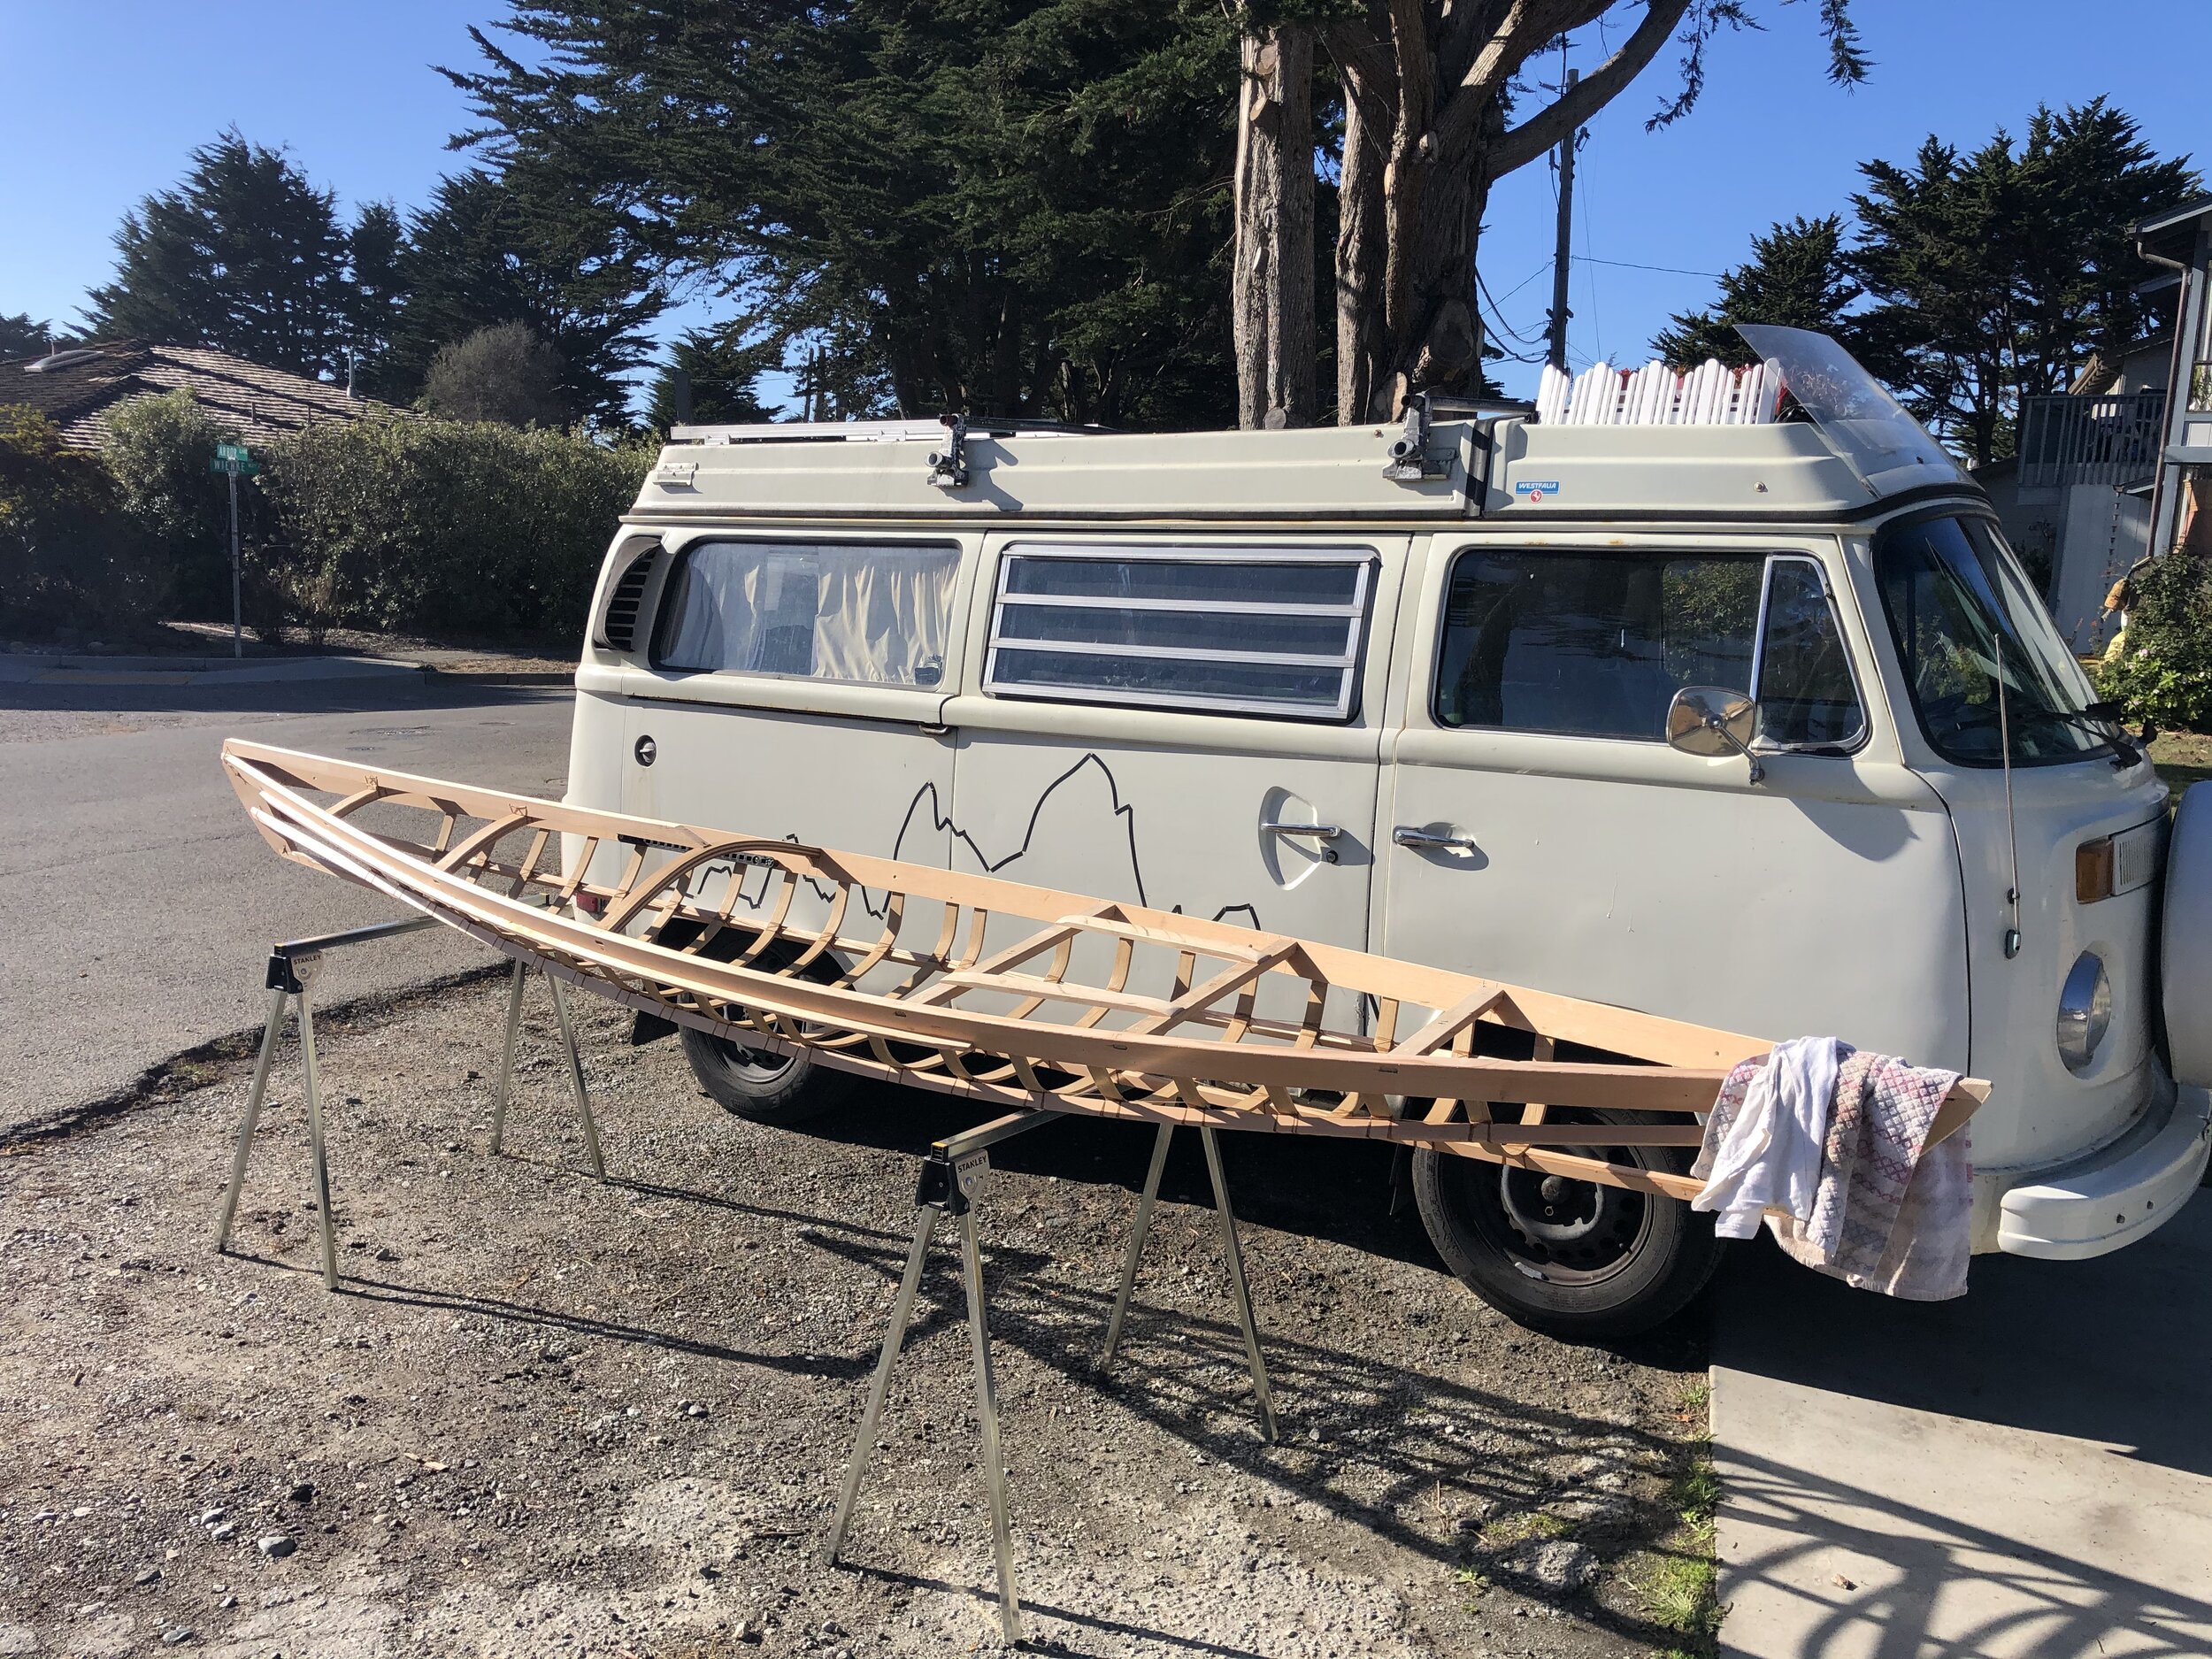
The initial layout used two middle forms and two forms at the ends, made out of plywood, that helped guide the gunwales into the kayak shape. These were eventually pegged together with dowels as the shape came together.
JOINTS //
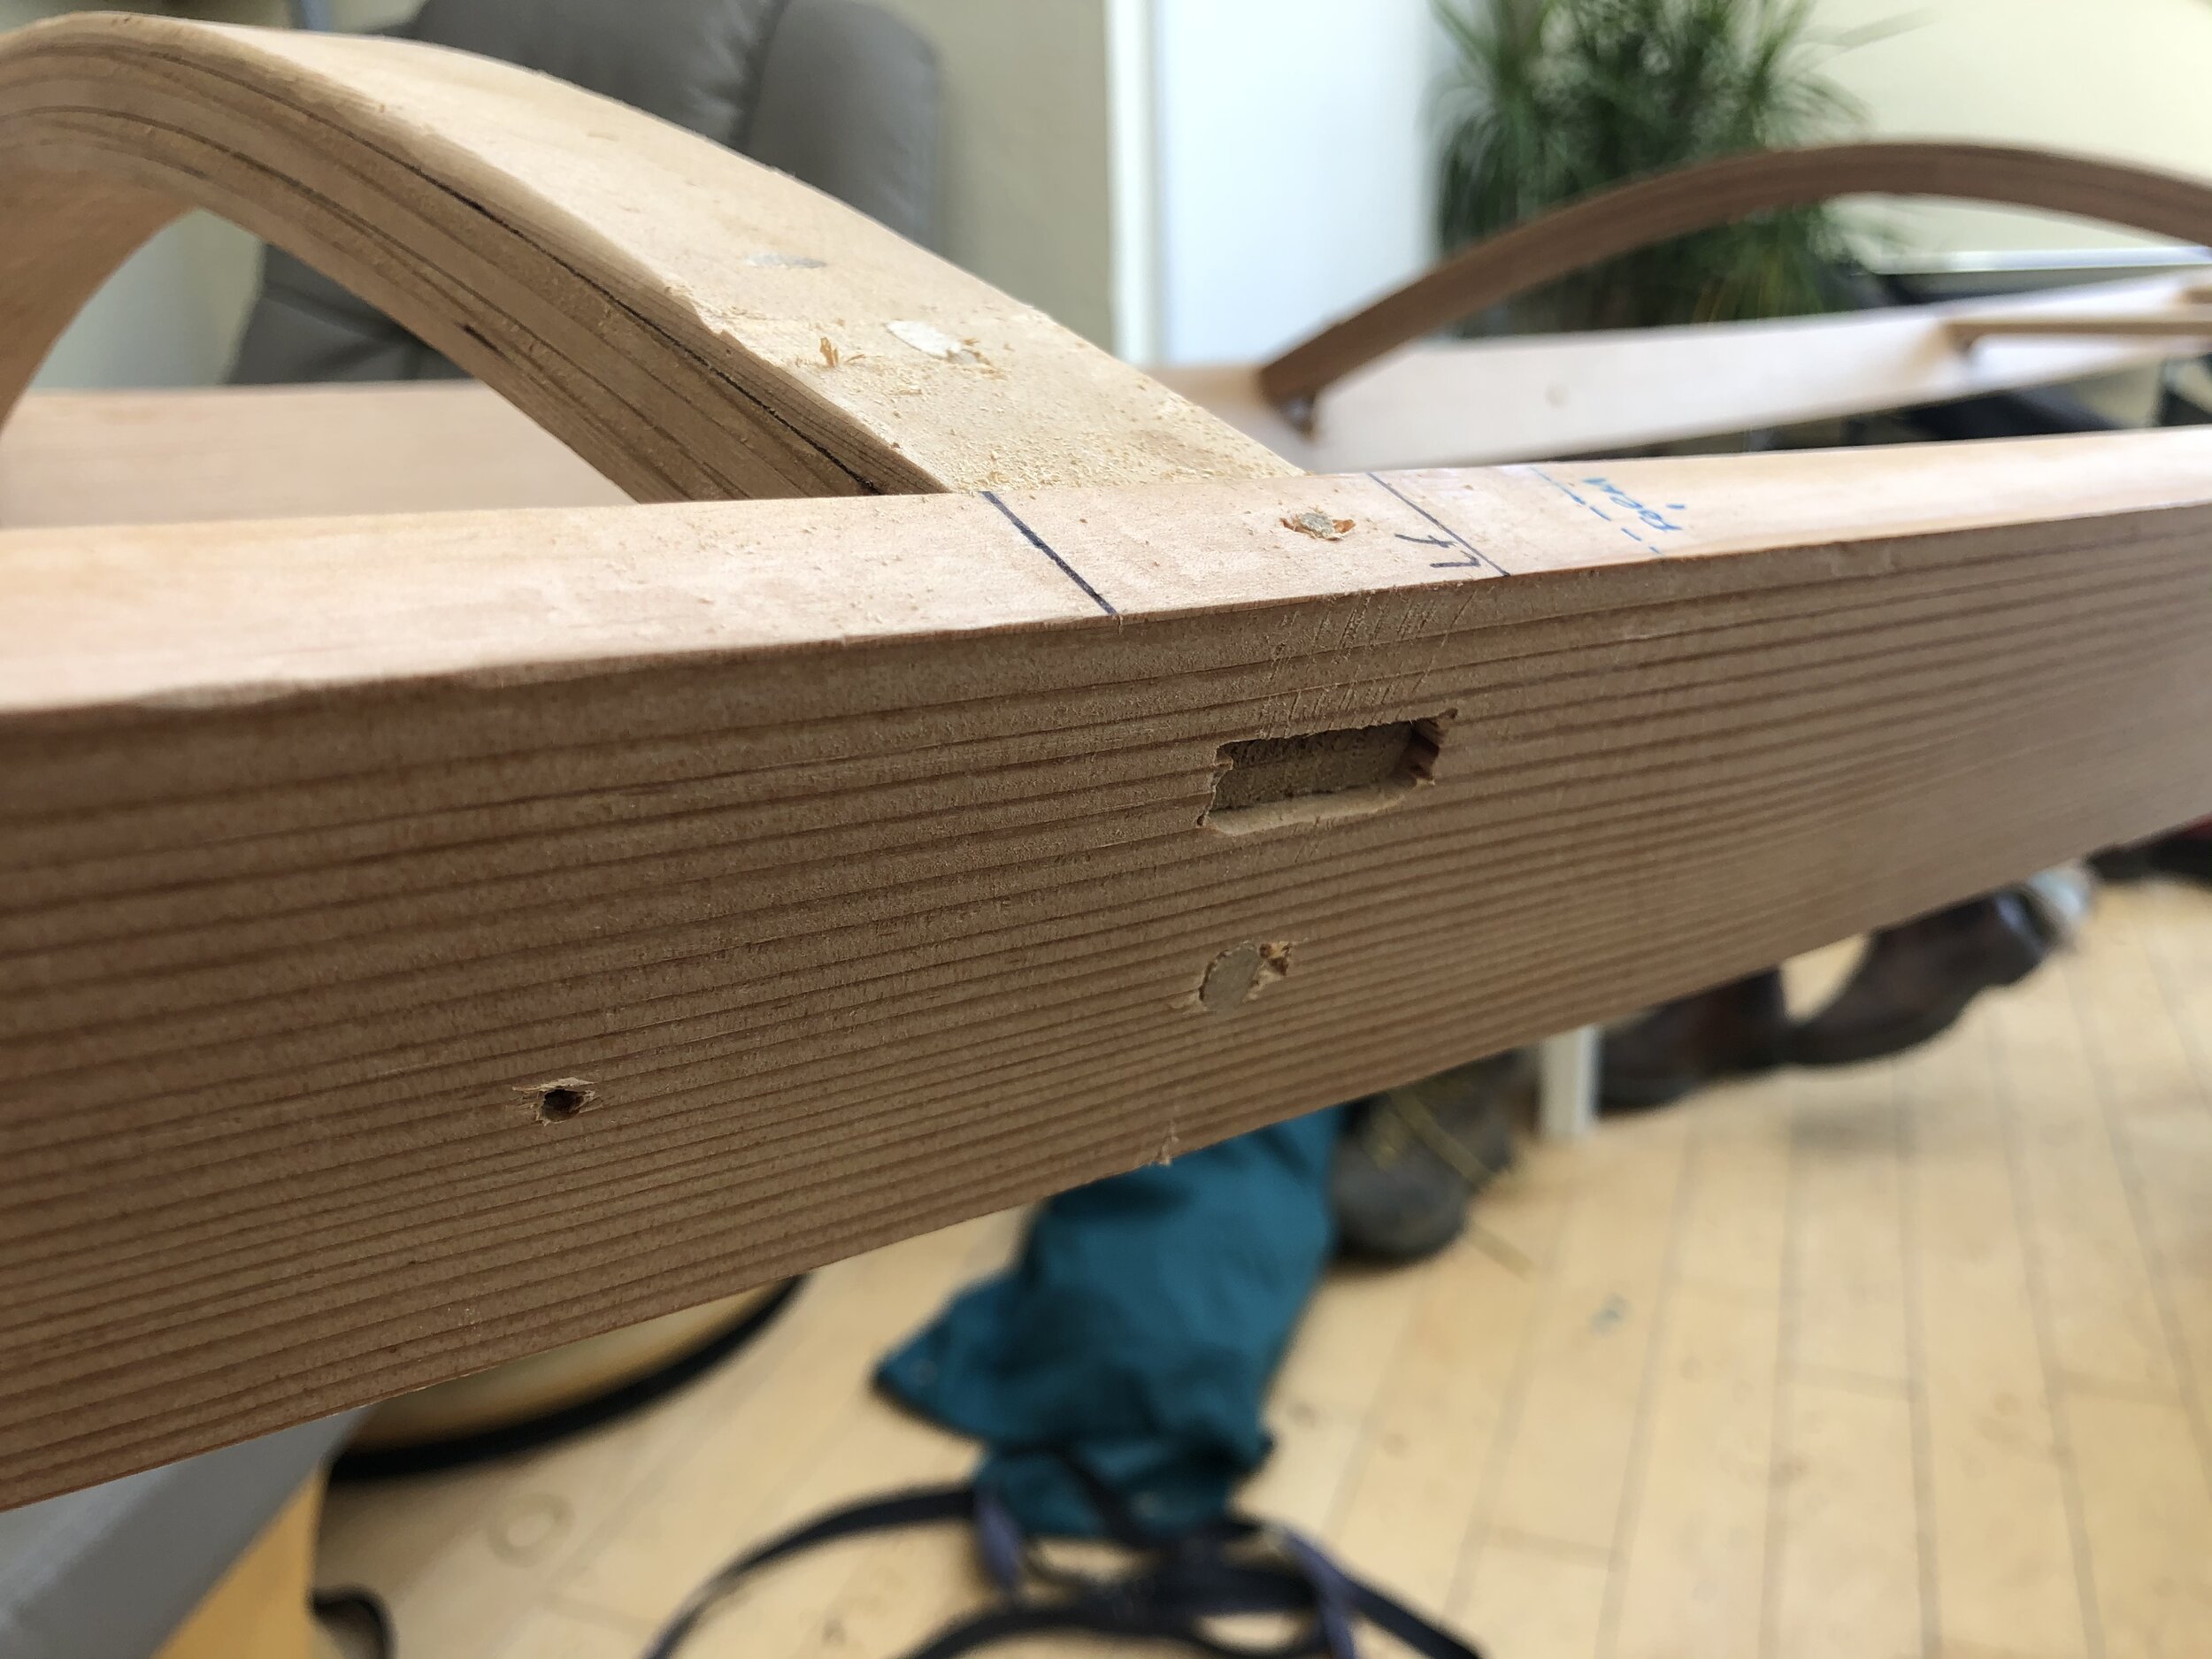
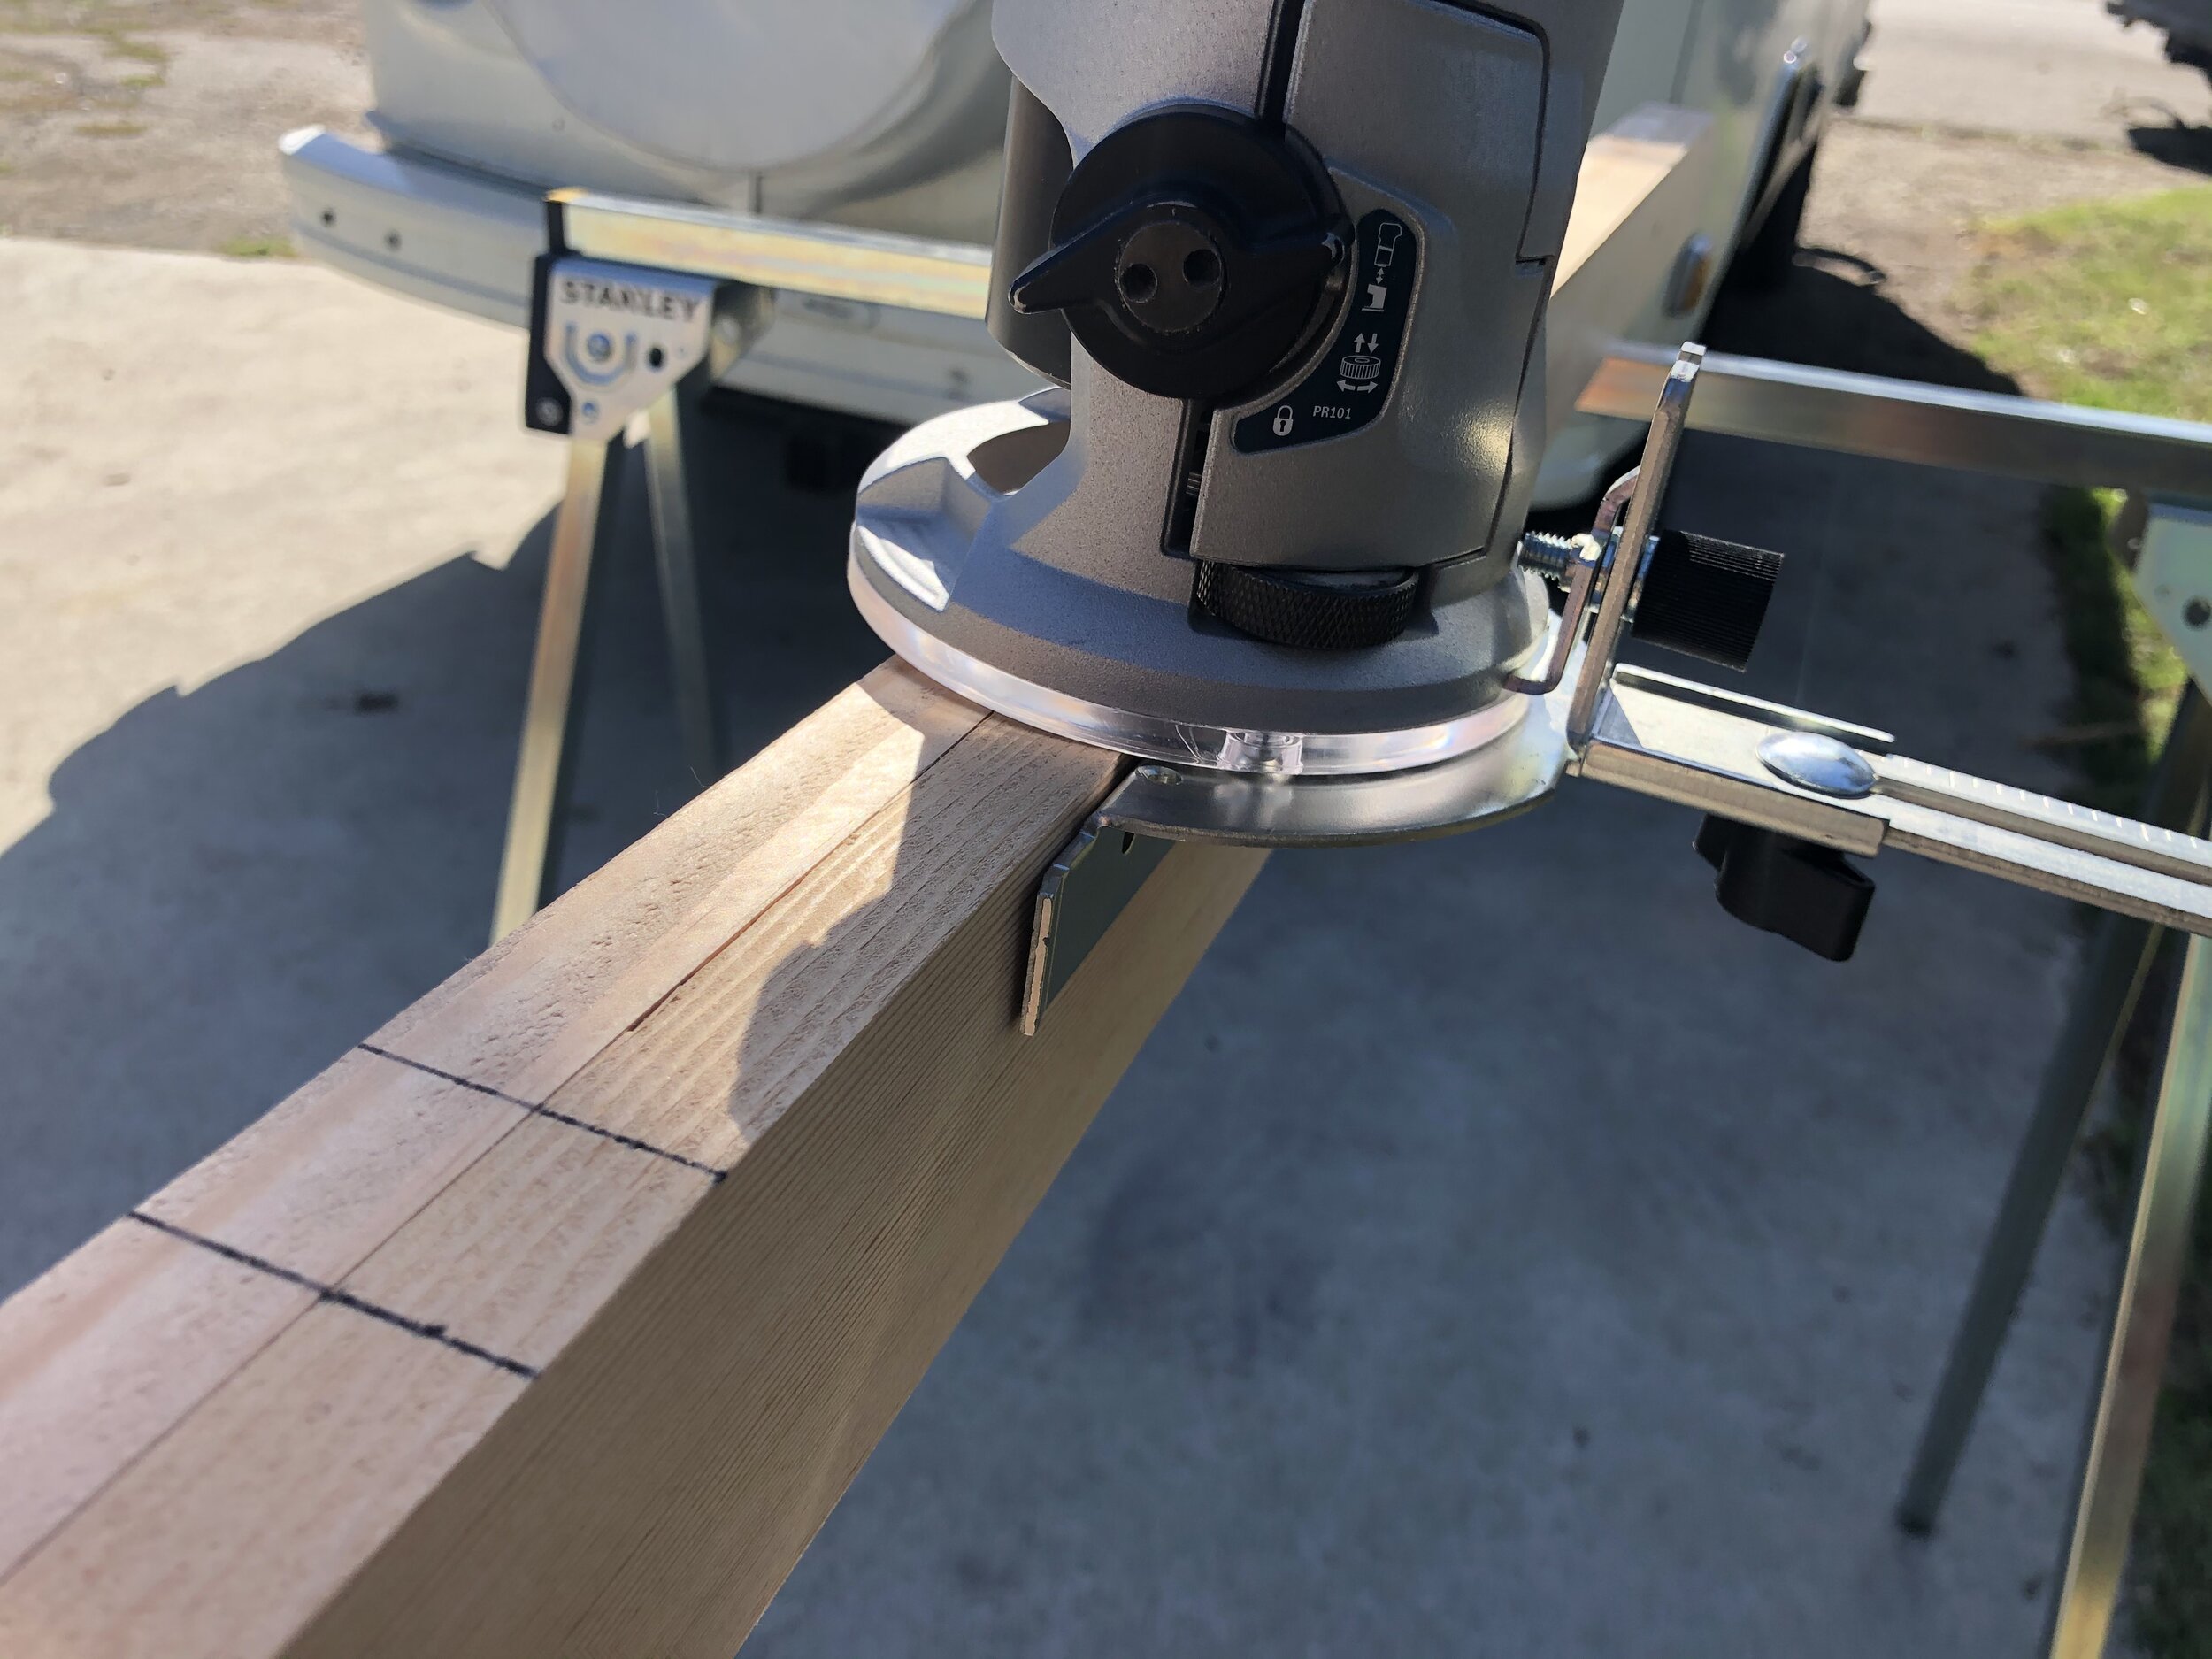
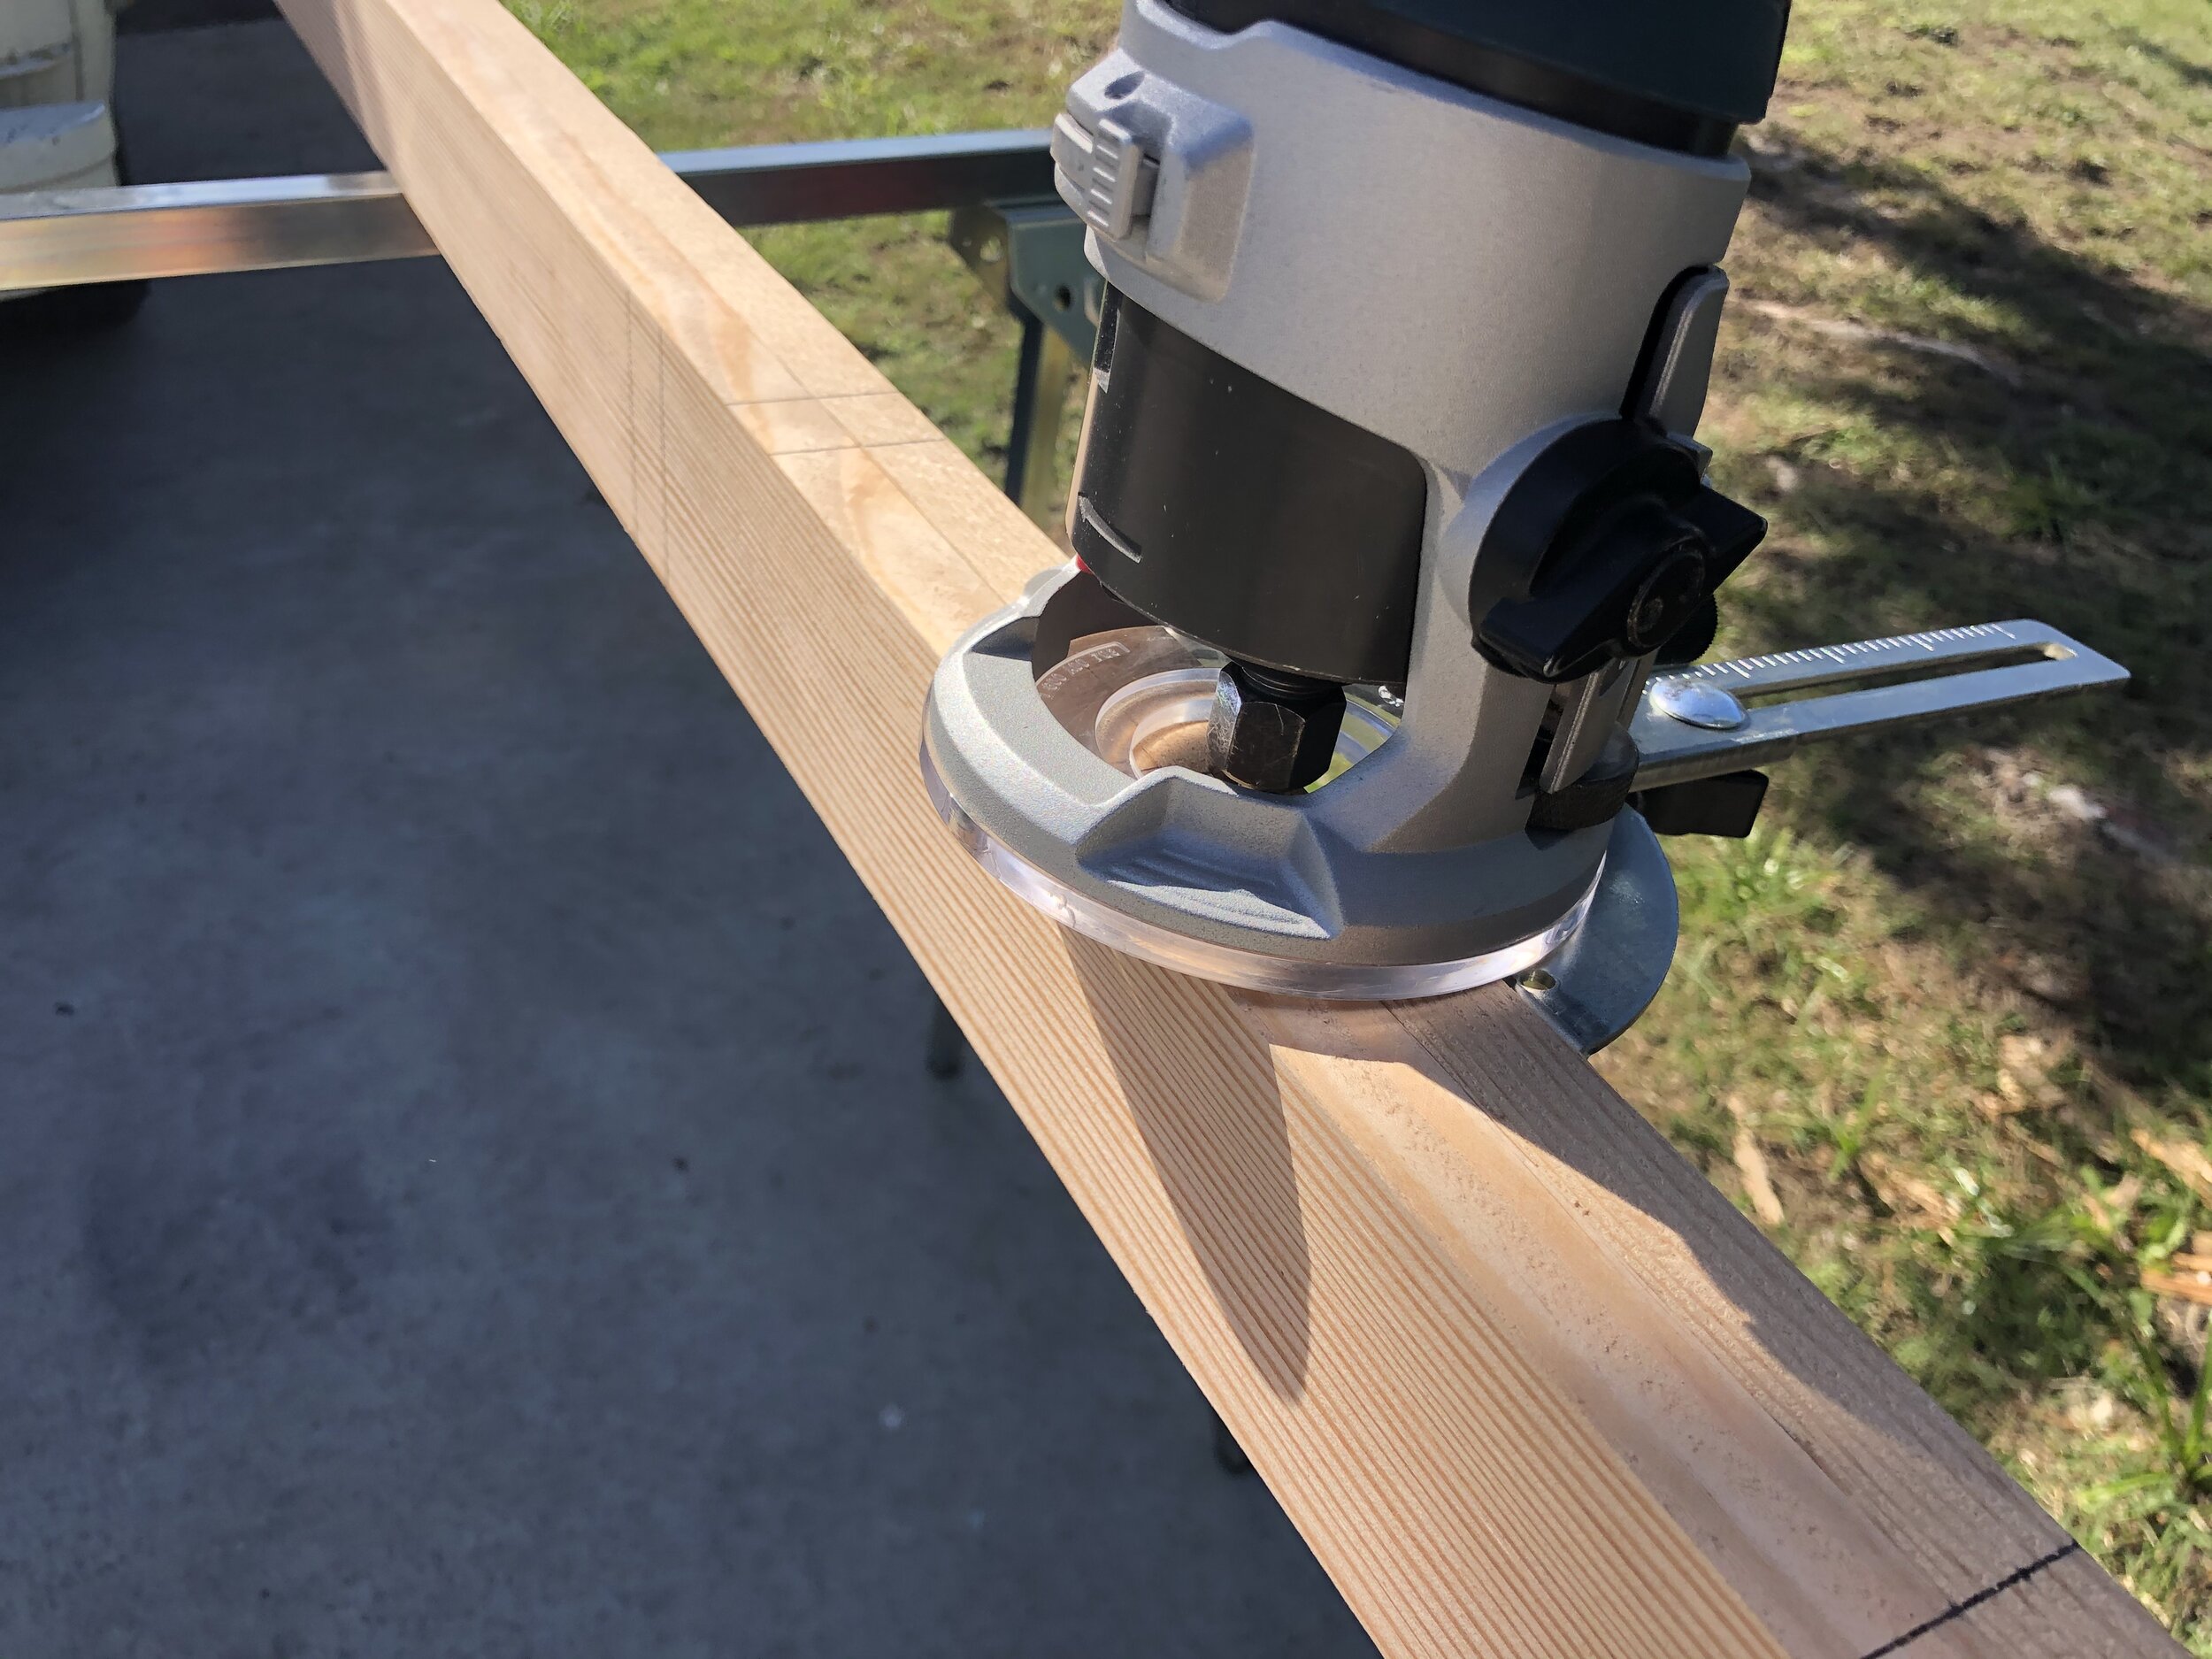
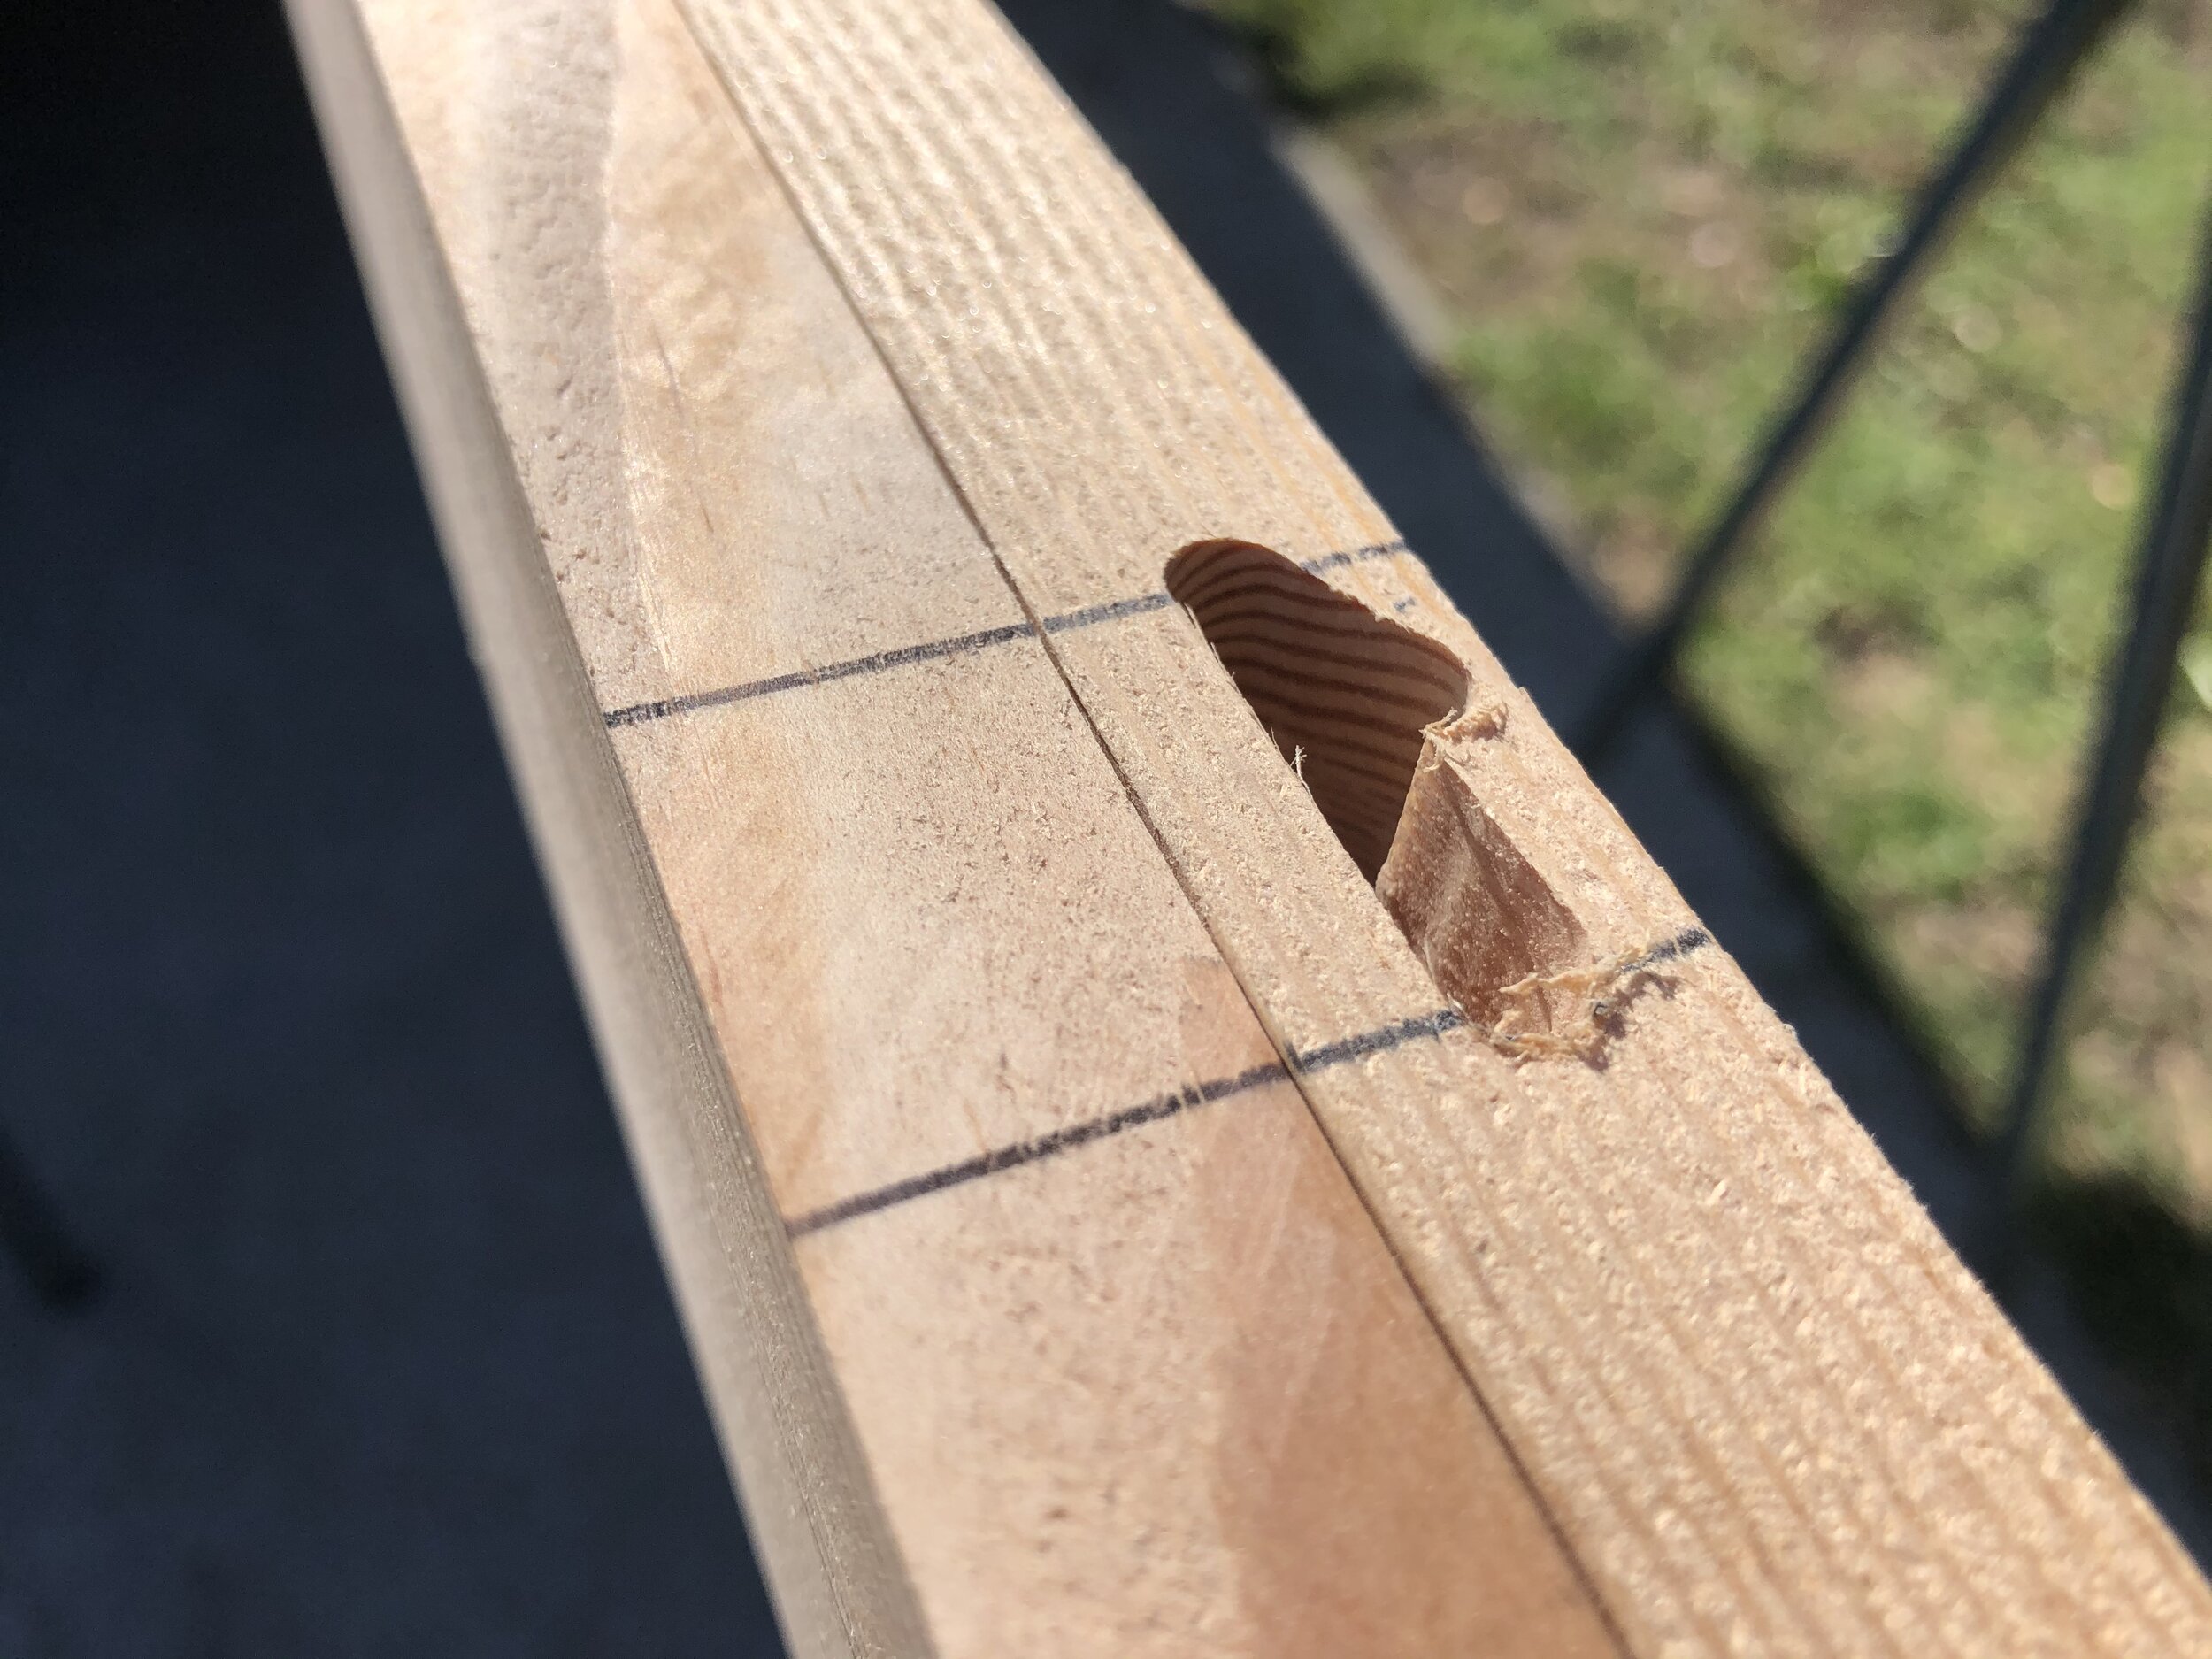
There are two different recommended approaches for creating the mortises for the ribs and deck beams based on how many boats you are looking to build: (1) create a jig for a plunge router or (2) use a more elementary guide to drill out the mortises. I initially planned on doing the latter but after doing one, it felt quite imprecise and ugly so I rethought how I might use my non-plunge router to make them. Fortunately, as I was looking in the router case, I discovered that there was a guide that attached to the router which would allow me to make the rib mortises and straight deck mortises pretty quickly. After a few, I got the hang of it and they started to come out quite nicely and uniform. For the angled mortises, I build a quick jig but because of the length of the router bits, I couldn’t quite make it through all the way so I had to do a combination of drilling and routing to make these.
Typically, when I would create mortise and tenon joints, I would makes sure to chisel out the corners of my pockets but with this technique, you actually leave them round and use a slightly softer wood for the tenon, rounding the edges of the tenon as you push them together. I can’t say that they were the most elegant mortises that I have ever made, but there are so many cross members to the design that once the skin is on, I imagine the cumulative structure is quite strong and rigid. As for the aesthetics of the joints, the skin shields most all of this from being visible so I wasn’t too worried about break out around the edges of the mortises.
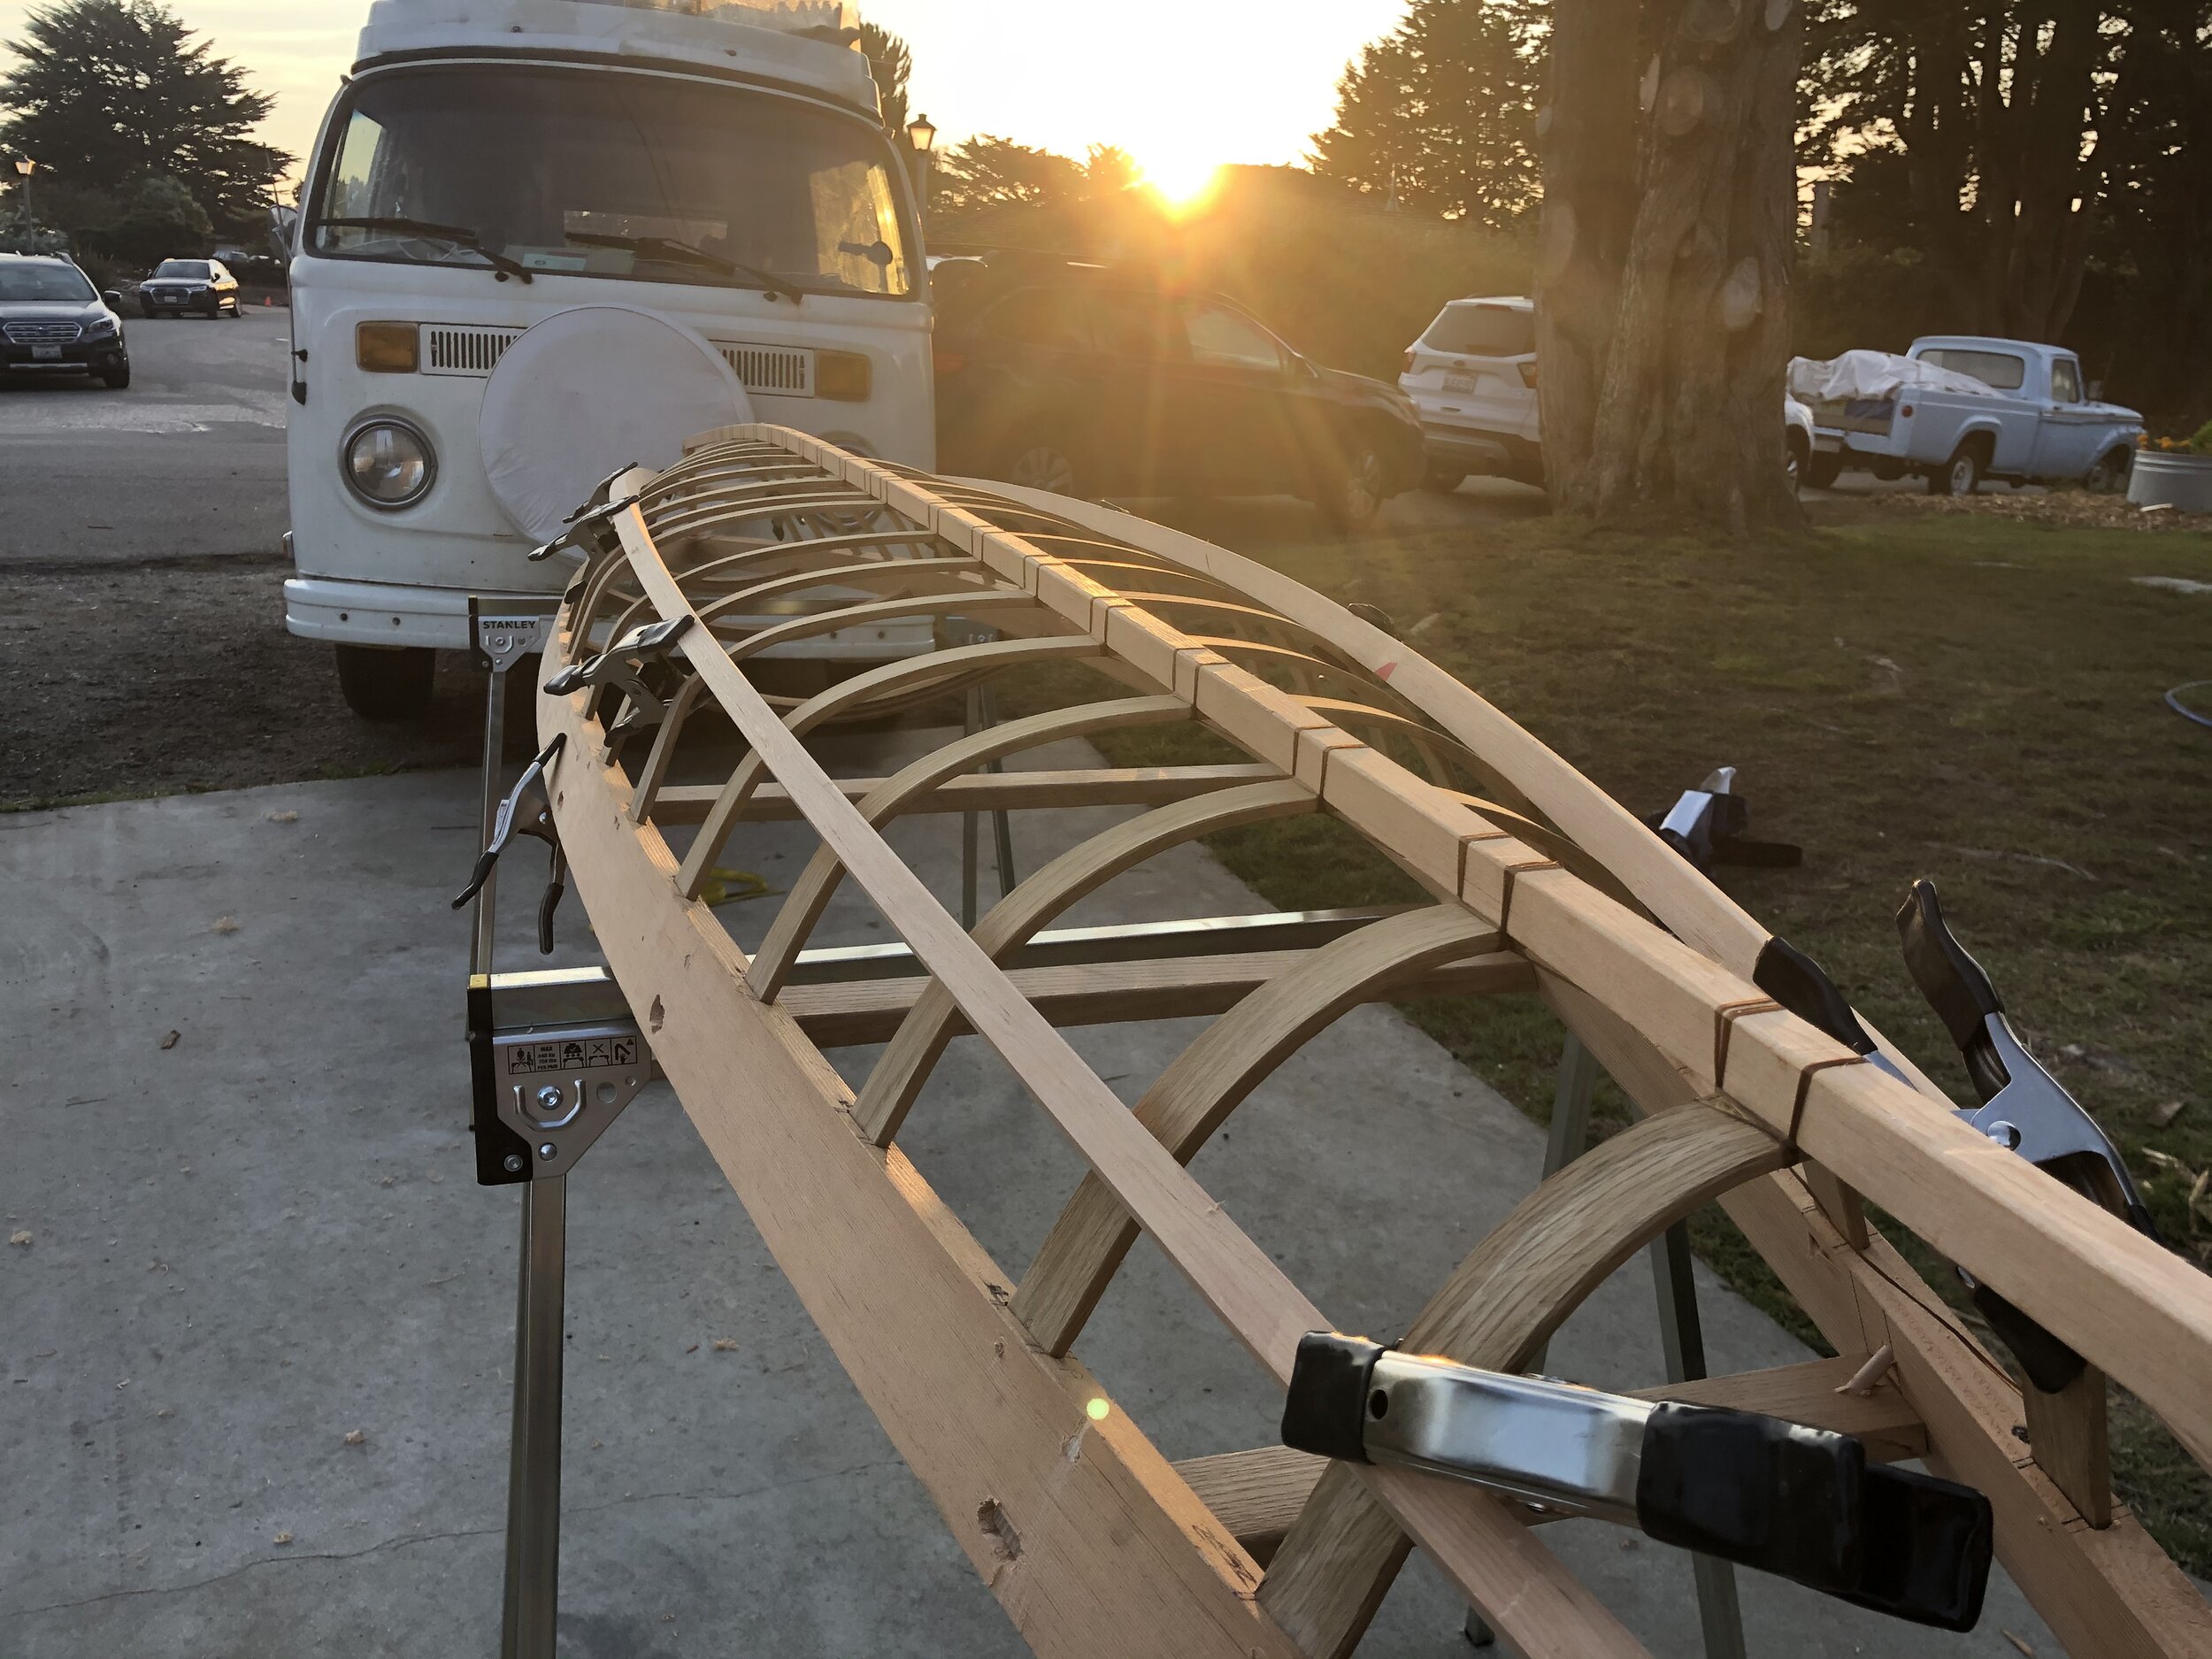
BENDING //
The bending day was the most exciting and nerve wracking. I had opted to order precut, straight grained oak bending wood from Cape Falcon because I couldn’t find any in time for the small window I had access to a table saw/planar. It also helped eliminate any question about whether it was the right quality.
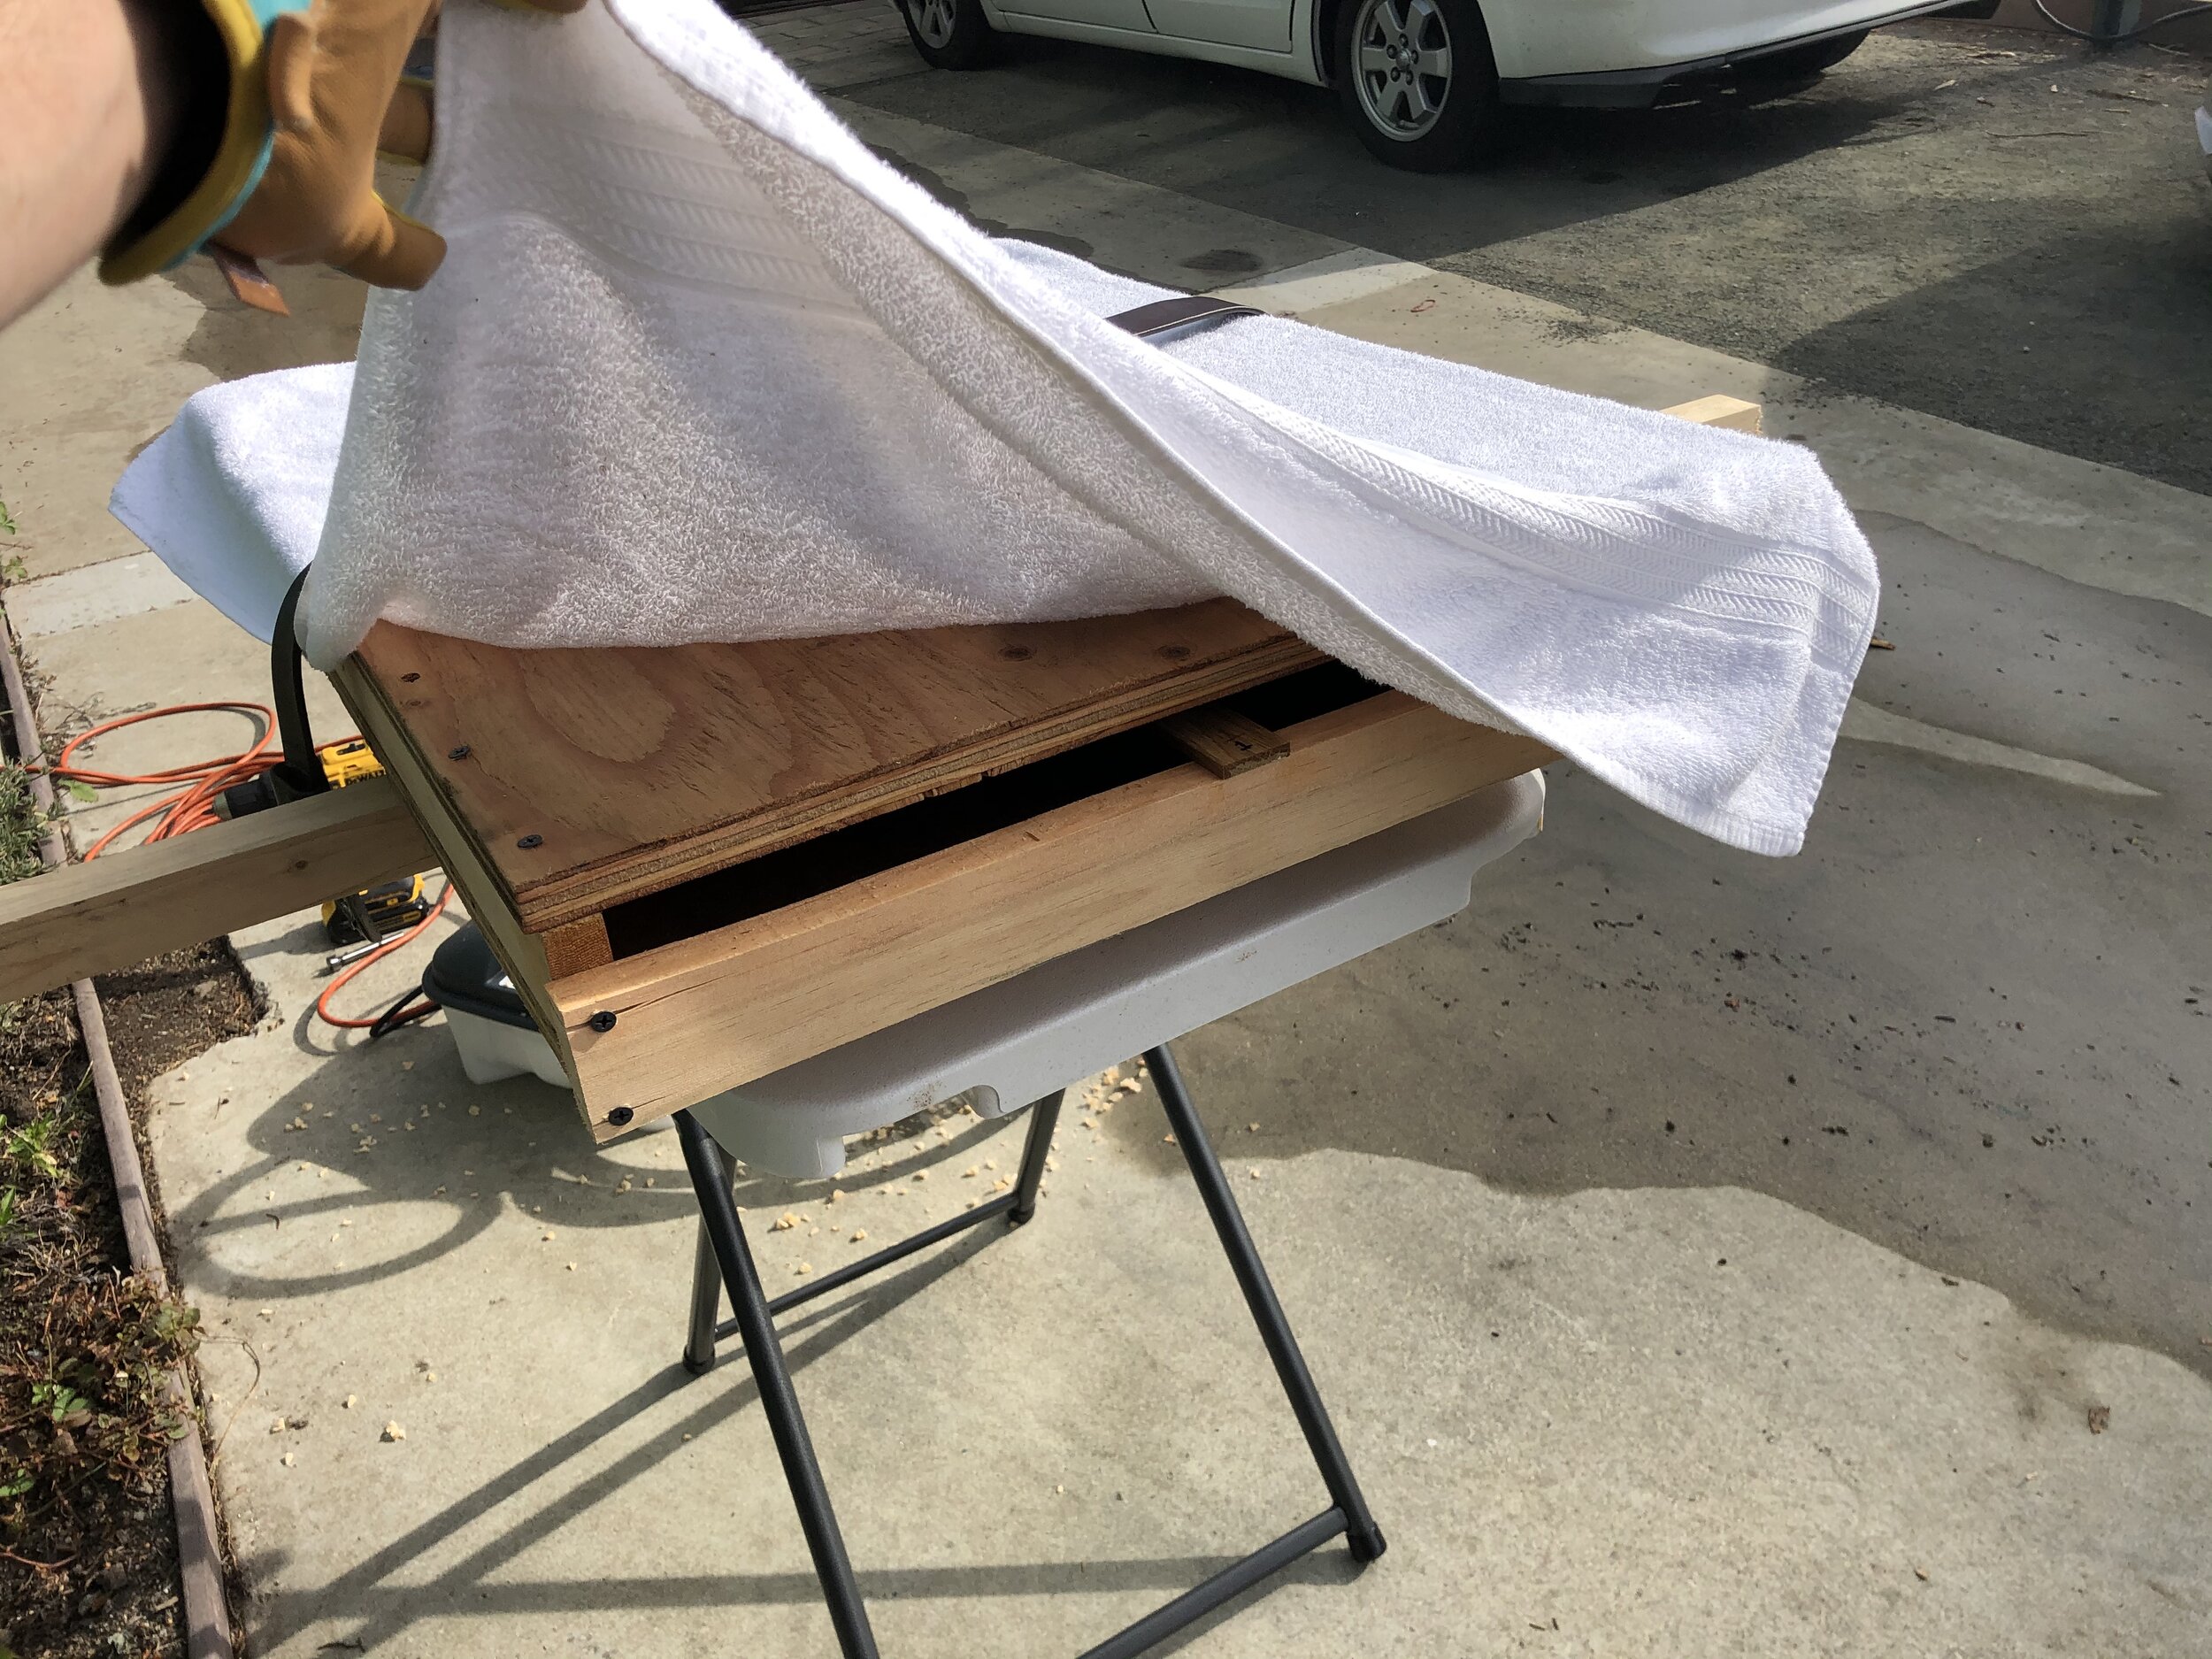
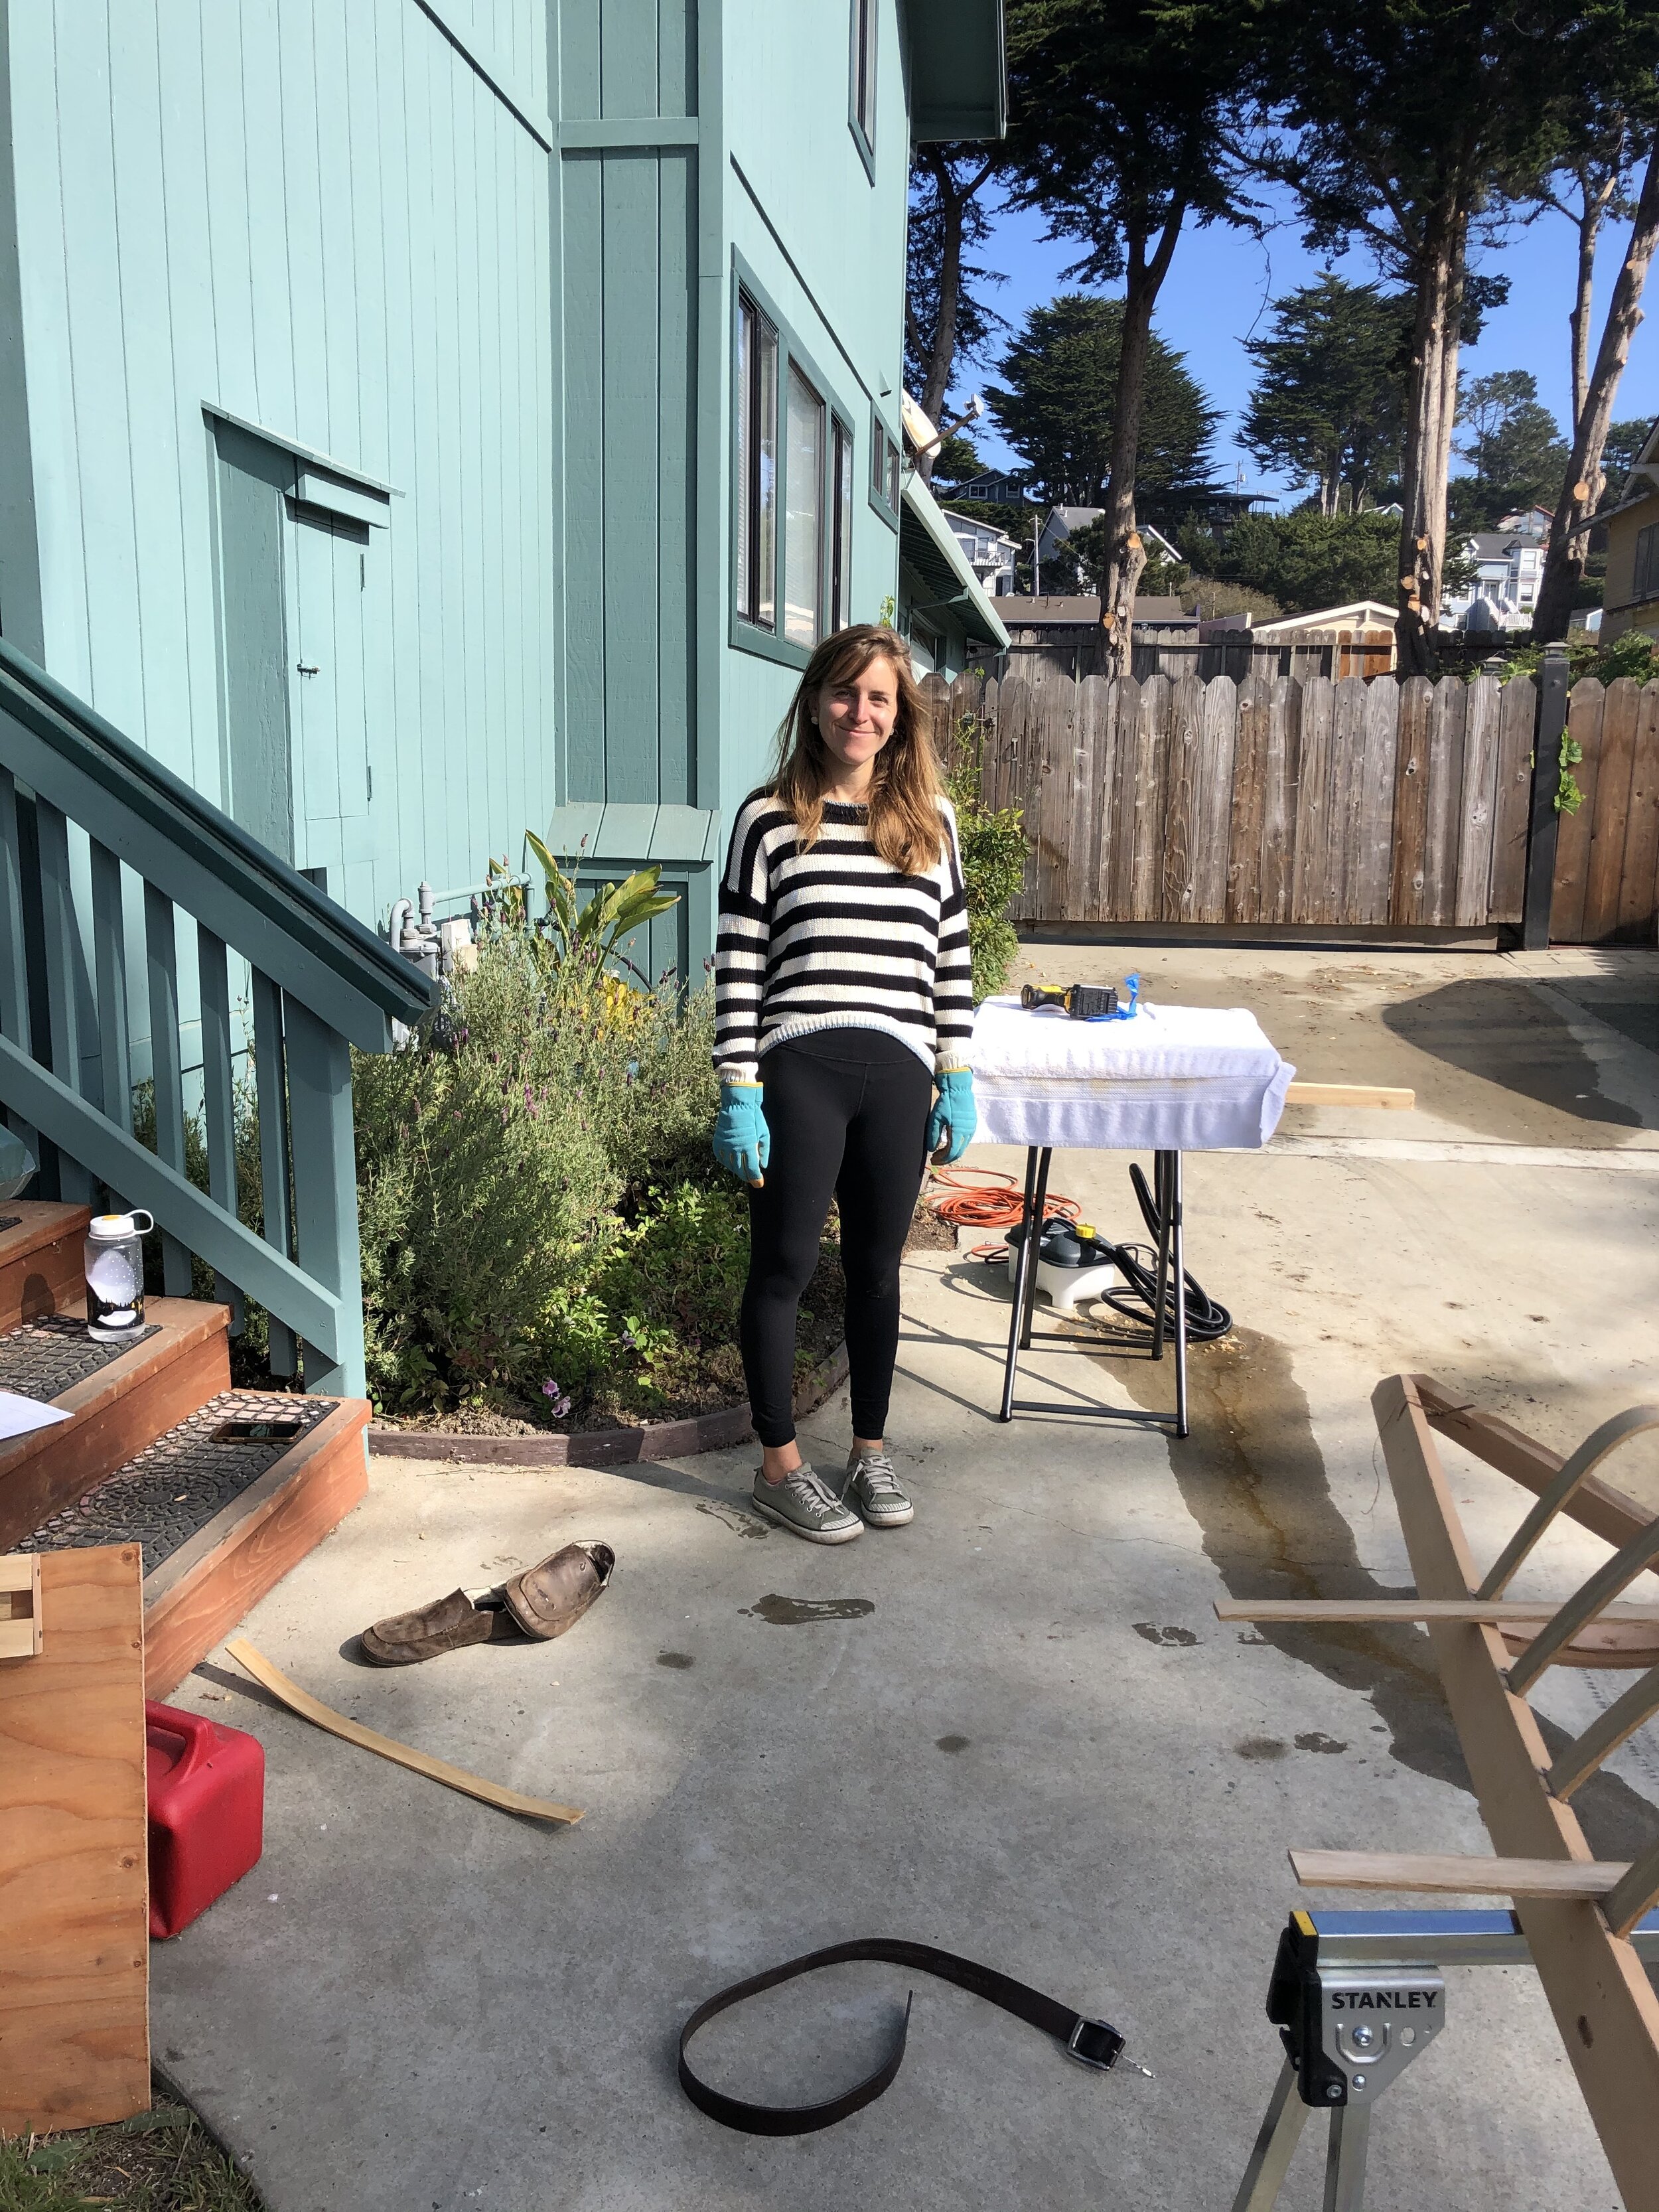
I built a steam box with some scrap wood I had lying around and then purchased a wall paper steamer to provide the steam. Per Brian’s suggestion, I used a towel to keep the opening of the box closed and used a 7 minute cycle time, which seemed to work well for me and my particular wood. I would add a piece of pre-cut wood in once a minute and then when I reached 7 in the box, I would pull one, bend it and replace that piece to start steaming.
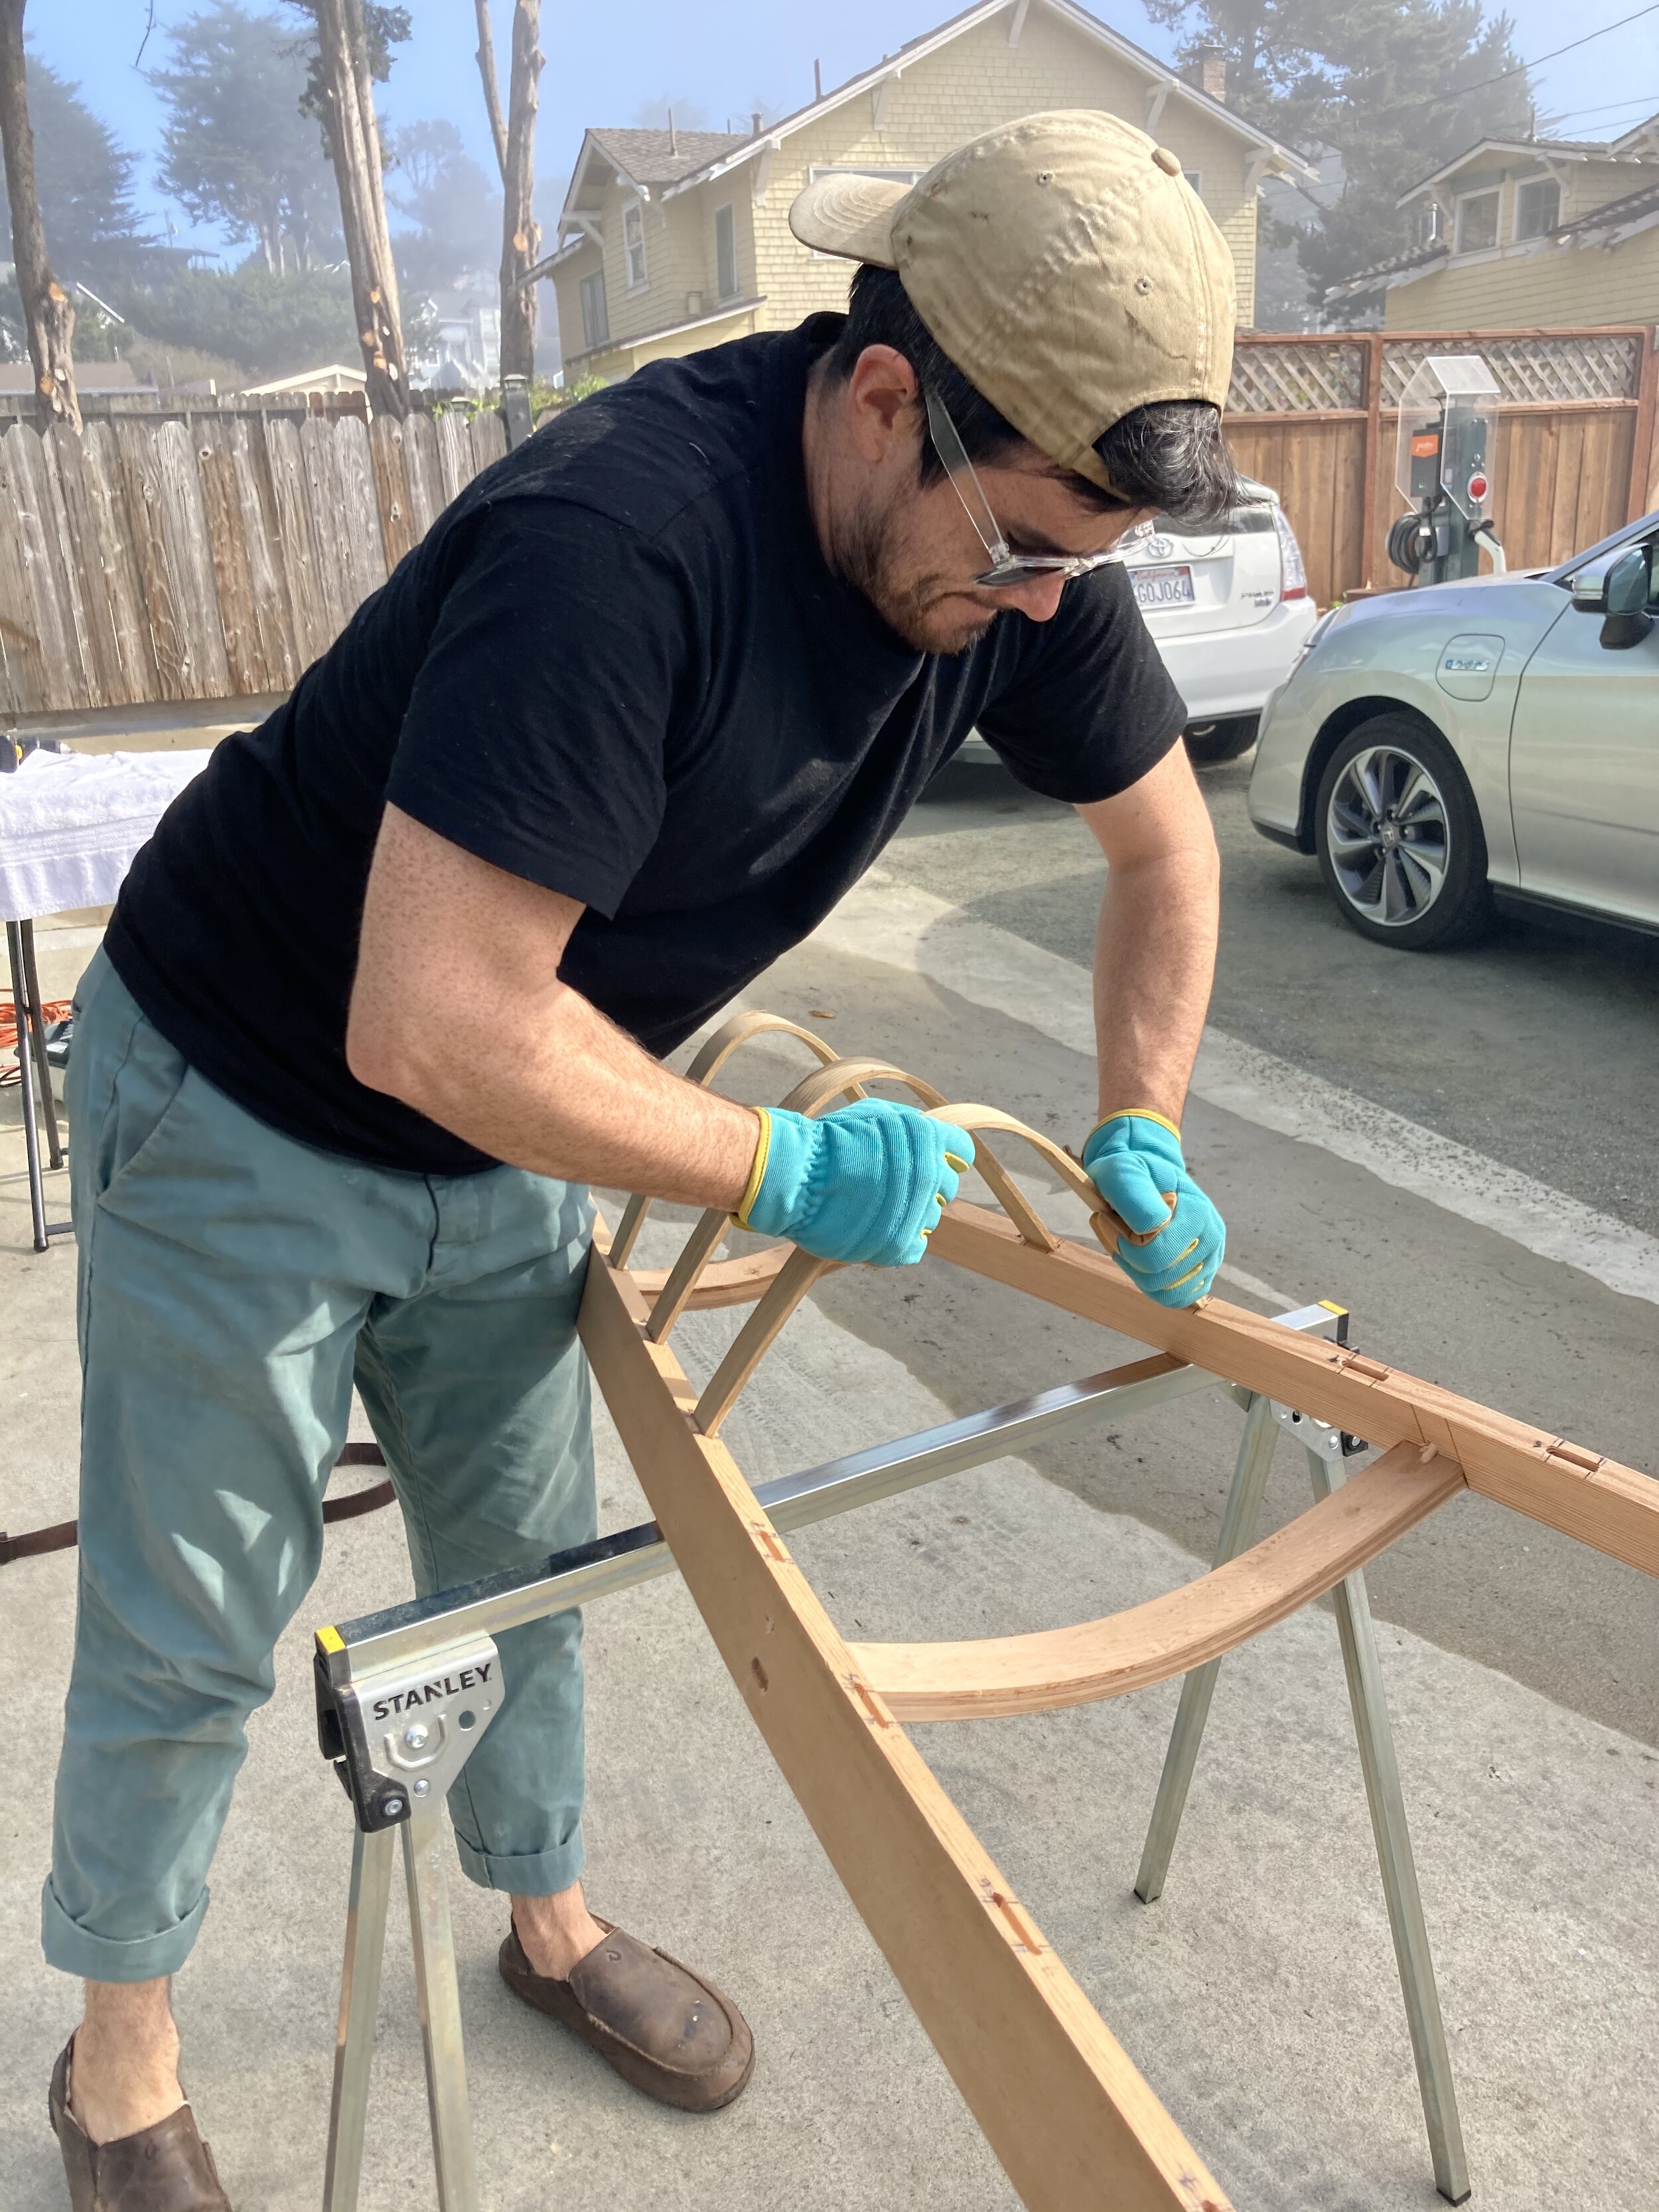
I haven’t done any steam bending before and I was really surprised how compliant the wood was and how easy it was to bend. The trick was really in getting the entire shape to come together. The pieces in the box were quite steep angles but as you got closer to the cockpit, you want to really flatten out to provide more stability.
Ultimately, I has a little bit of break out on one or two ribs and since I had a few spares, and had just gotten a taste for bending, I went through and replaced them and a few others that I thought I could shape better. I was quite happy with how they came together and except for a few moments, it wasn’t too stressful.
A big shoutout to Lauren who helped keep me on track with the time and documented the process live.
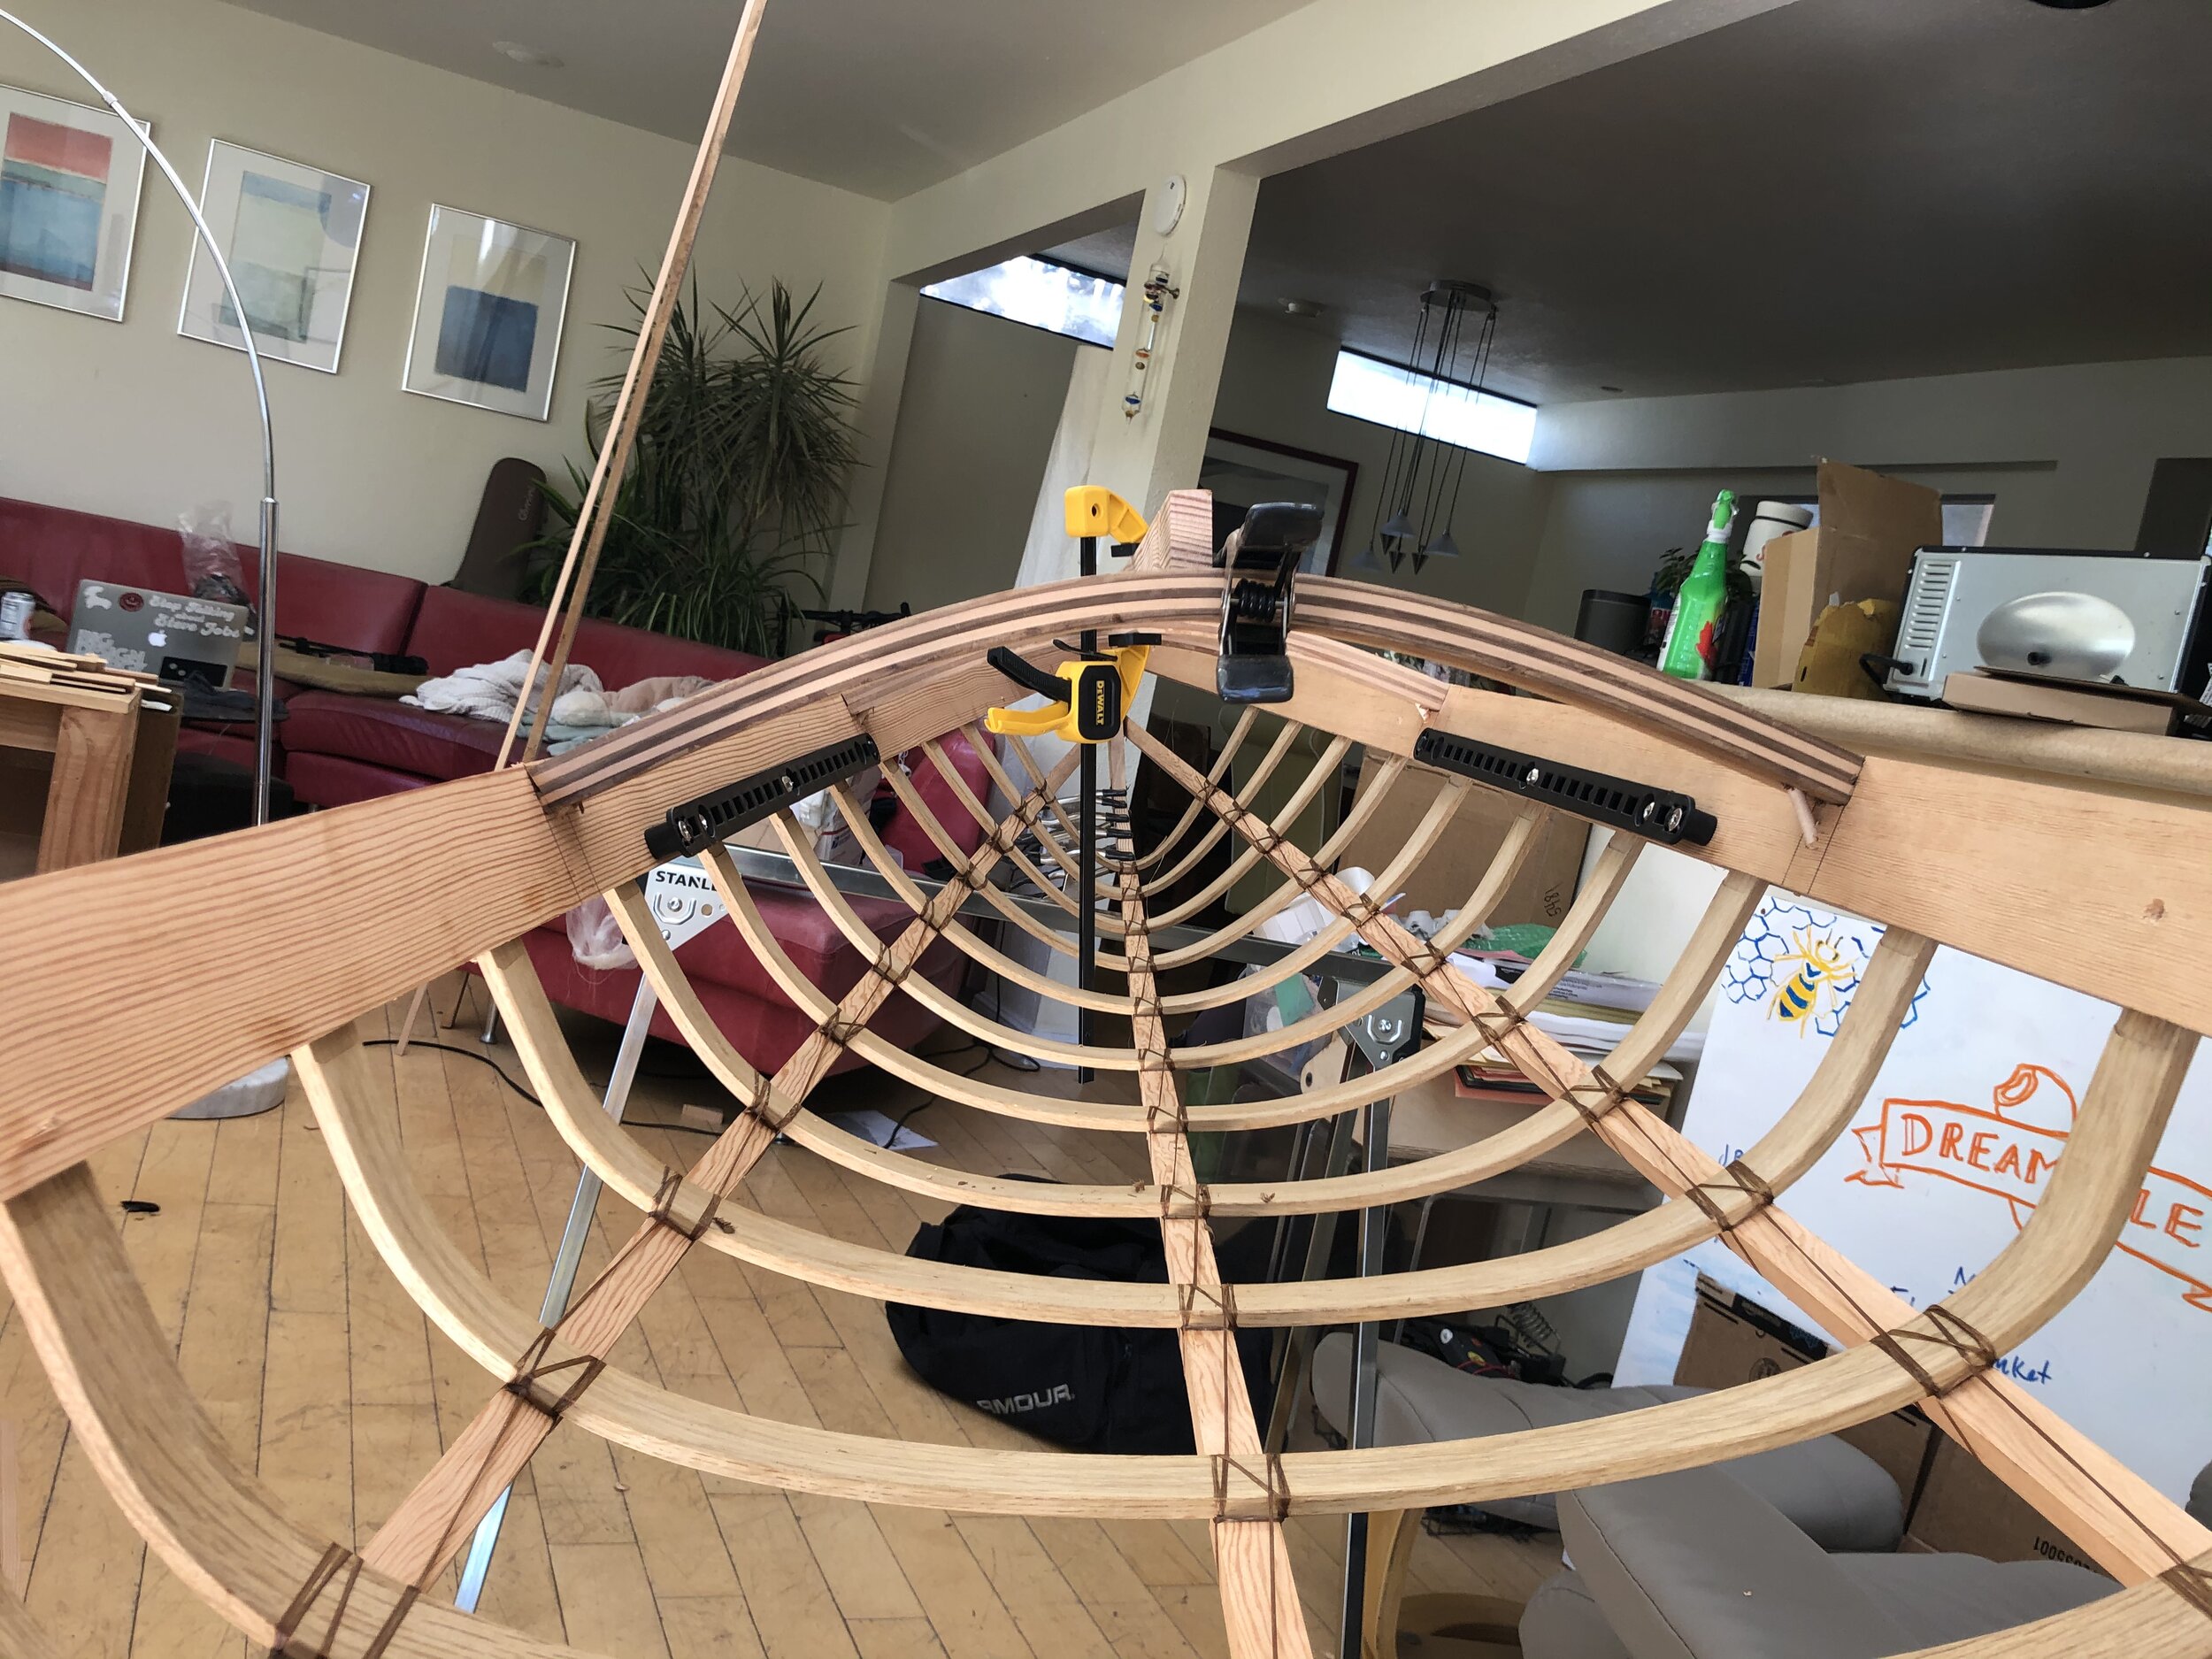
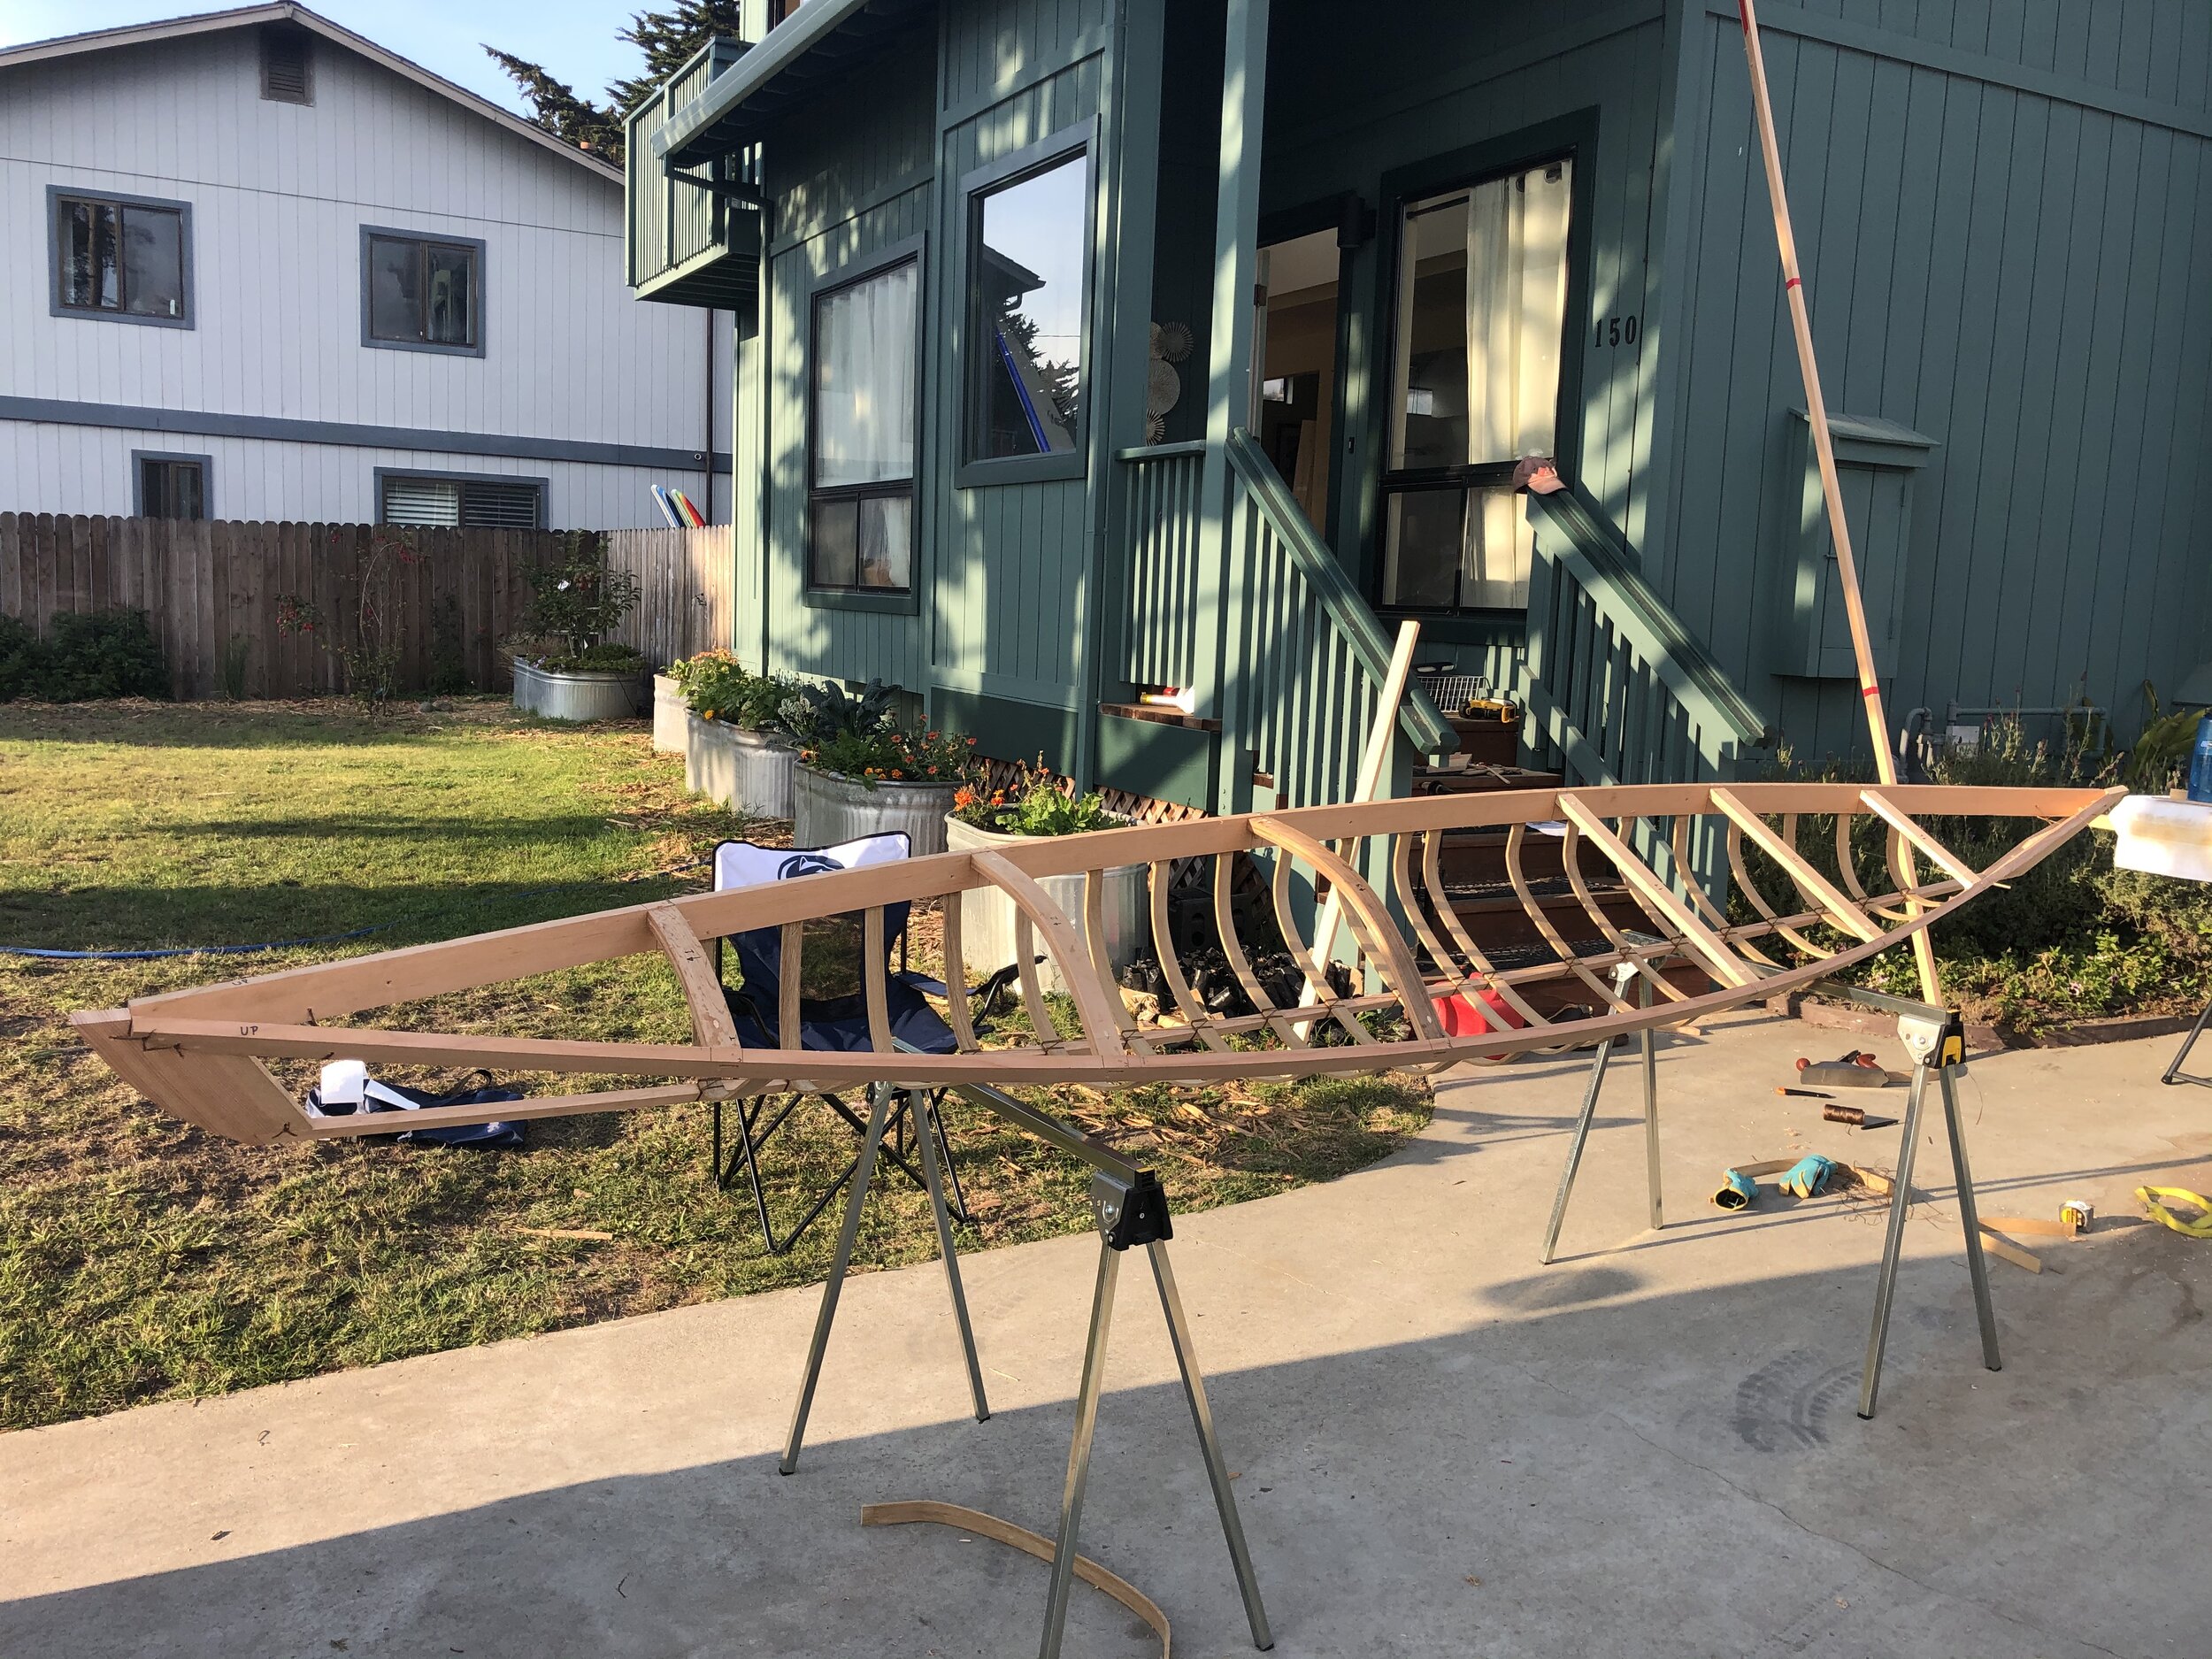
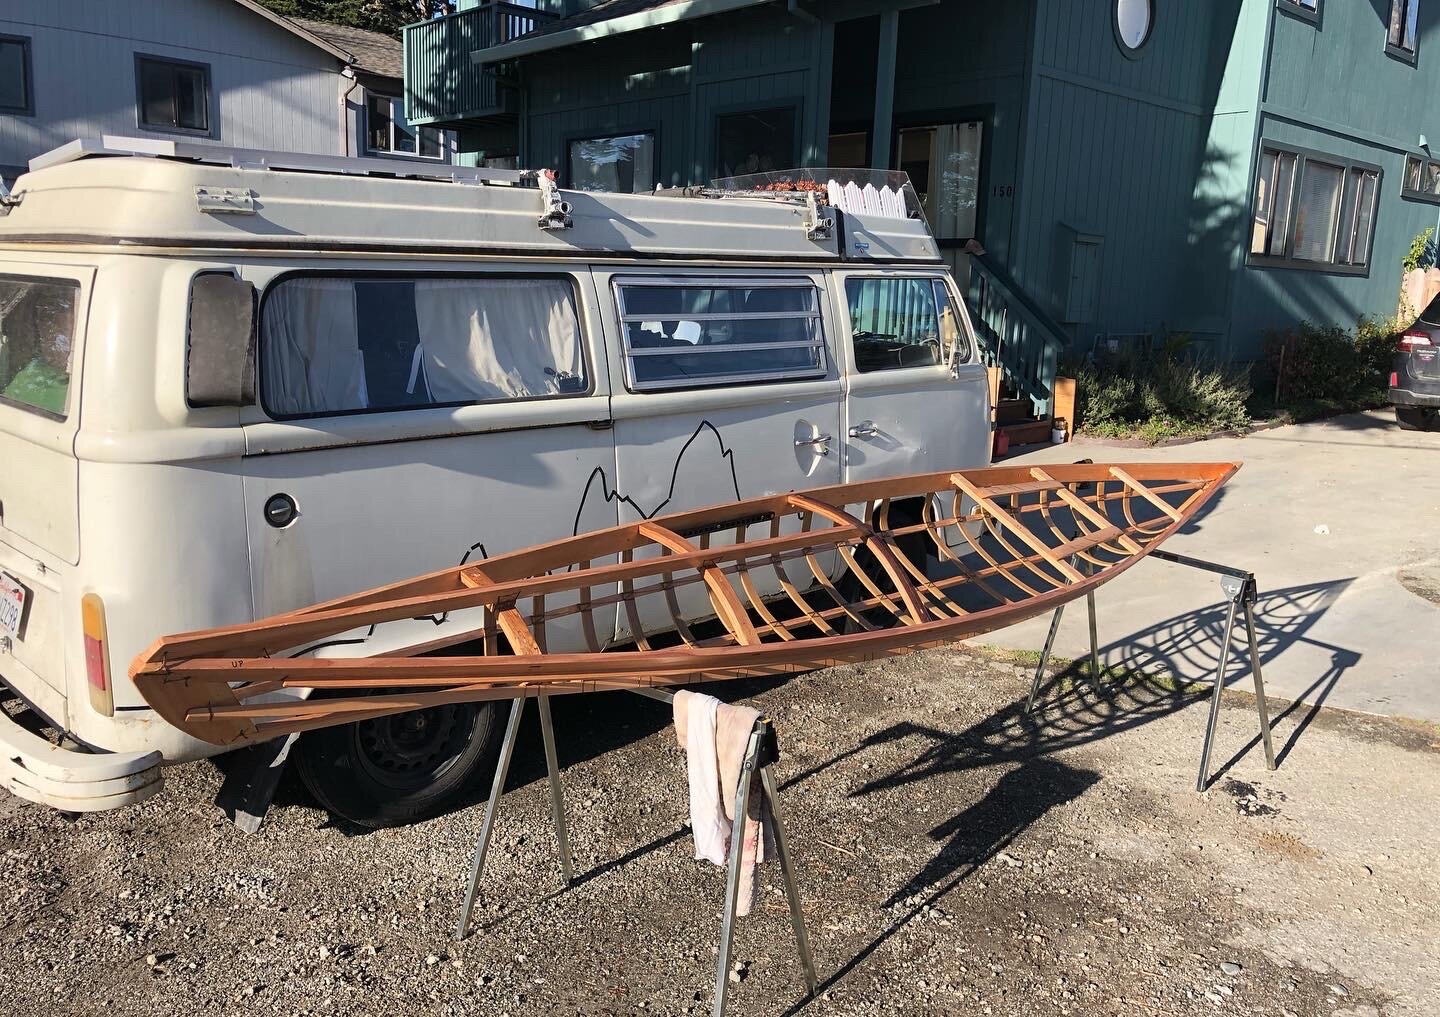
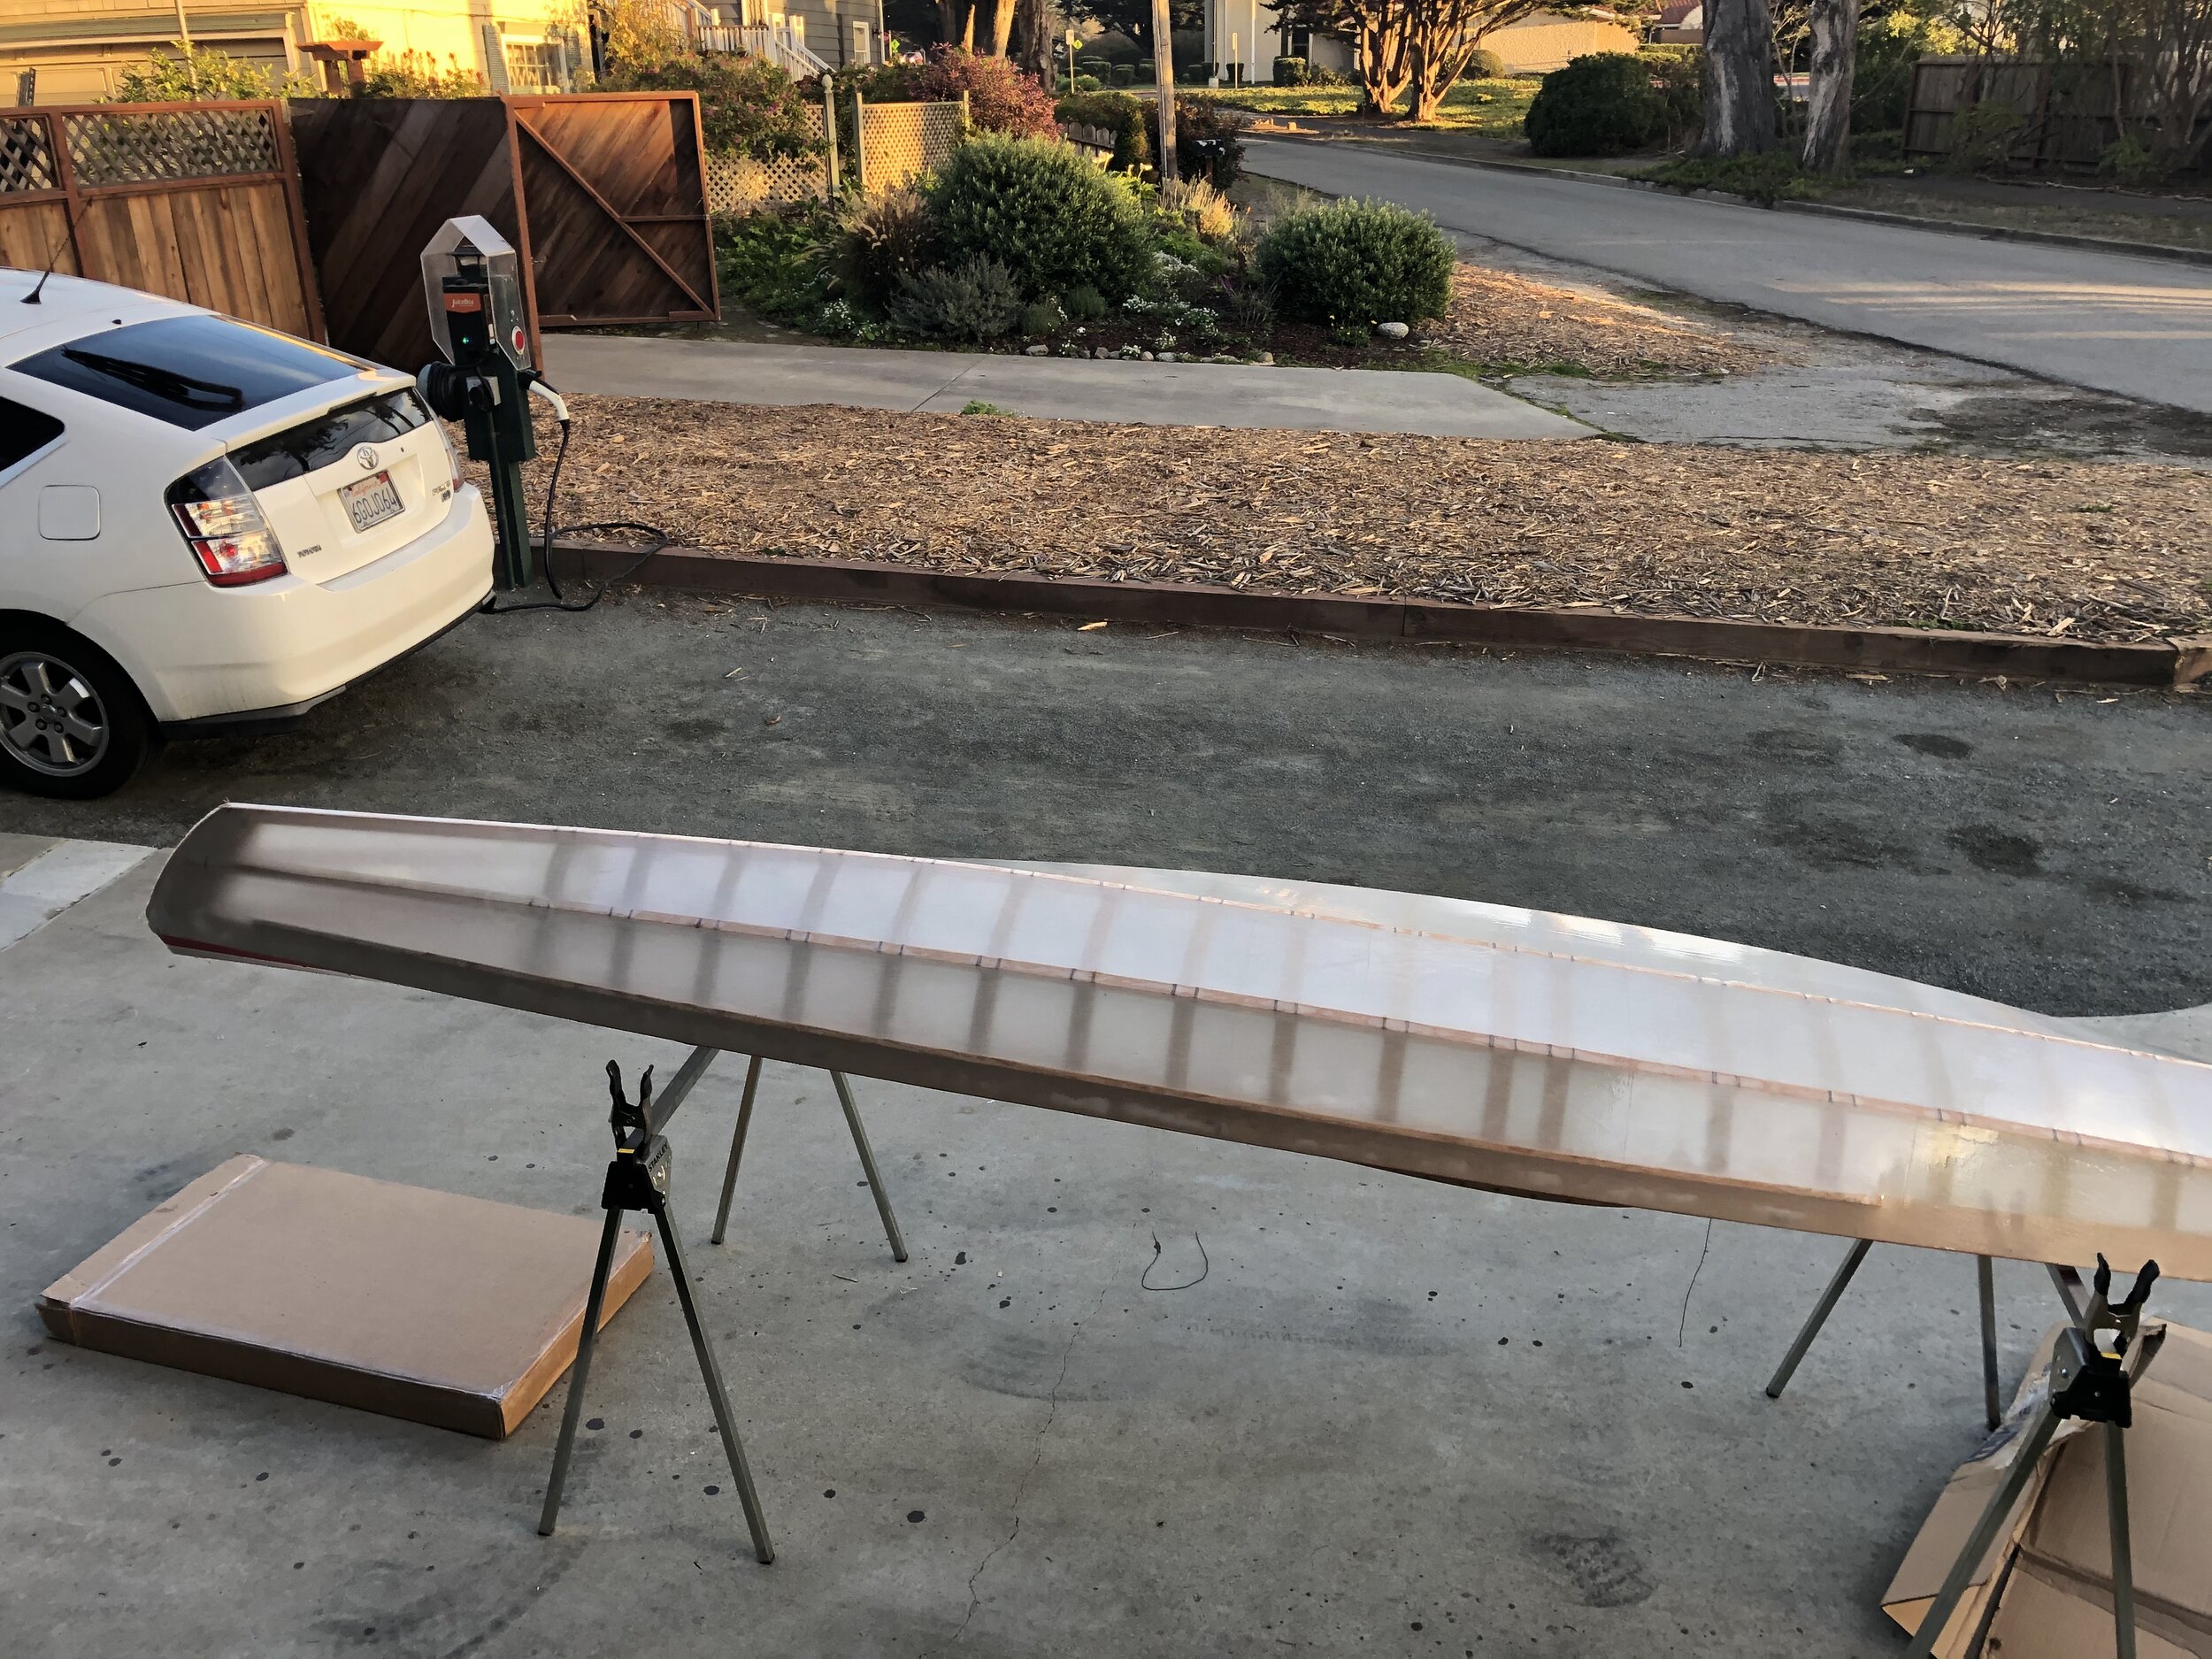
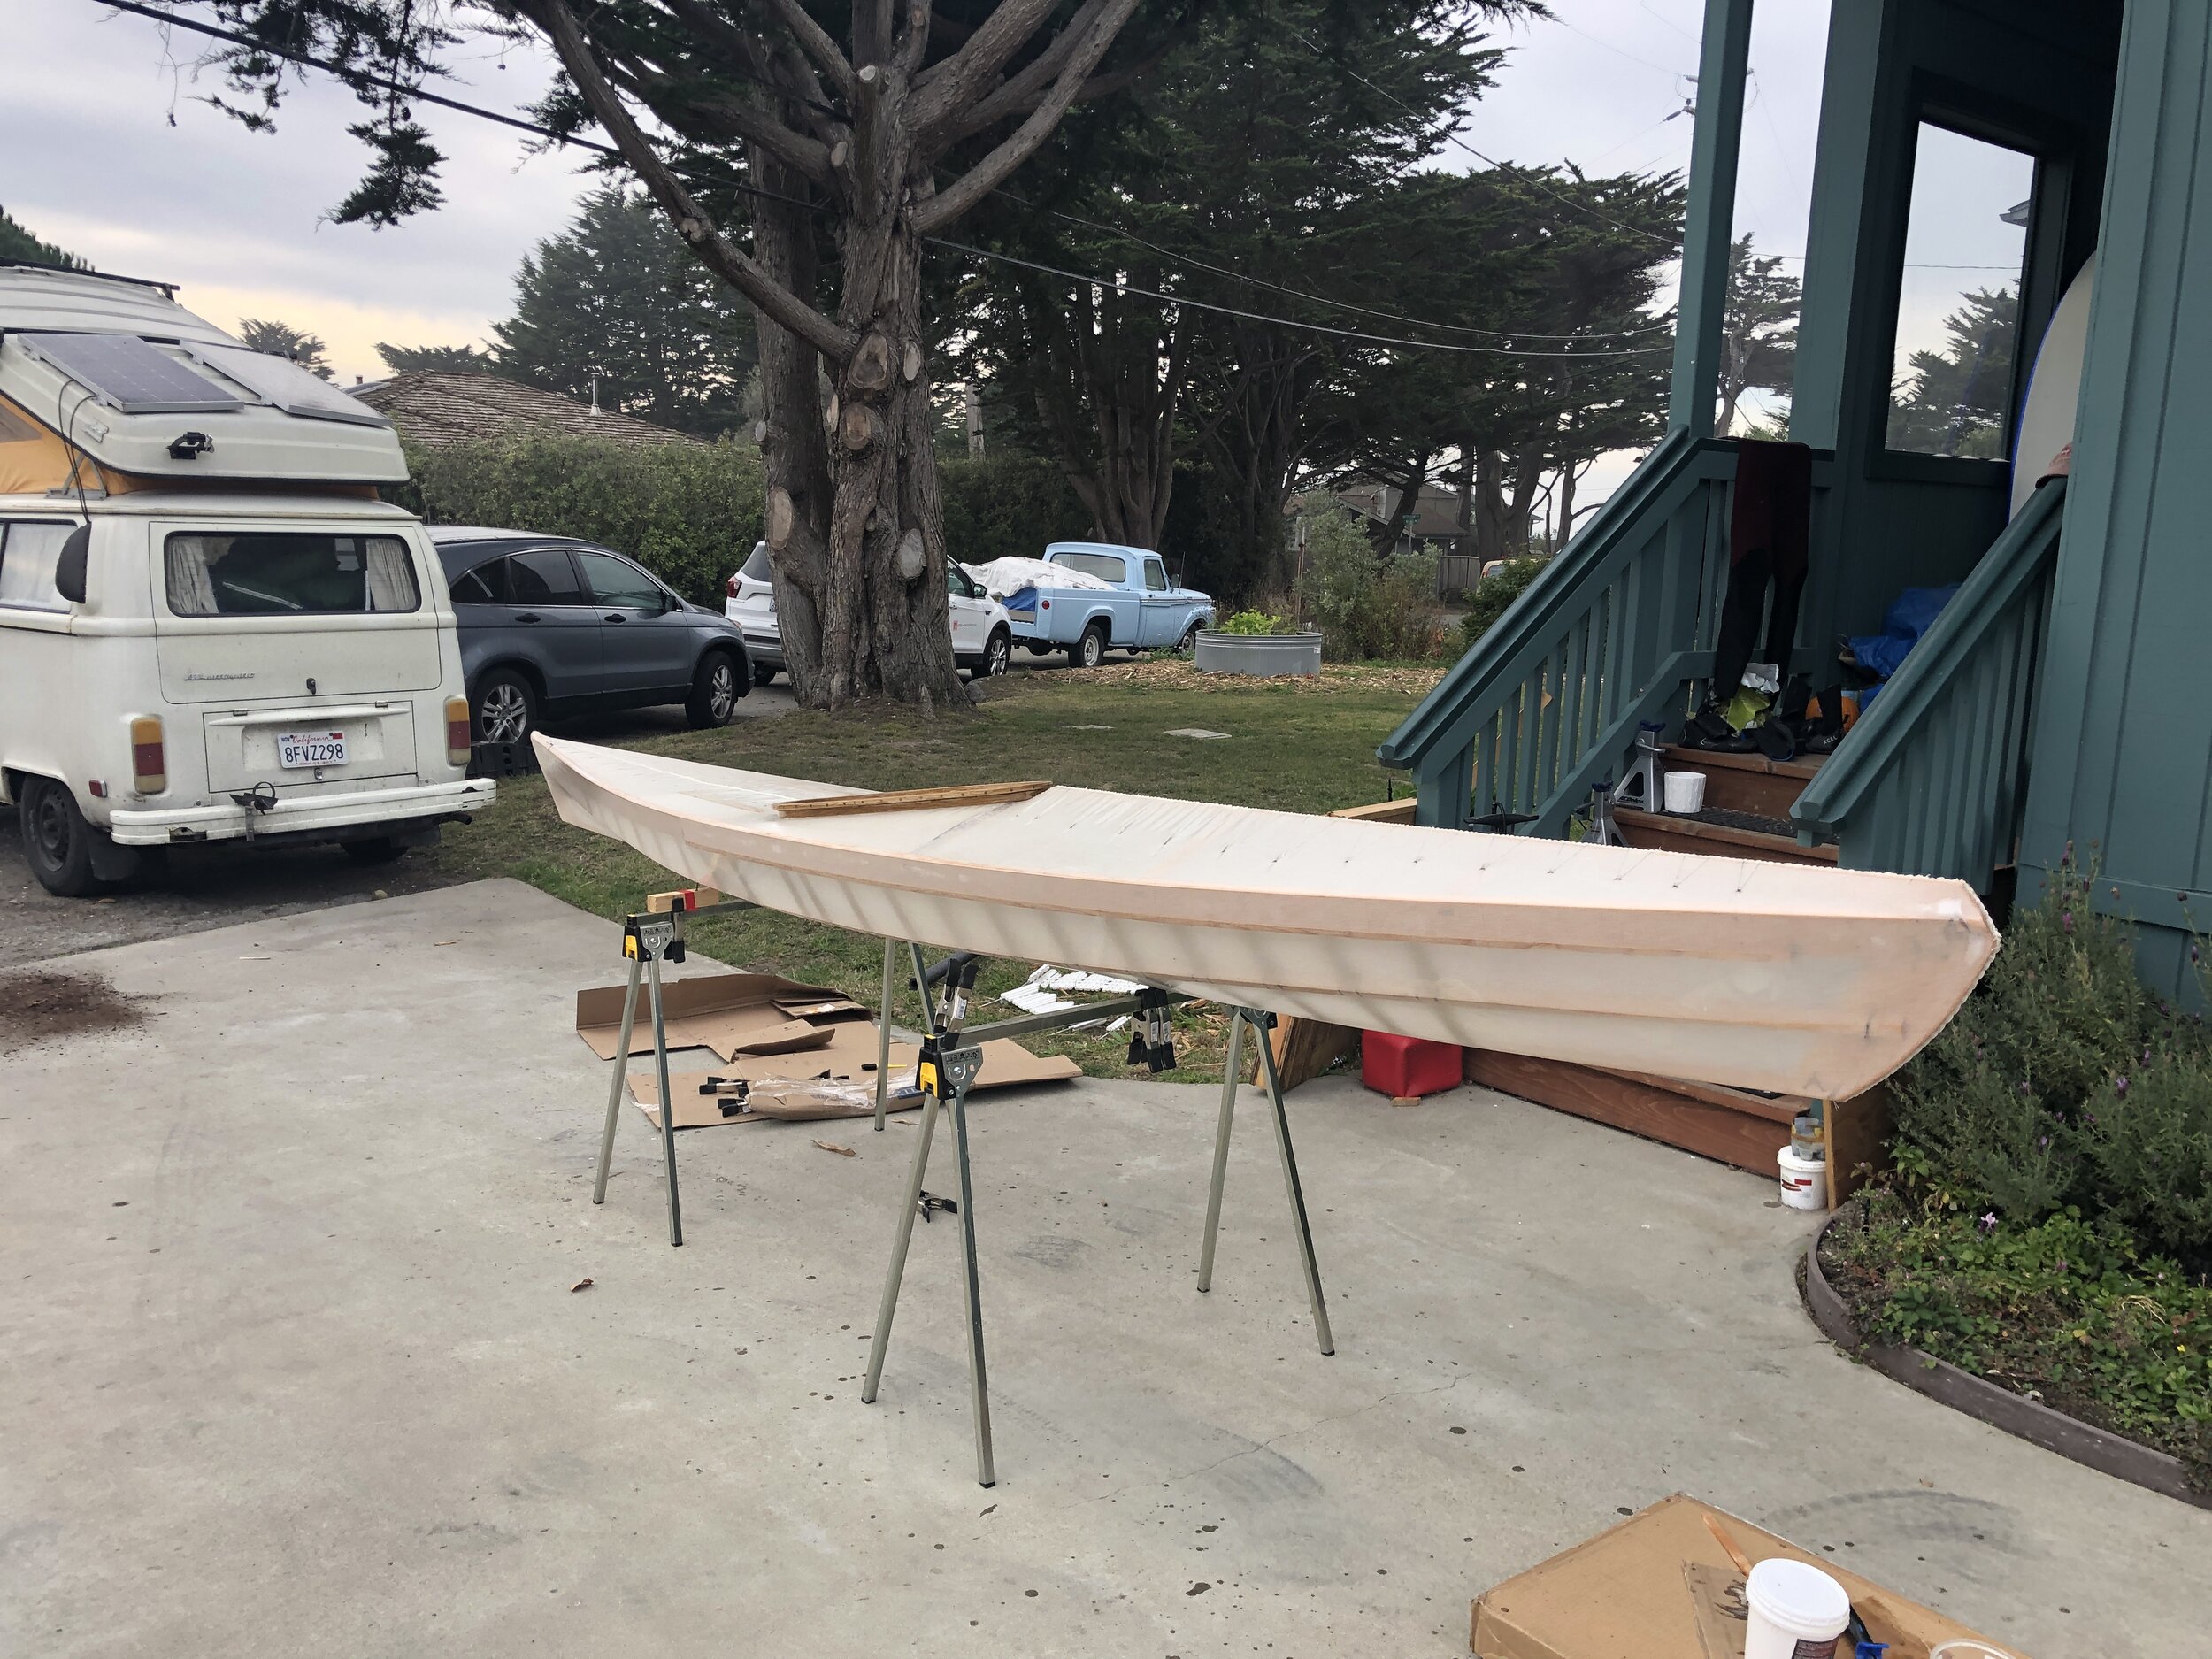
ASSEMBLY //
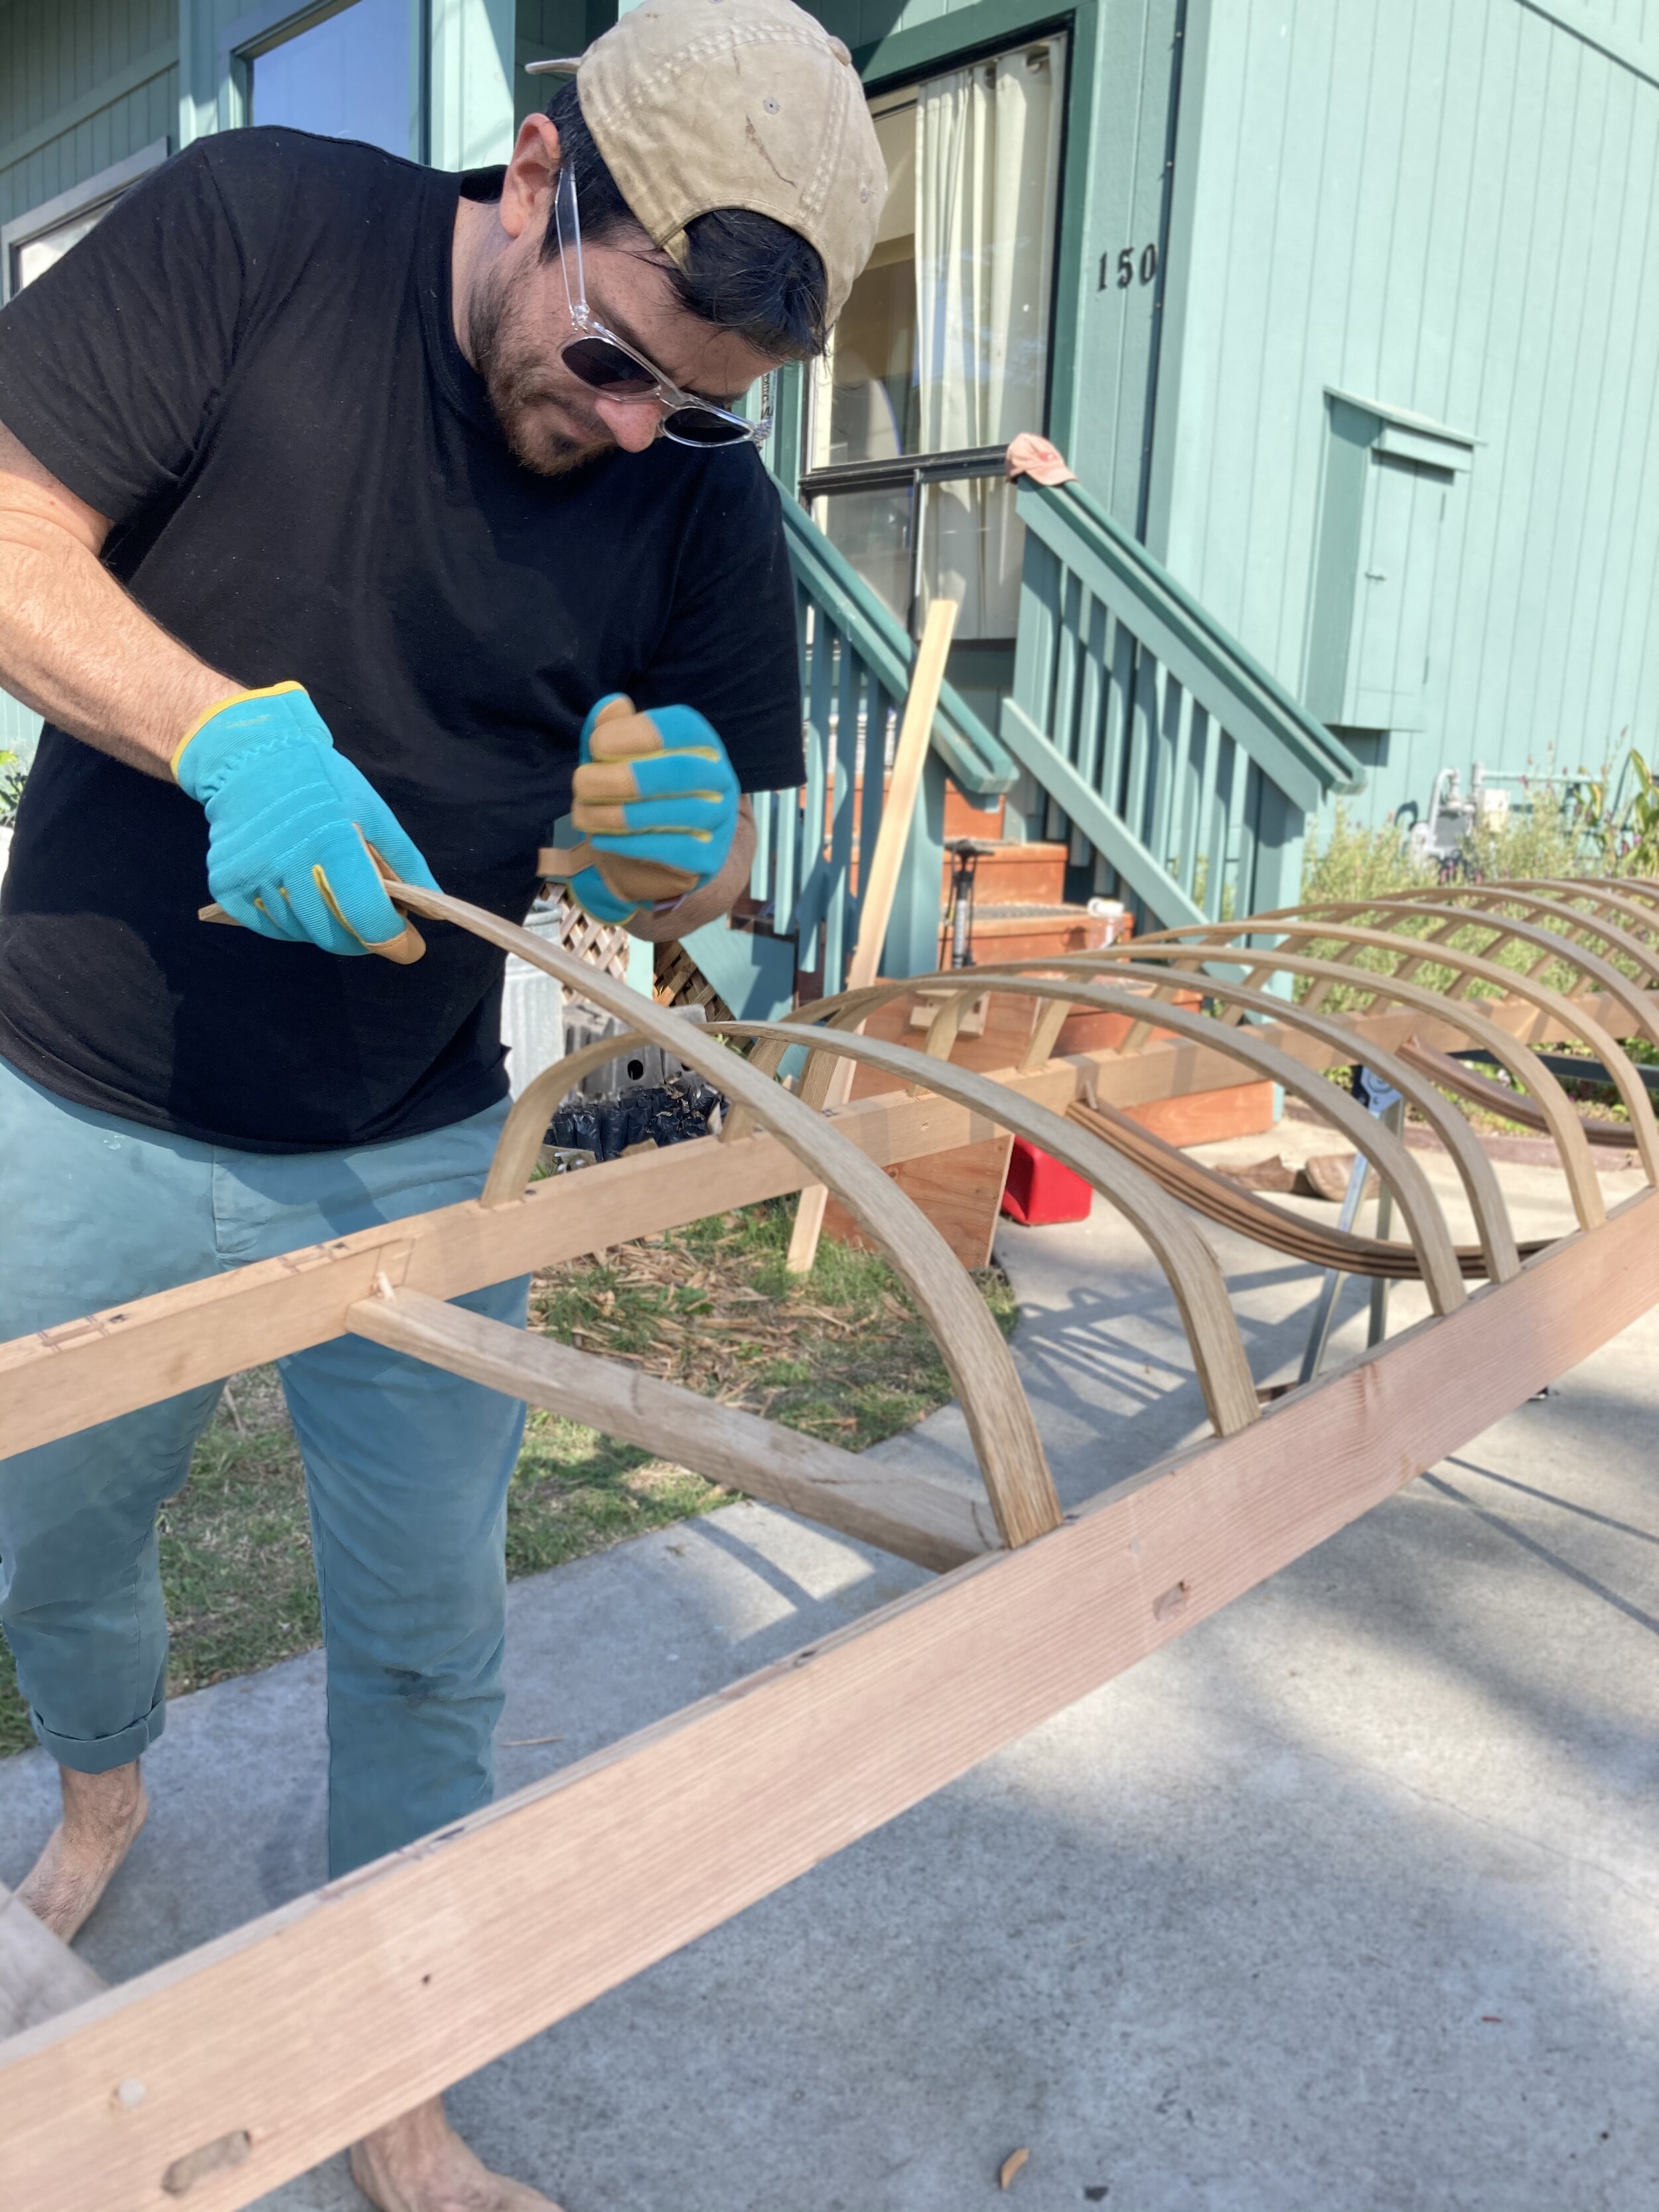
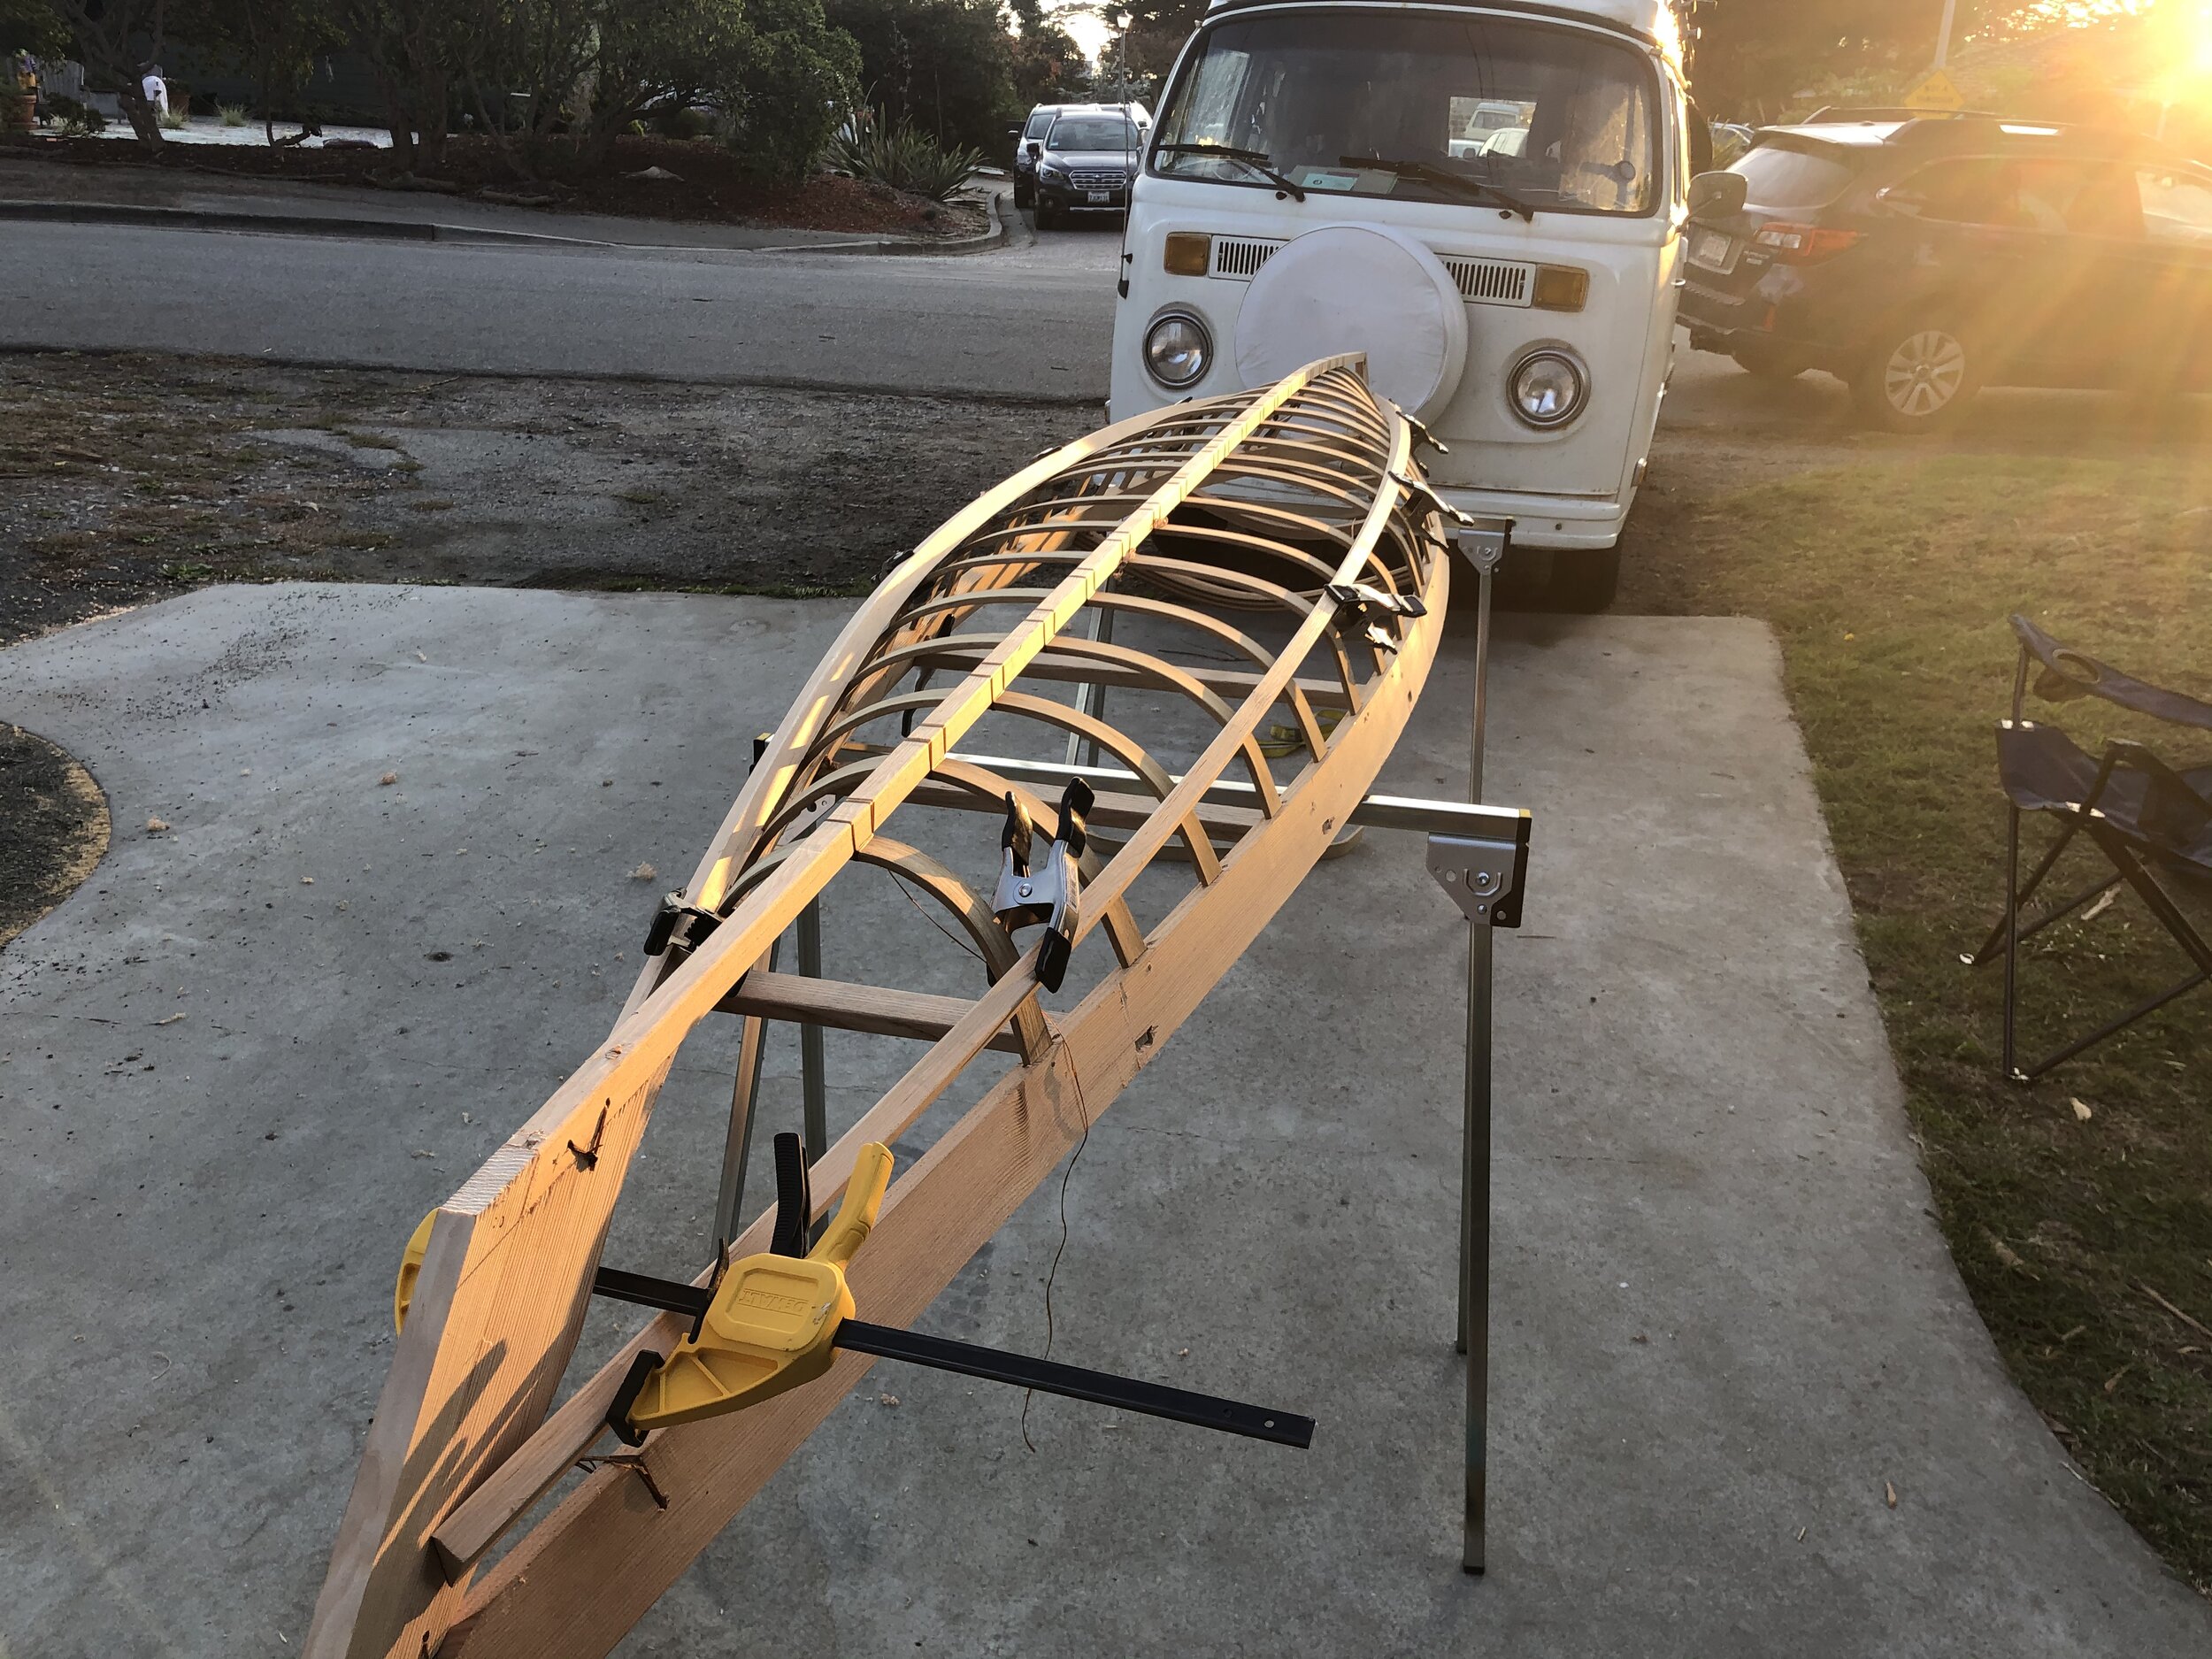
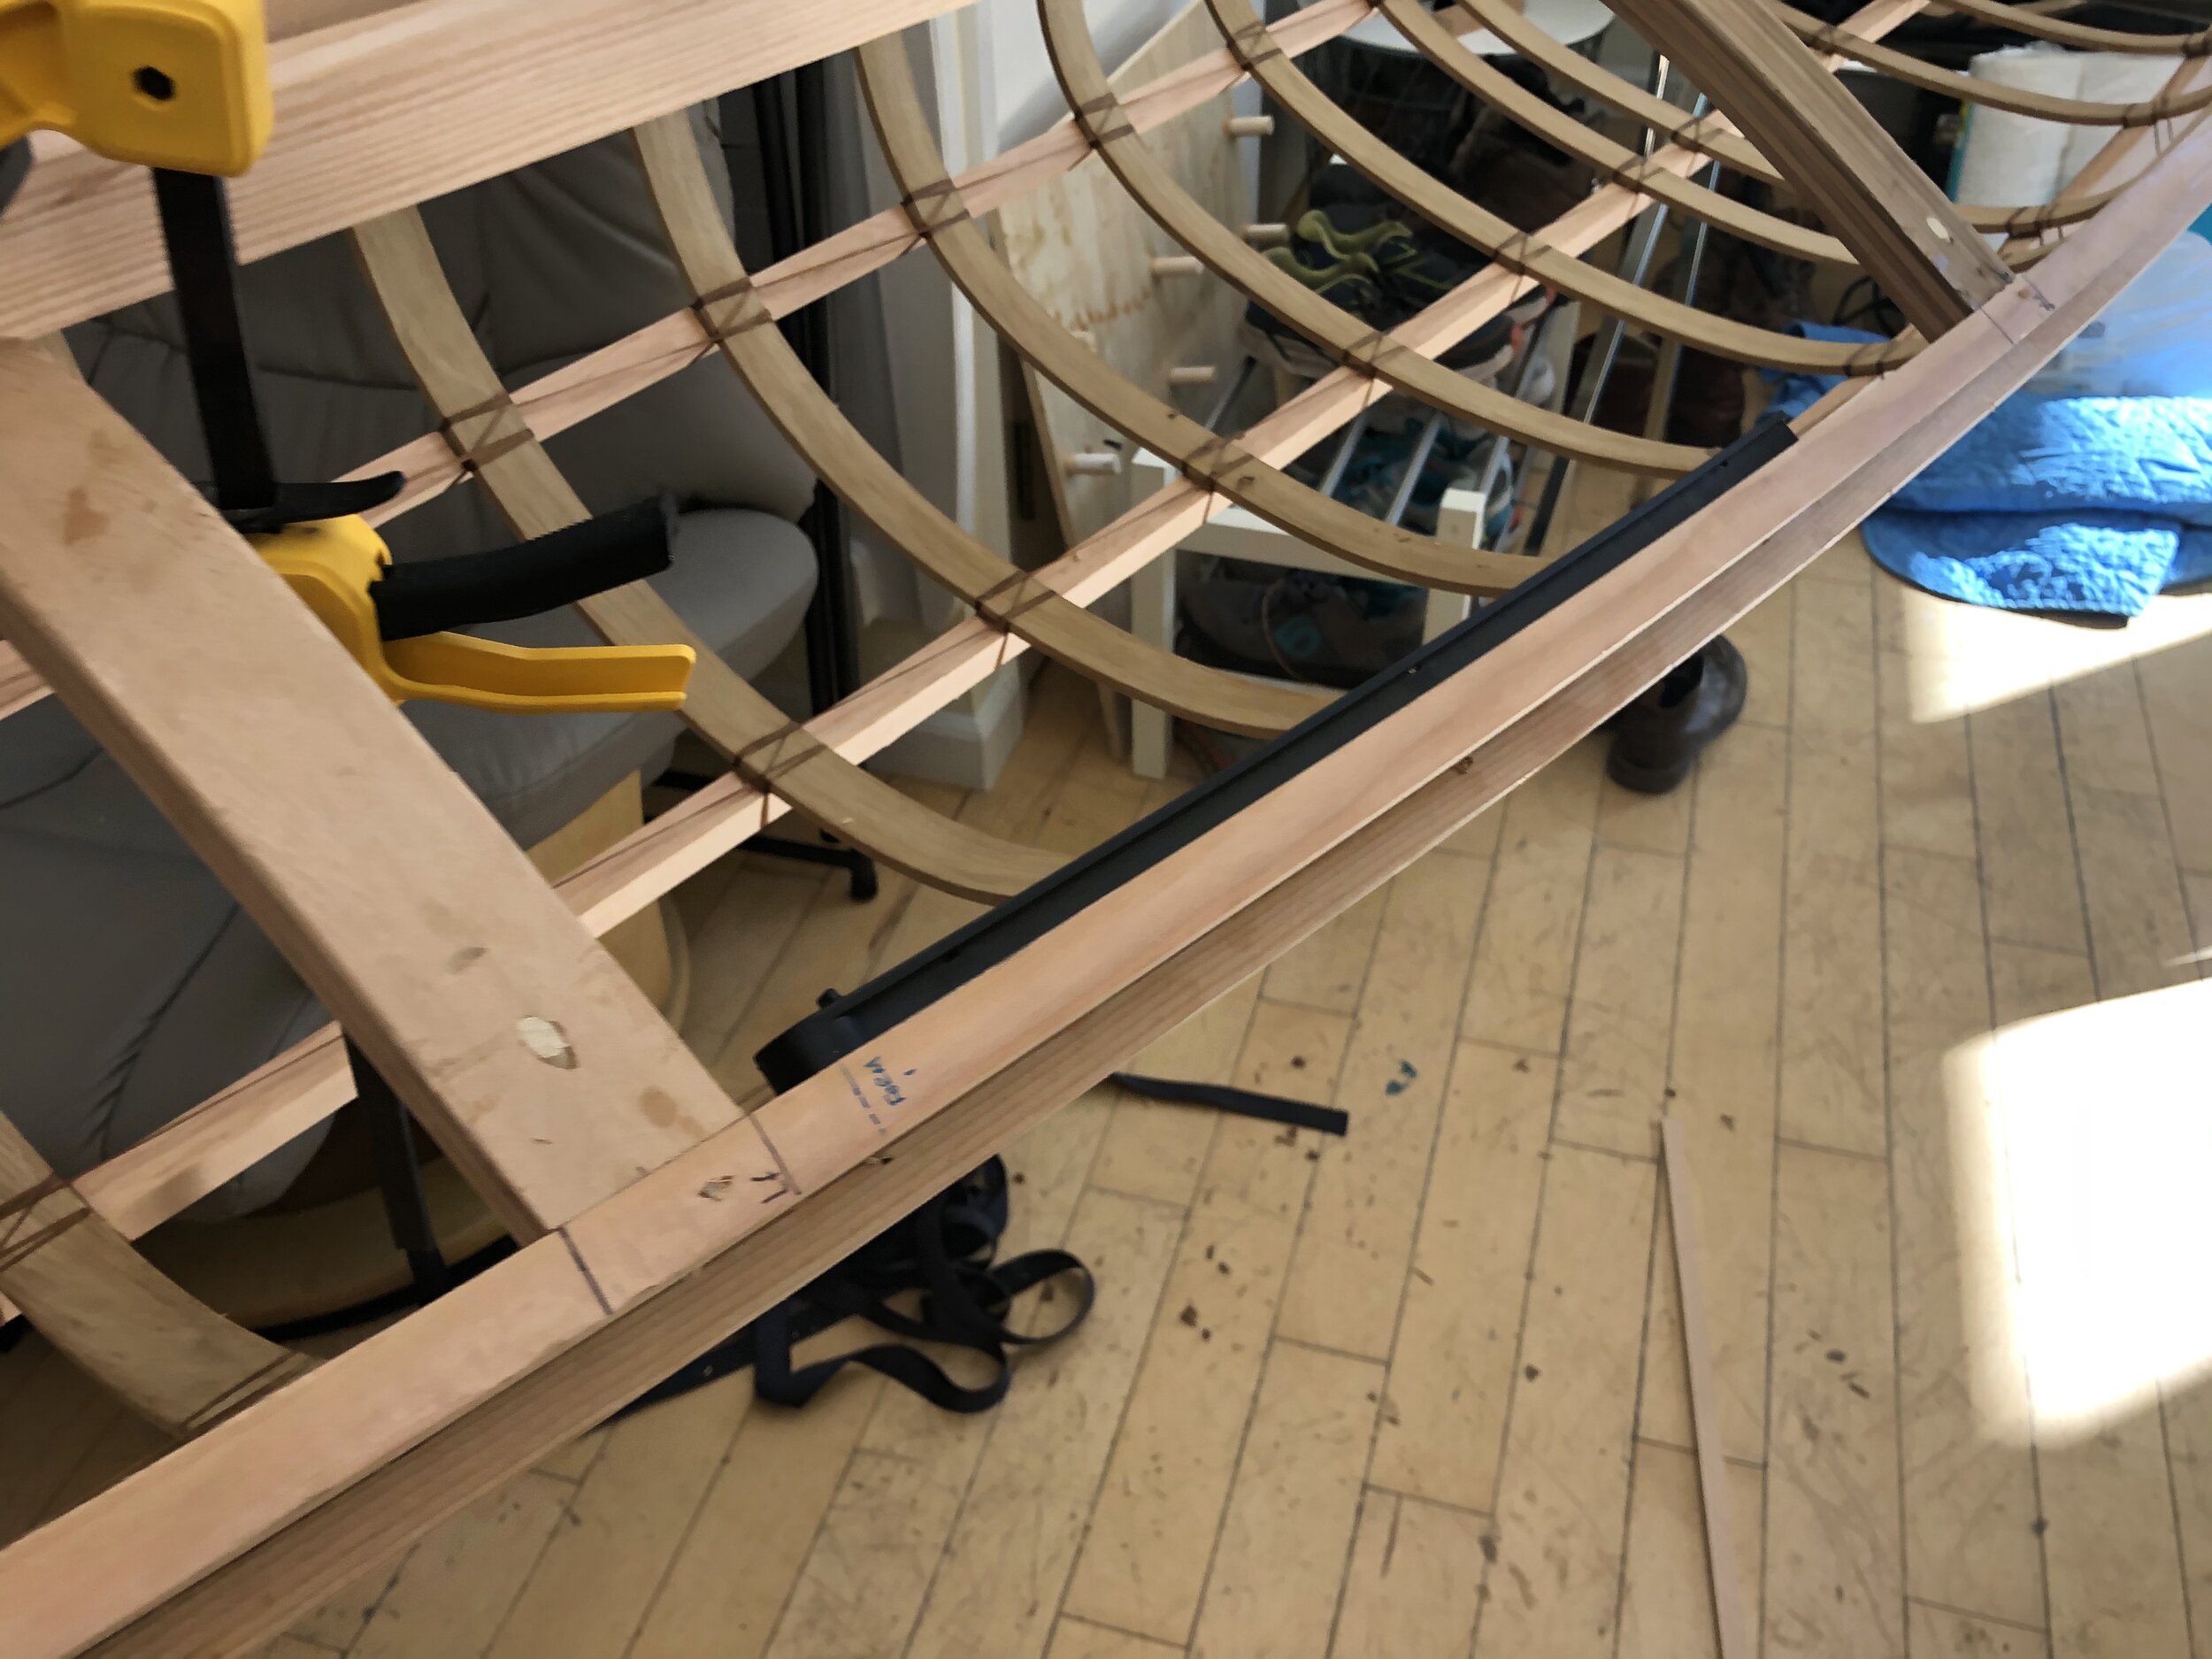
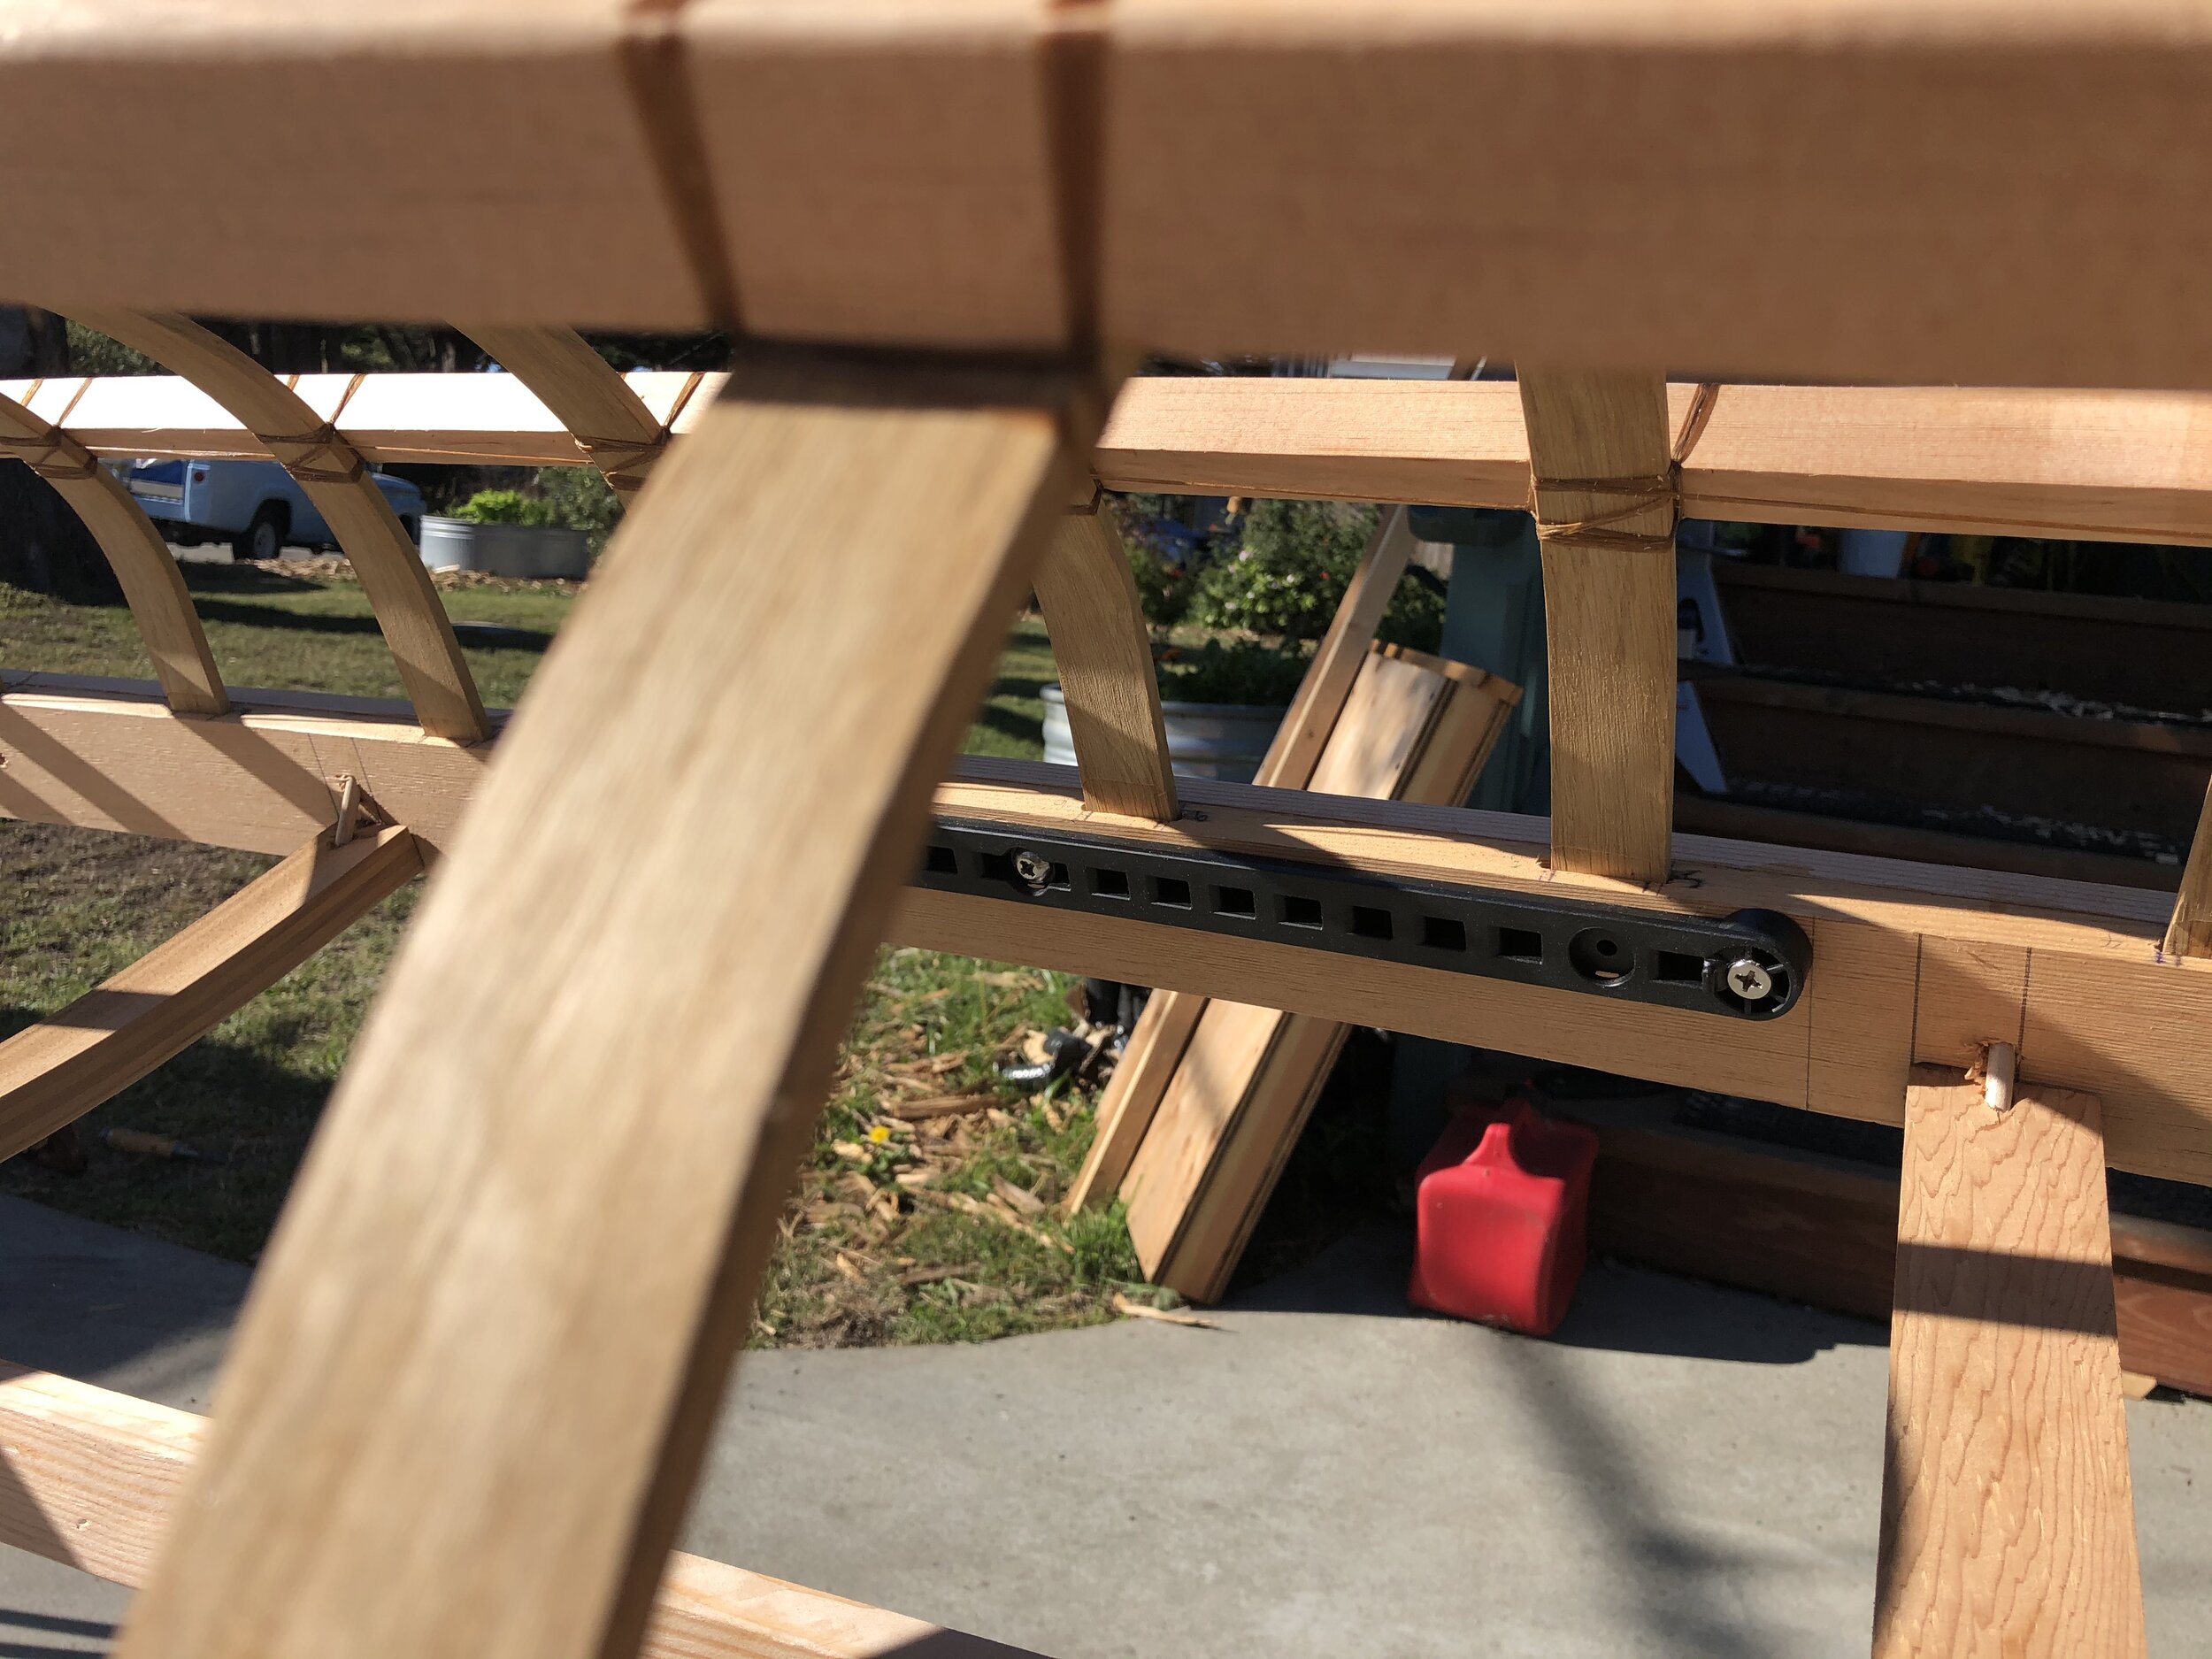
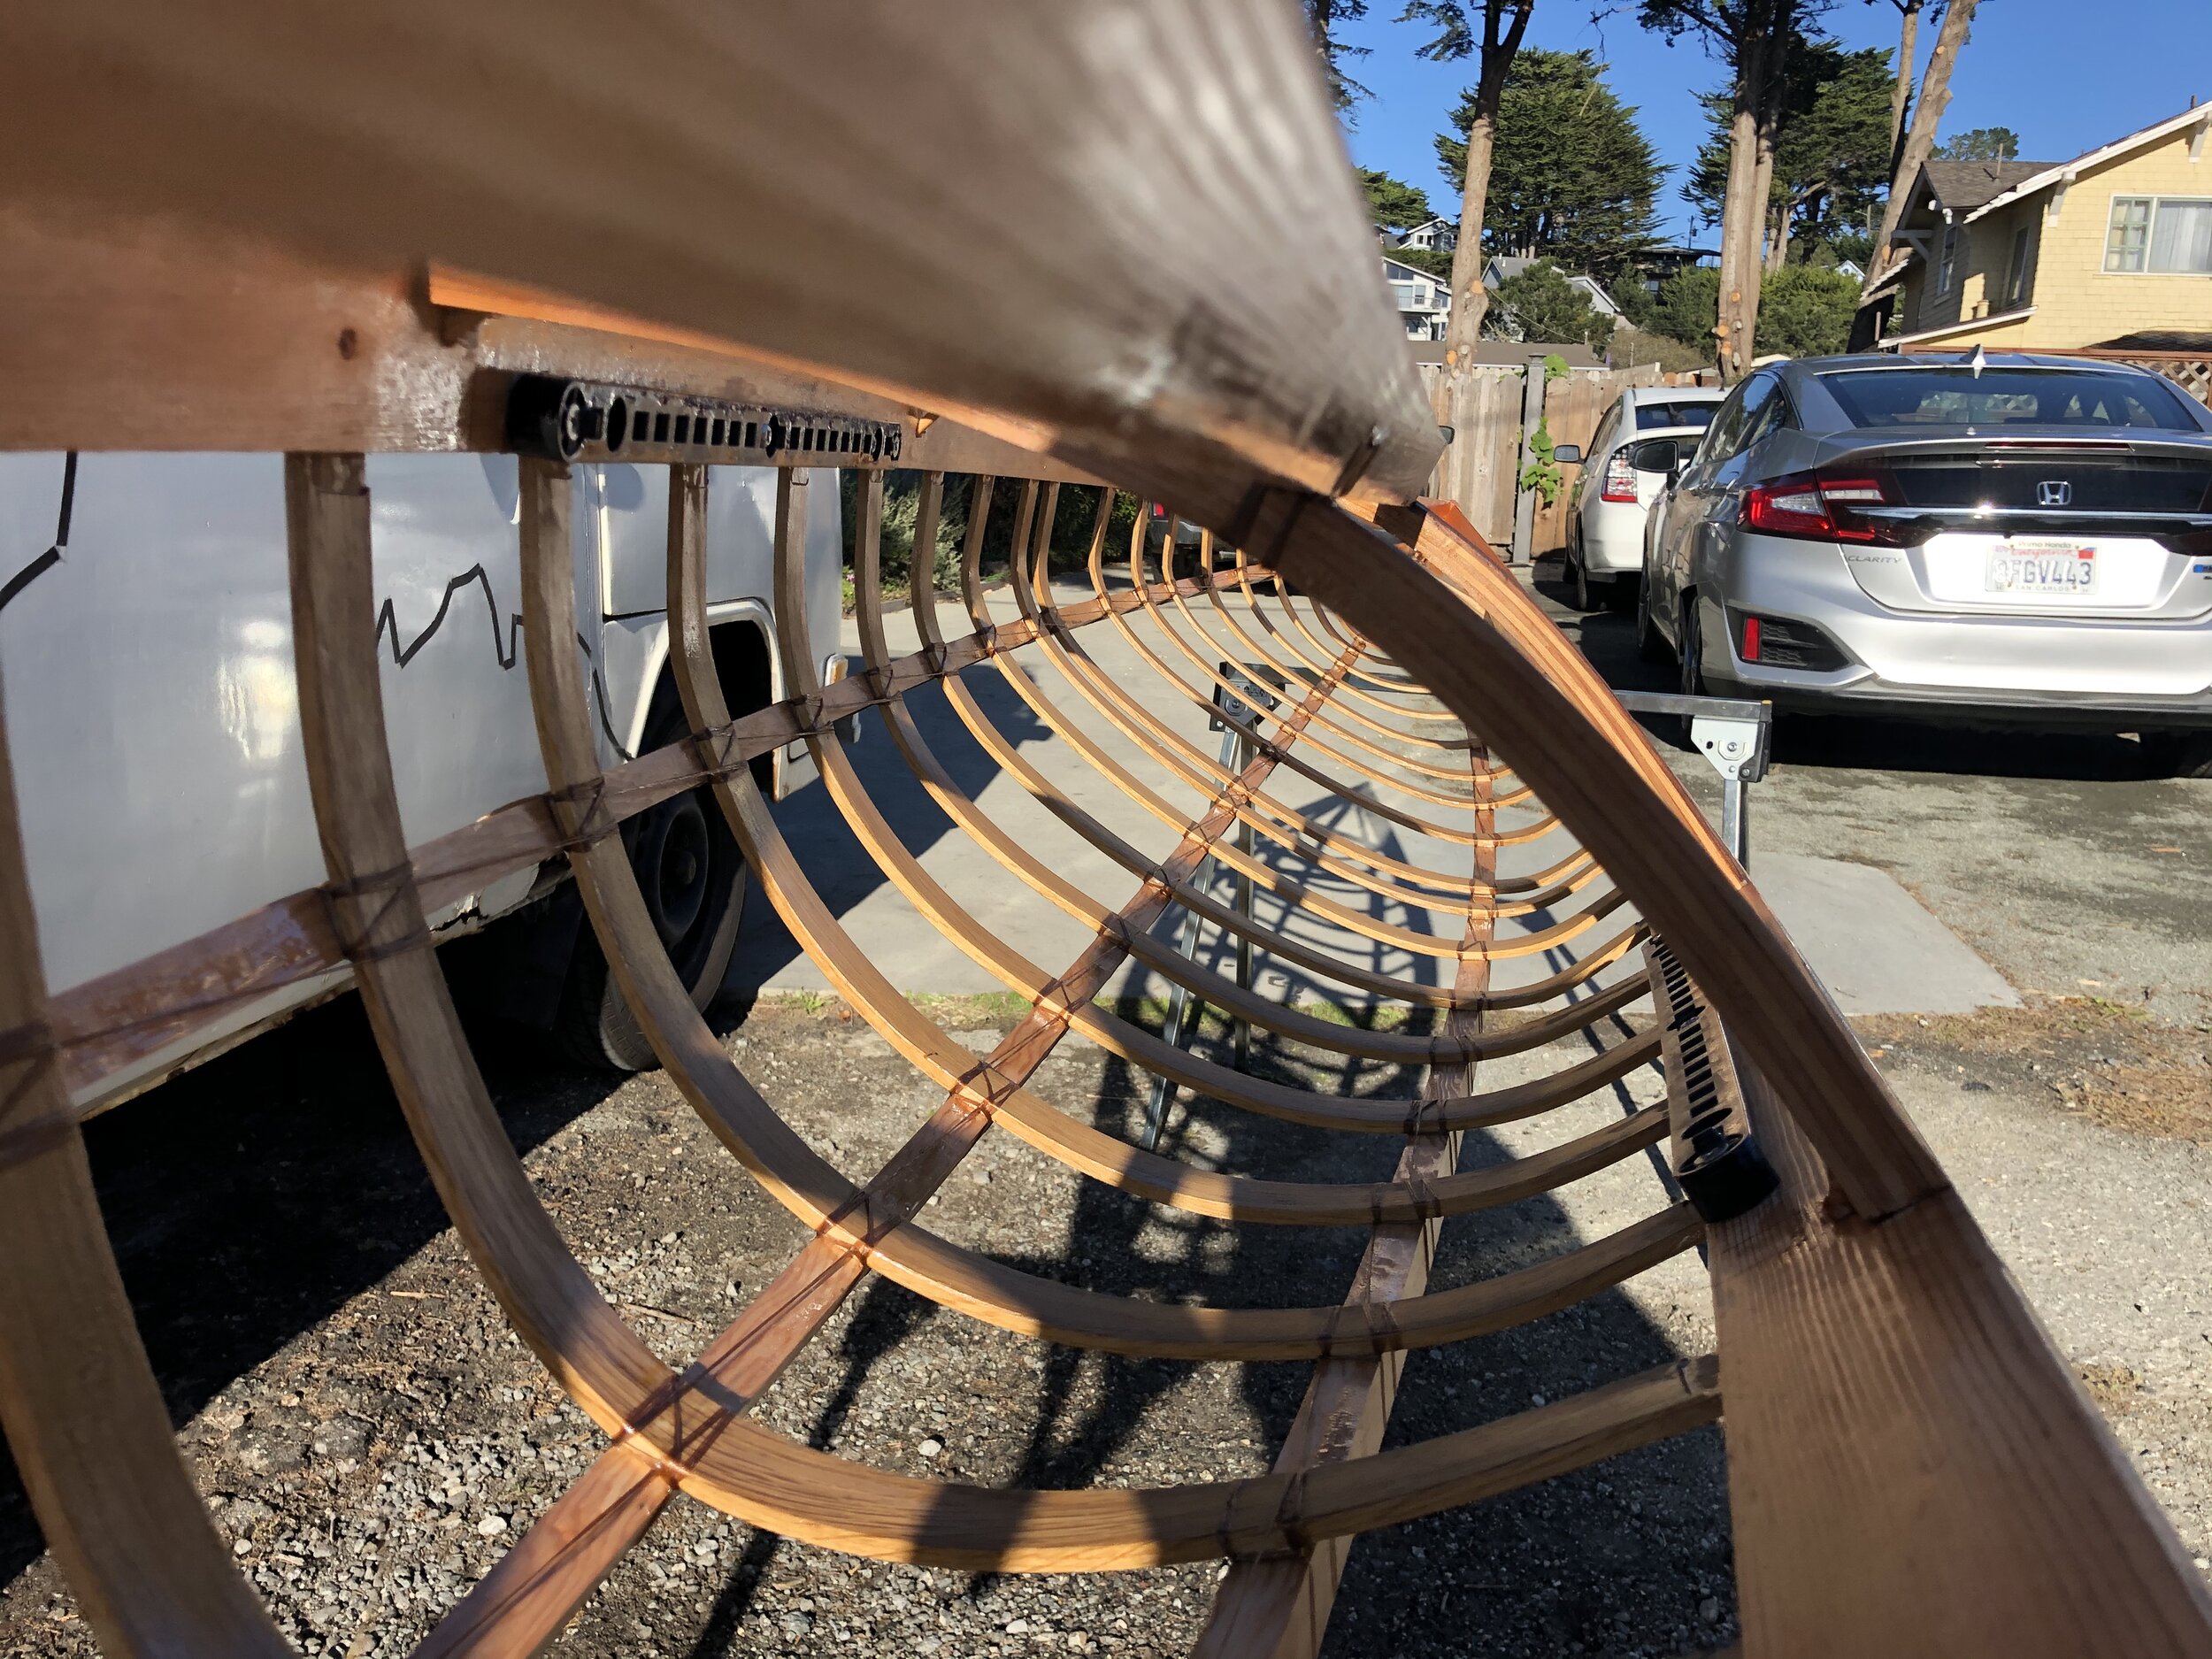
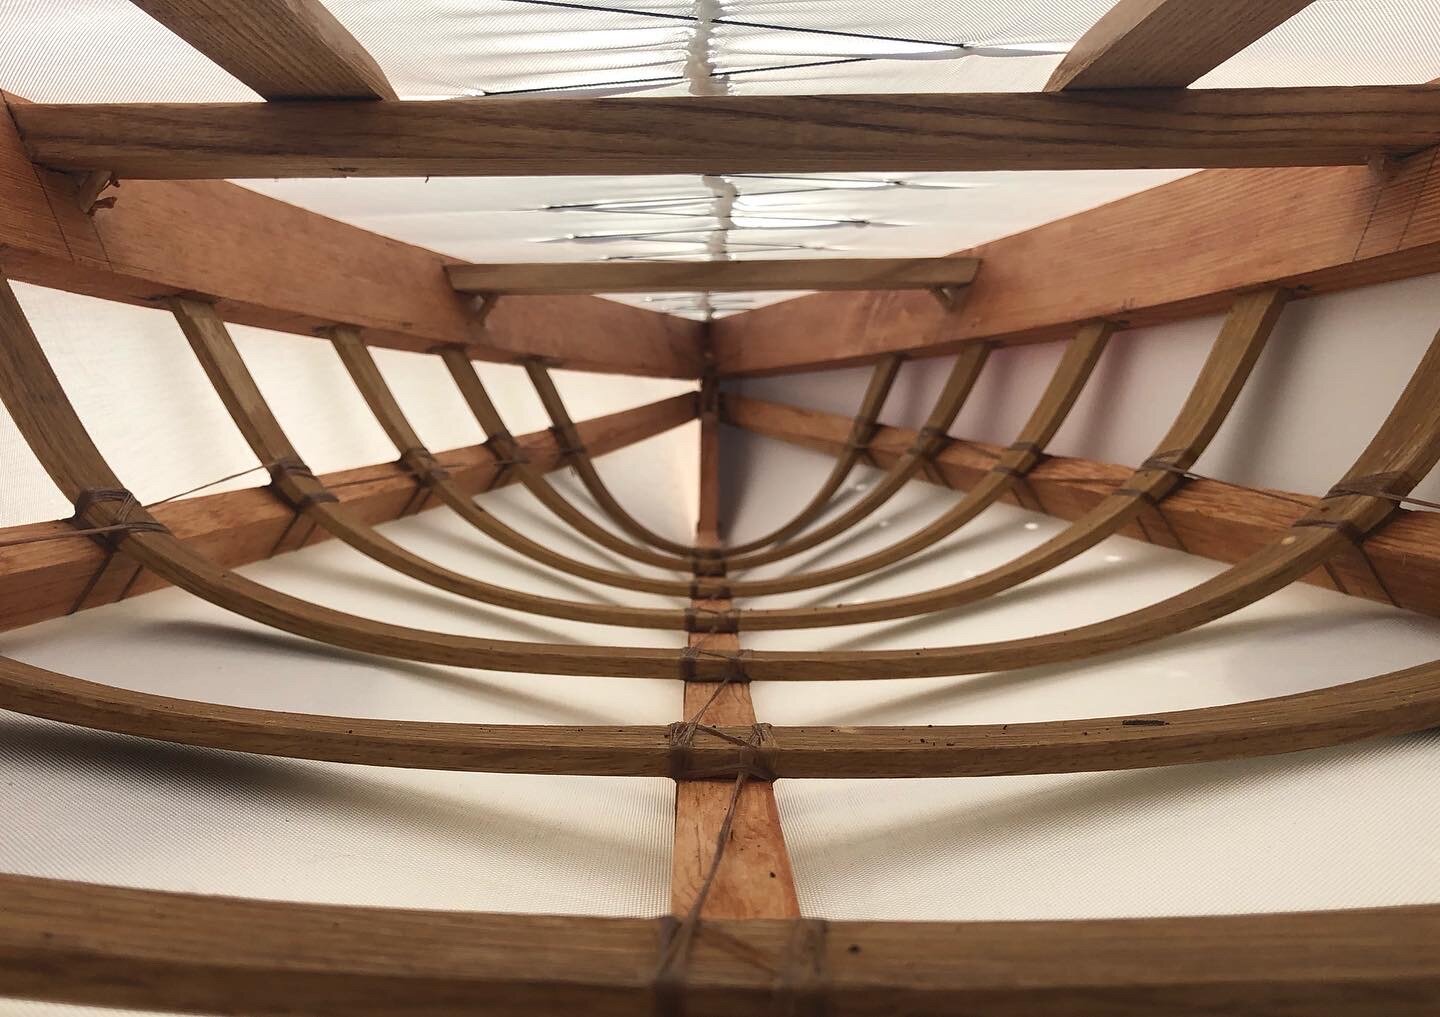
As soon as the ribs were completed, I started lashing on the stringers. These are the long members that run the length of the boat and are lashed to each ribs. These help lock everything in place as well as give a little extra volume to the kayak once the skin has been added. It was also time to add the keel on as well as the stems that go in the bow and stern of the boat.
These are all attached with an artificial sinew that is a bit sticky which helps it from sliding around. It also allows for a certain amount of movement between crossing members which allow for adjusting the shape of the boat later in the process. Outside of the lashing, I used pegs to attach various members such as the ribs and the deck beams.
FINISHING //
Once the frame had been completed and lashed together, I prepped it for finishing by sanding down any sharp edges that could rub on the skin. I then covered the entire structure with a Tung oil finish. Per Brian’s suggestion, I made sure to go top then bottom on my oil then wipe down process as it was certainly leaking out of the joints for the next couple days but I was able to get most of it.
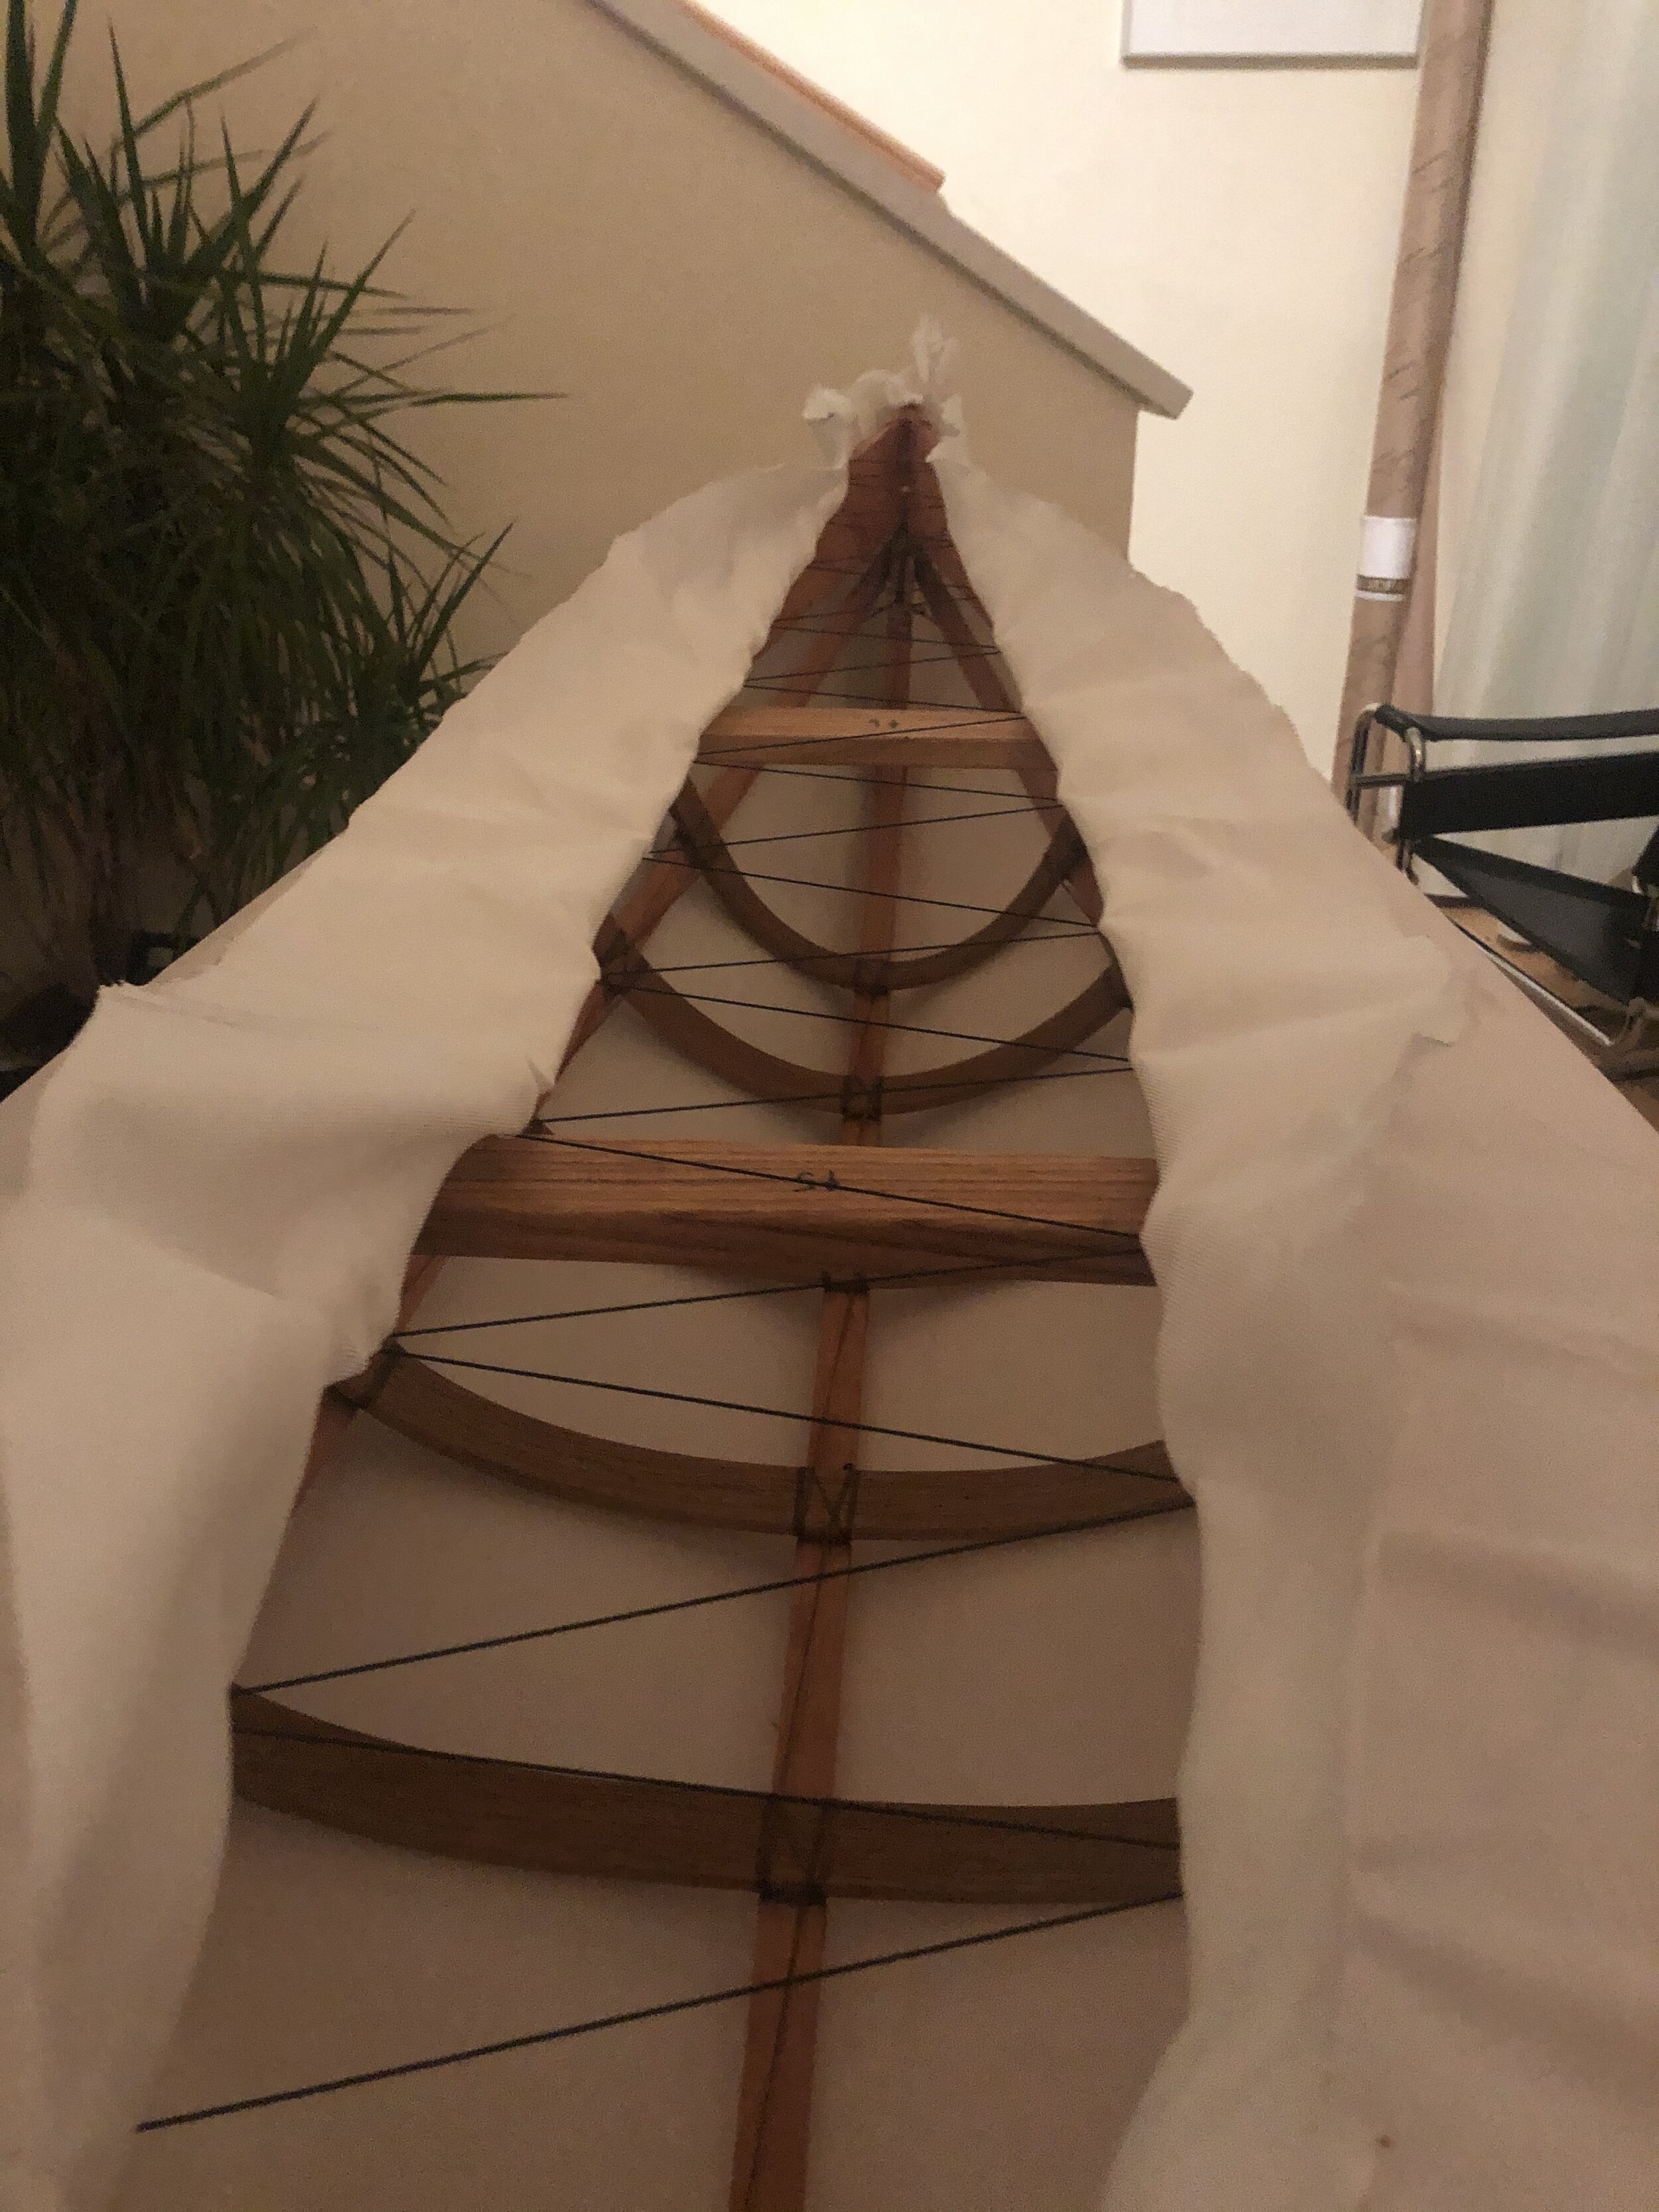
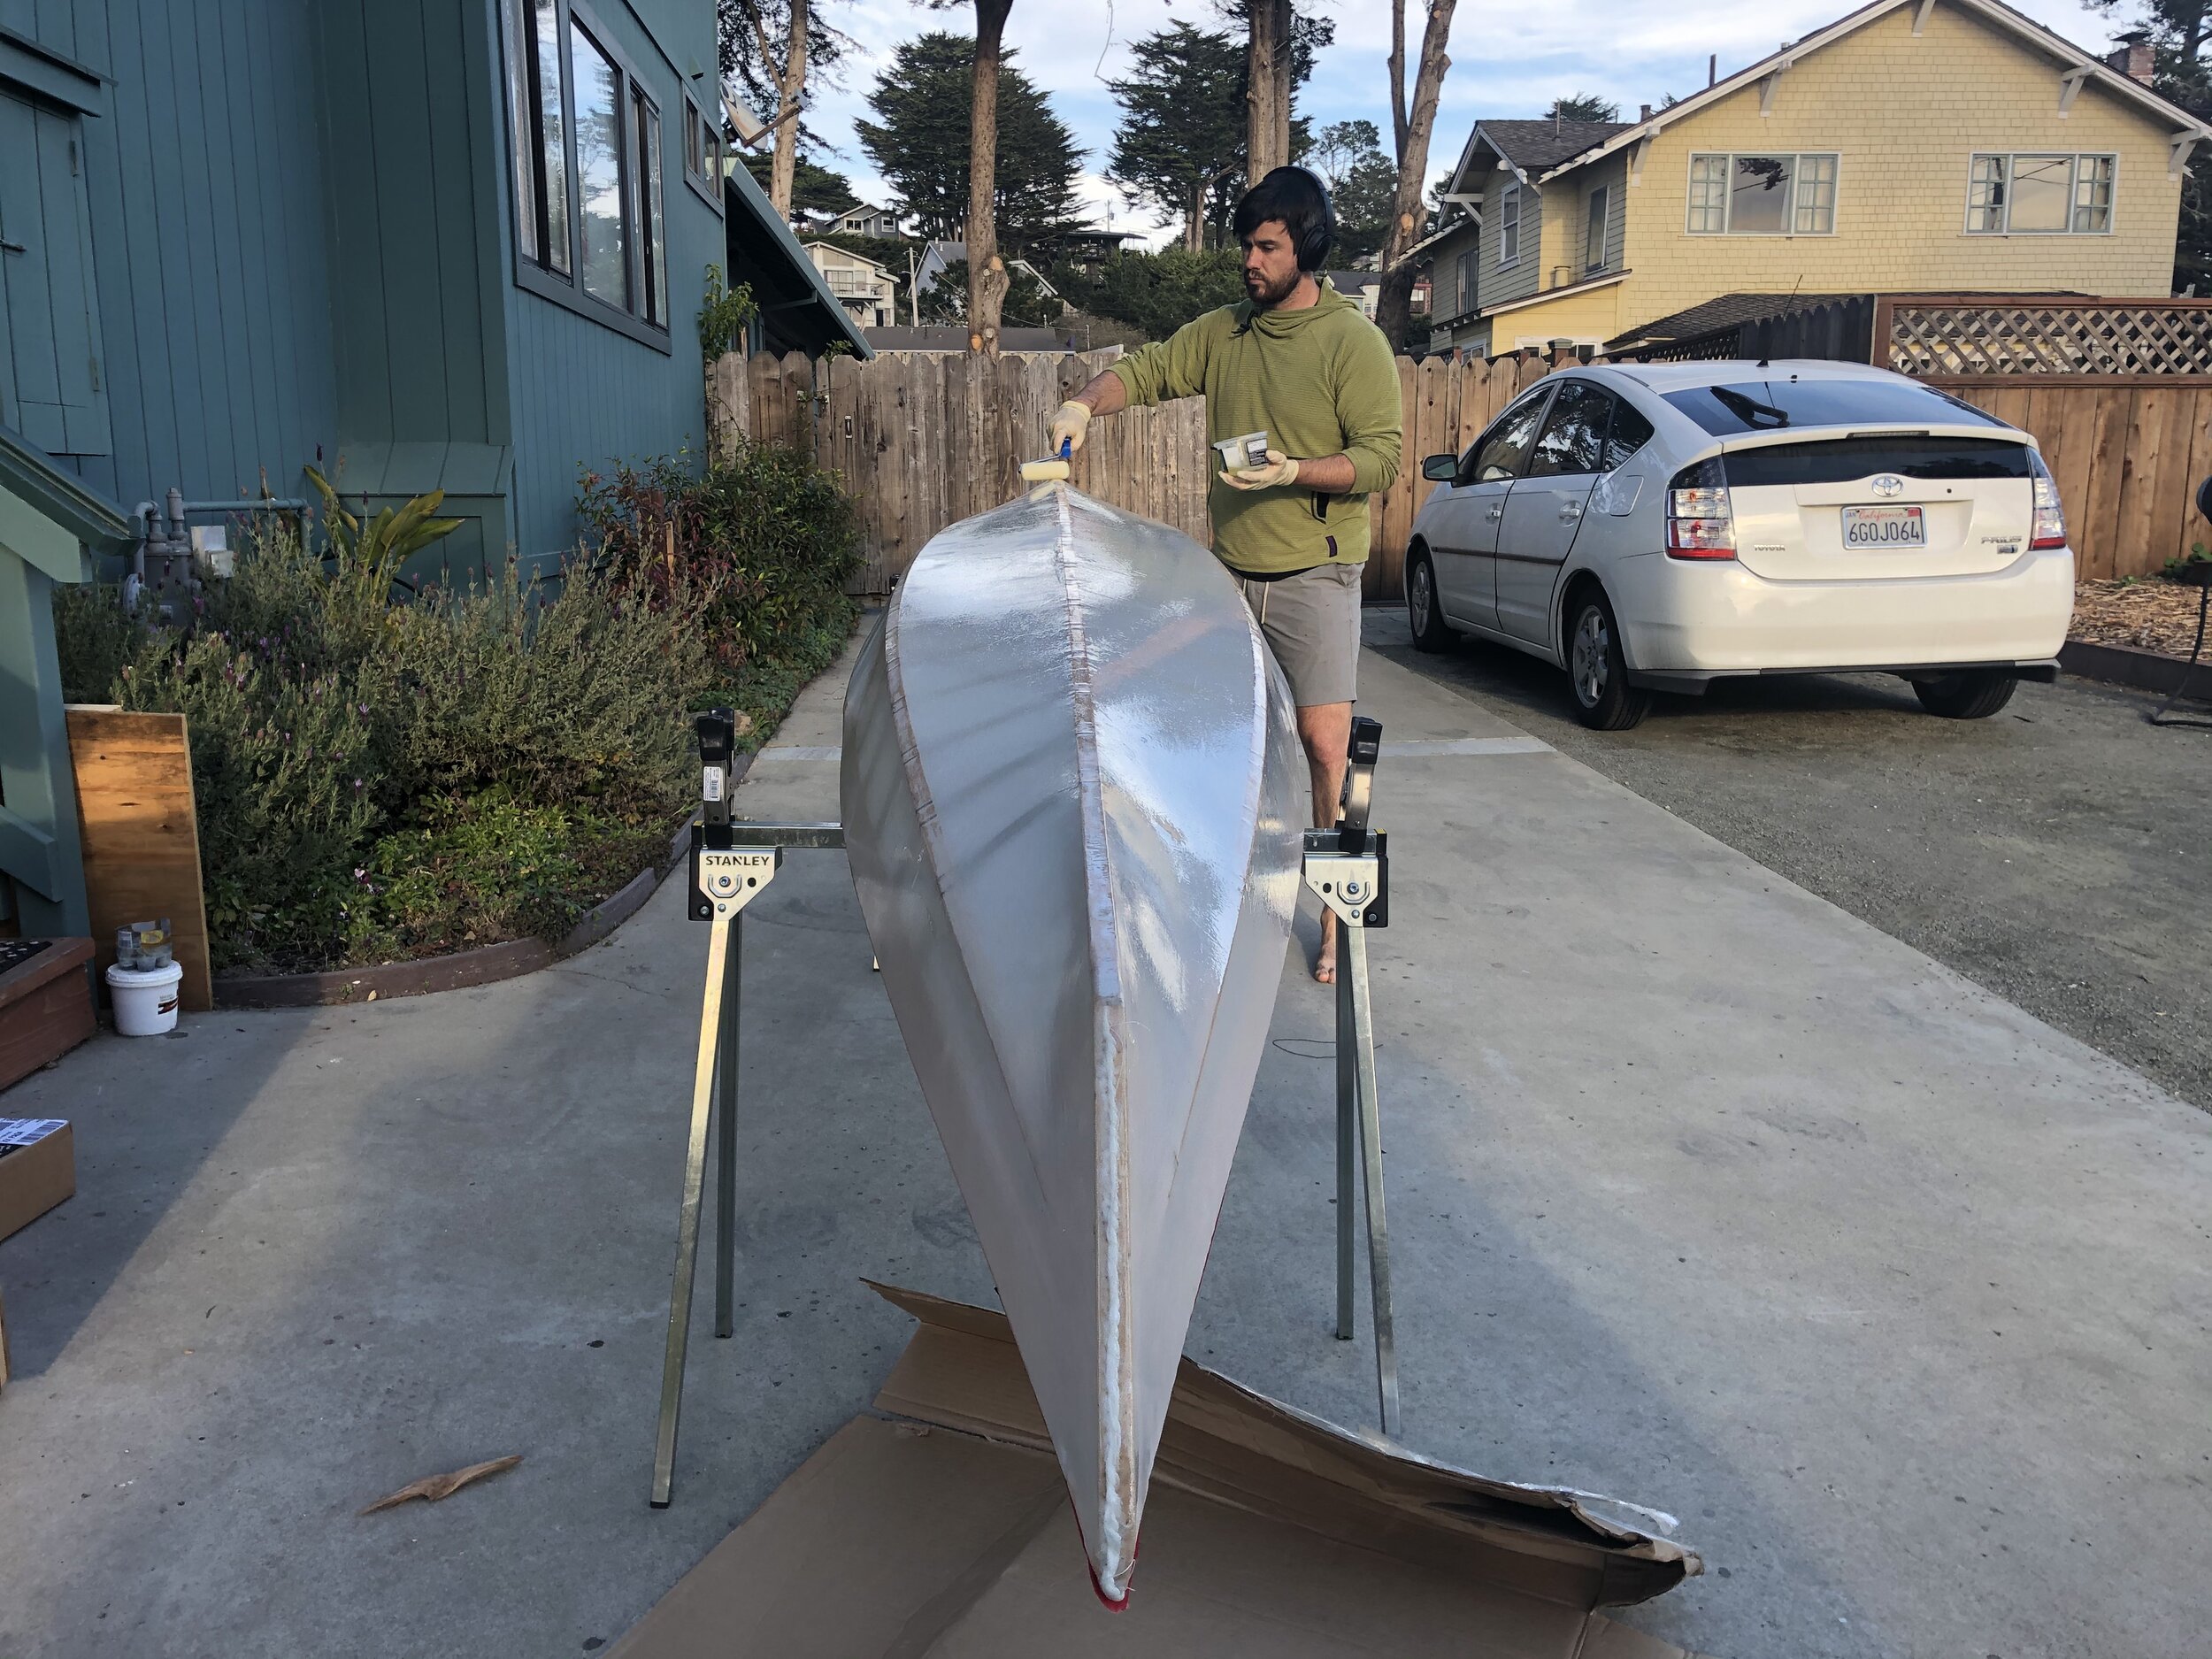
SKINNING //
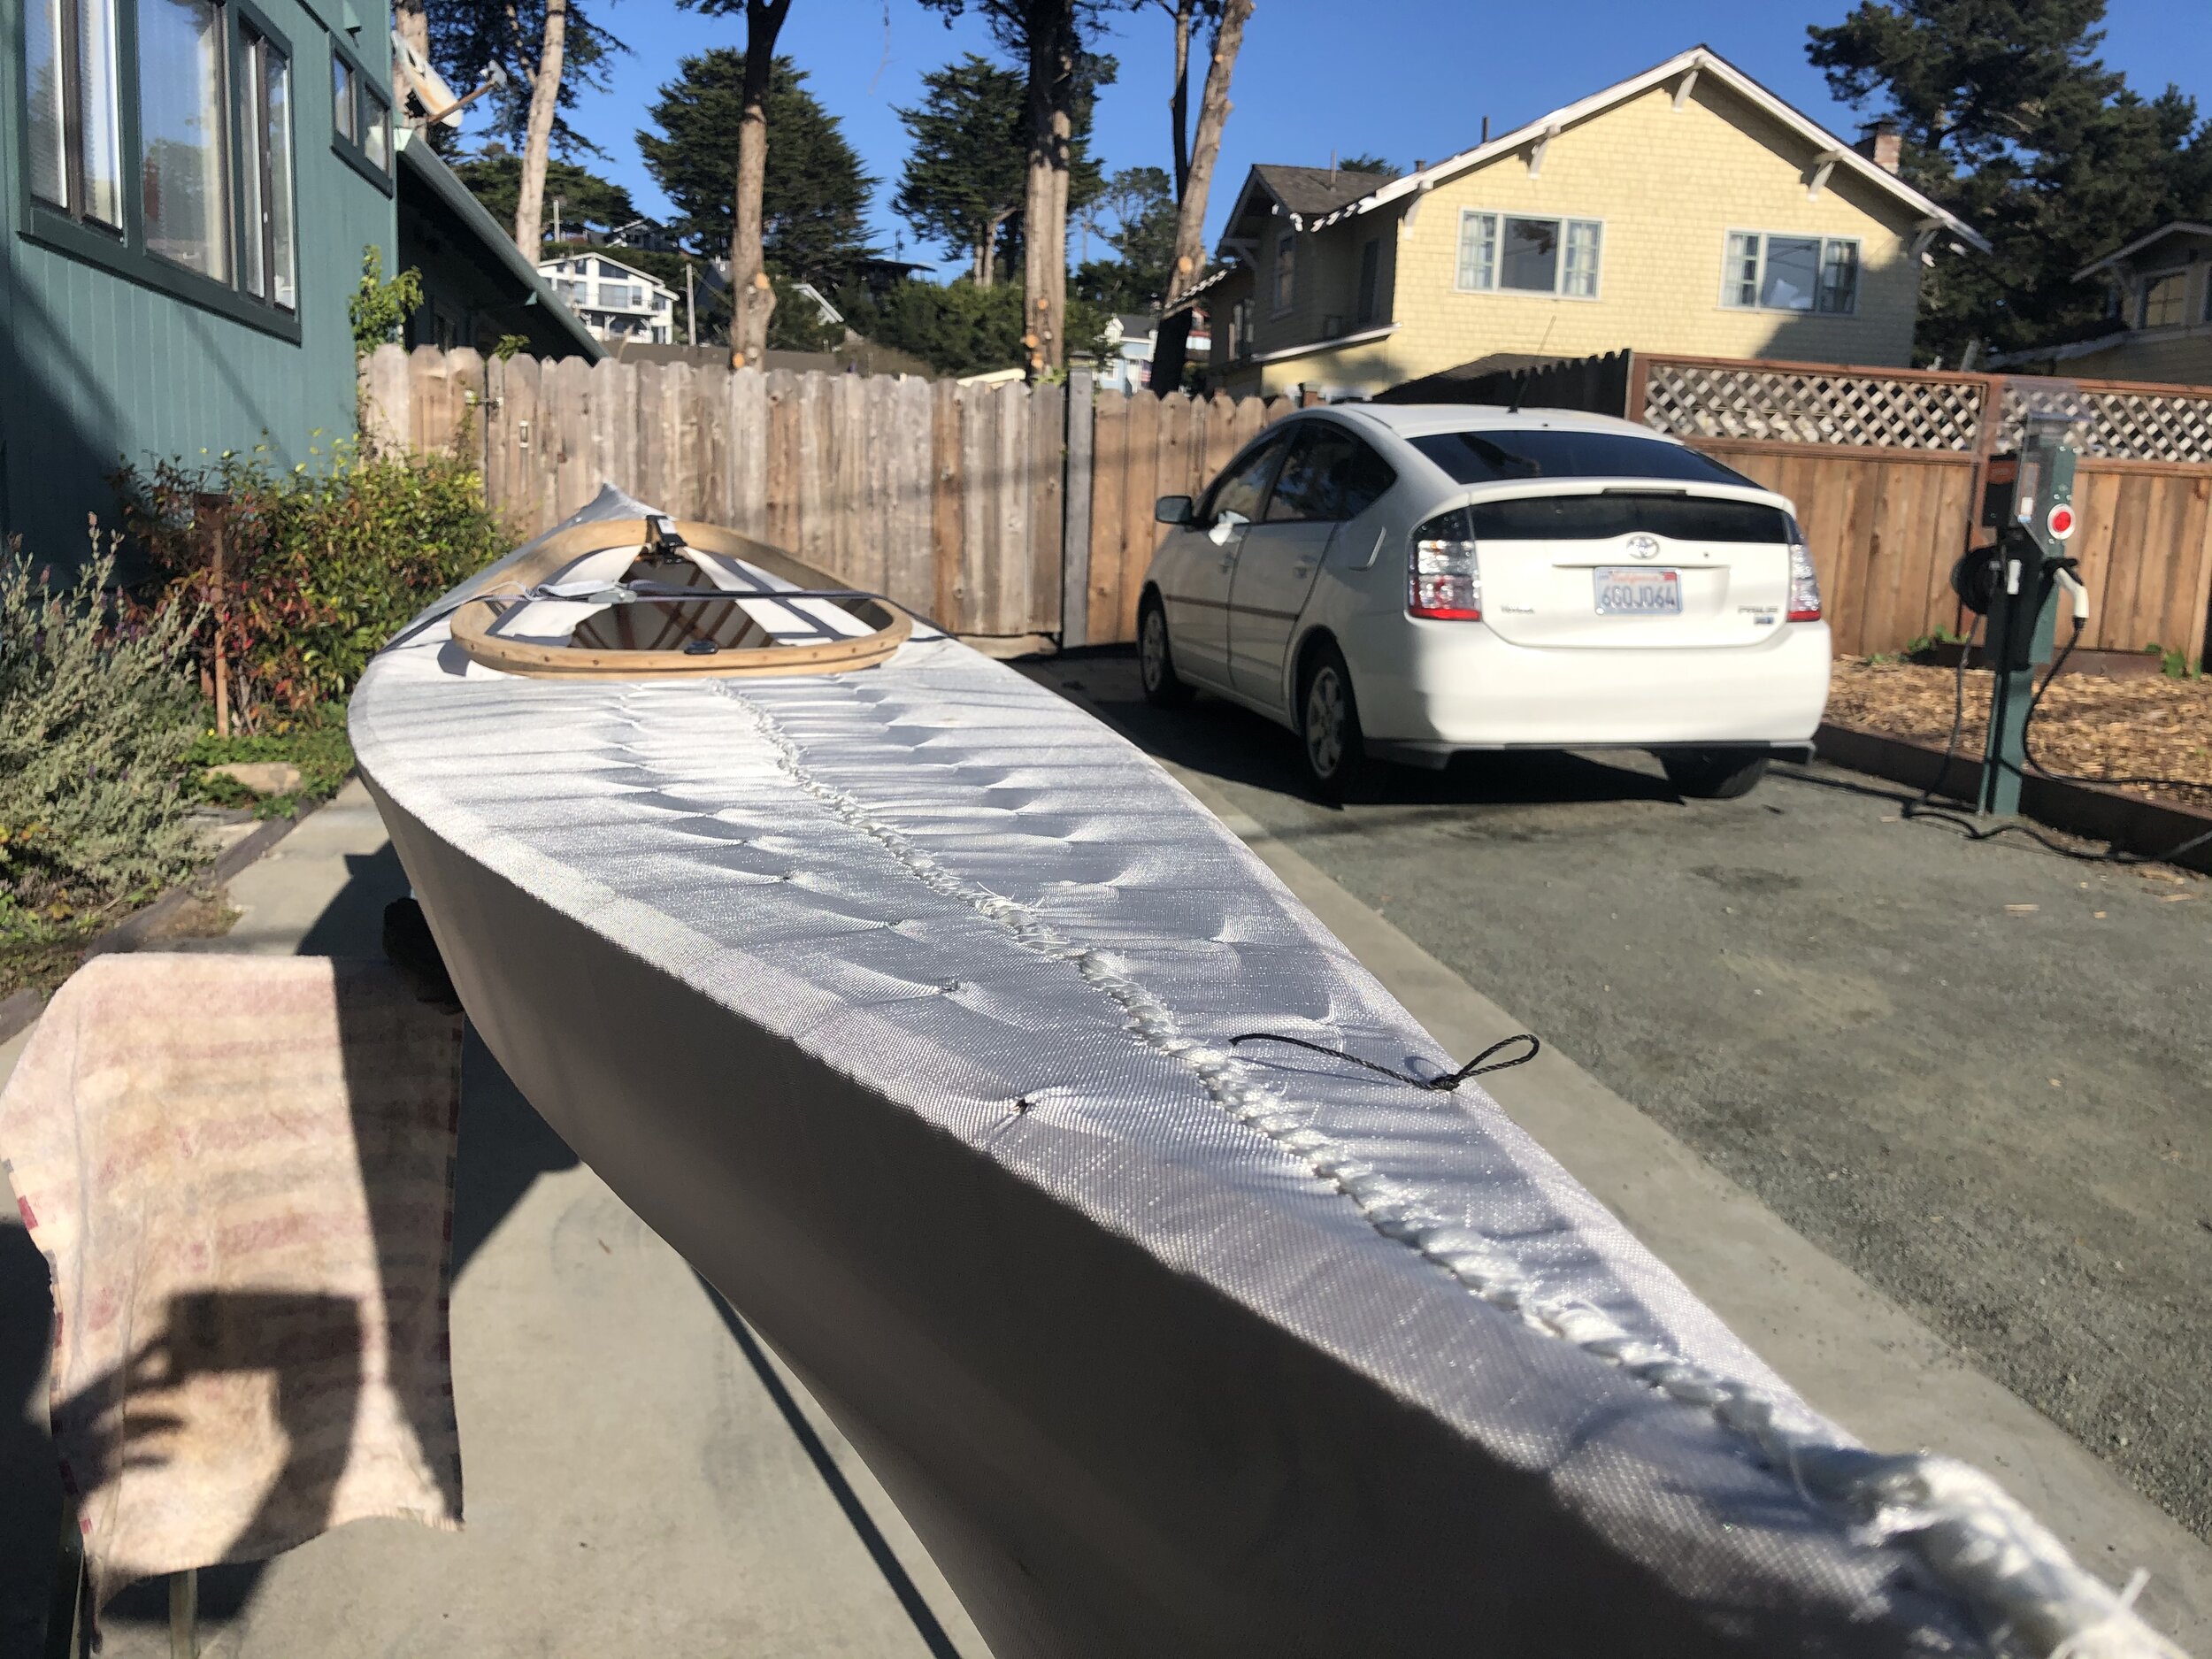
The skinning involved a single piece of ballistic nylon fabric that is rolled over the underside of the boat, sewn up the ends and then pulled tight over the top and sewn down the middle. In the interest of saving money, I decided not to buy a hot knife and instead used a cheap knife and a propane camping stove for cutting the fabric. This option was certainly tedious at times and definitely not as accurate in the end, but I think it was sufficient to get the job done. All the little imperfects in the cutting process end up hidden pretty well by the stitches, so it didn’t make much of a difference.
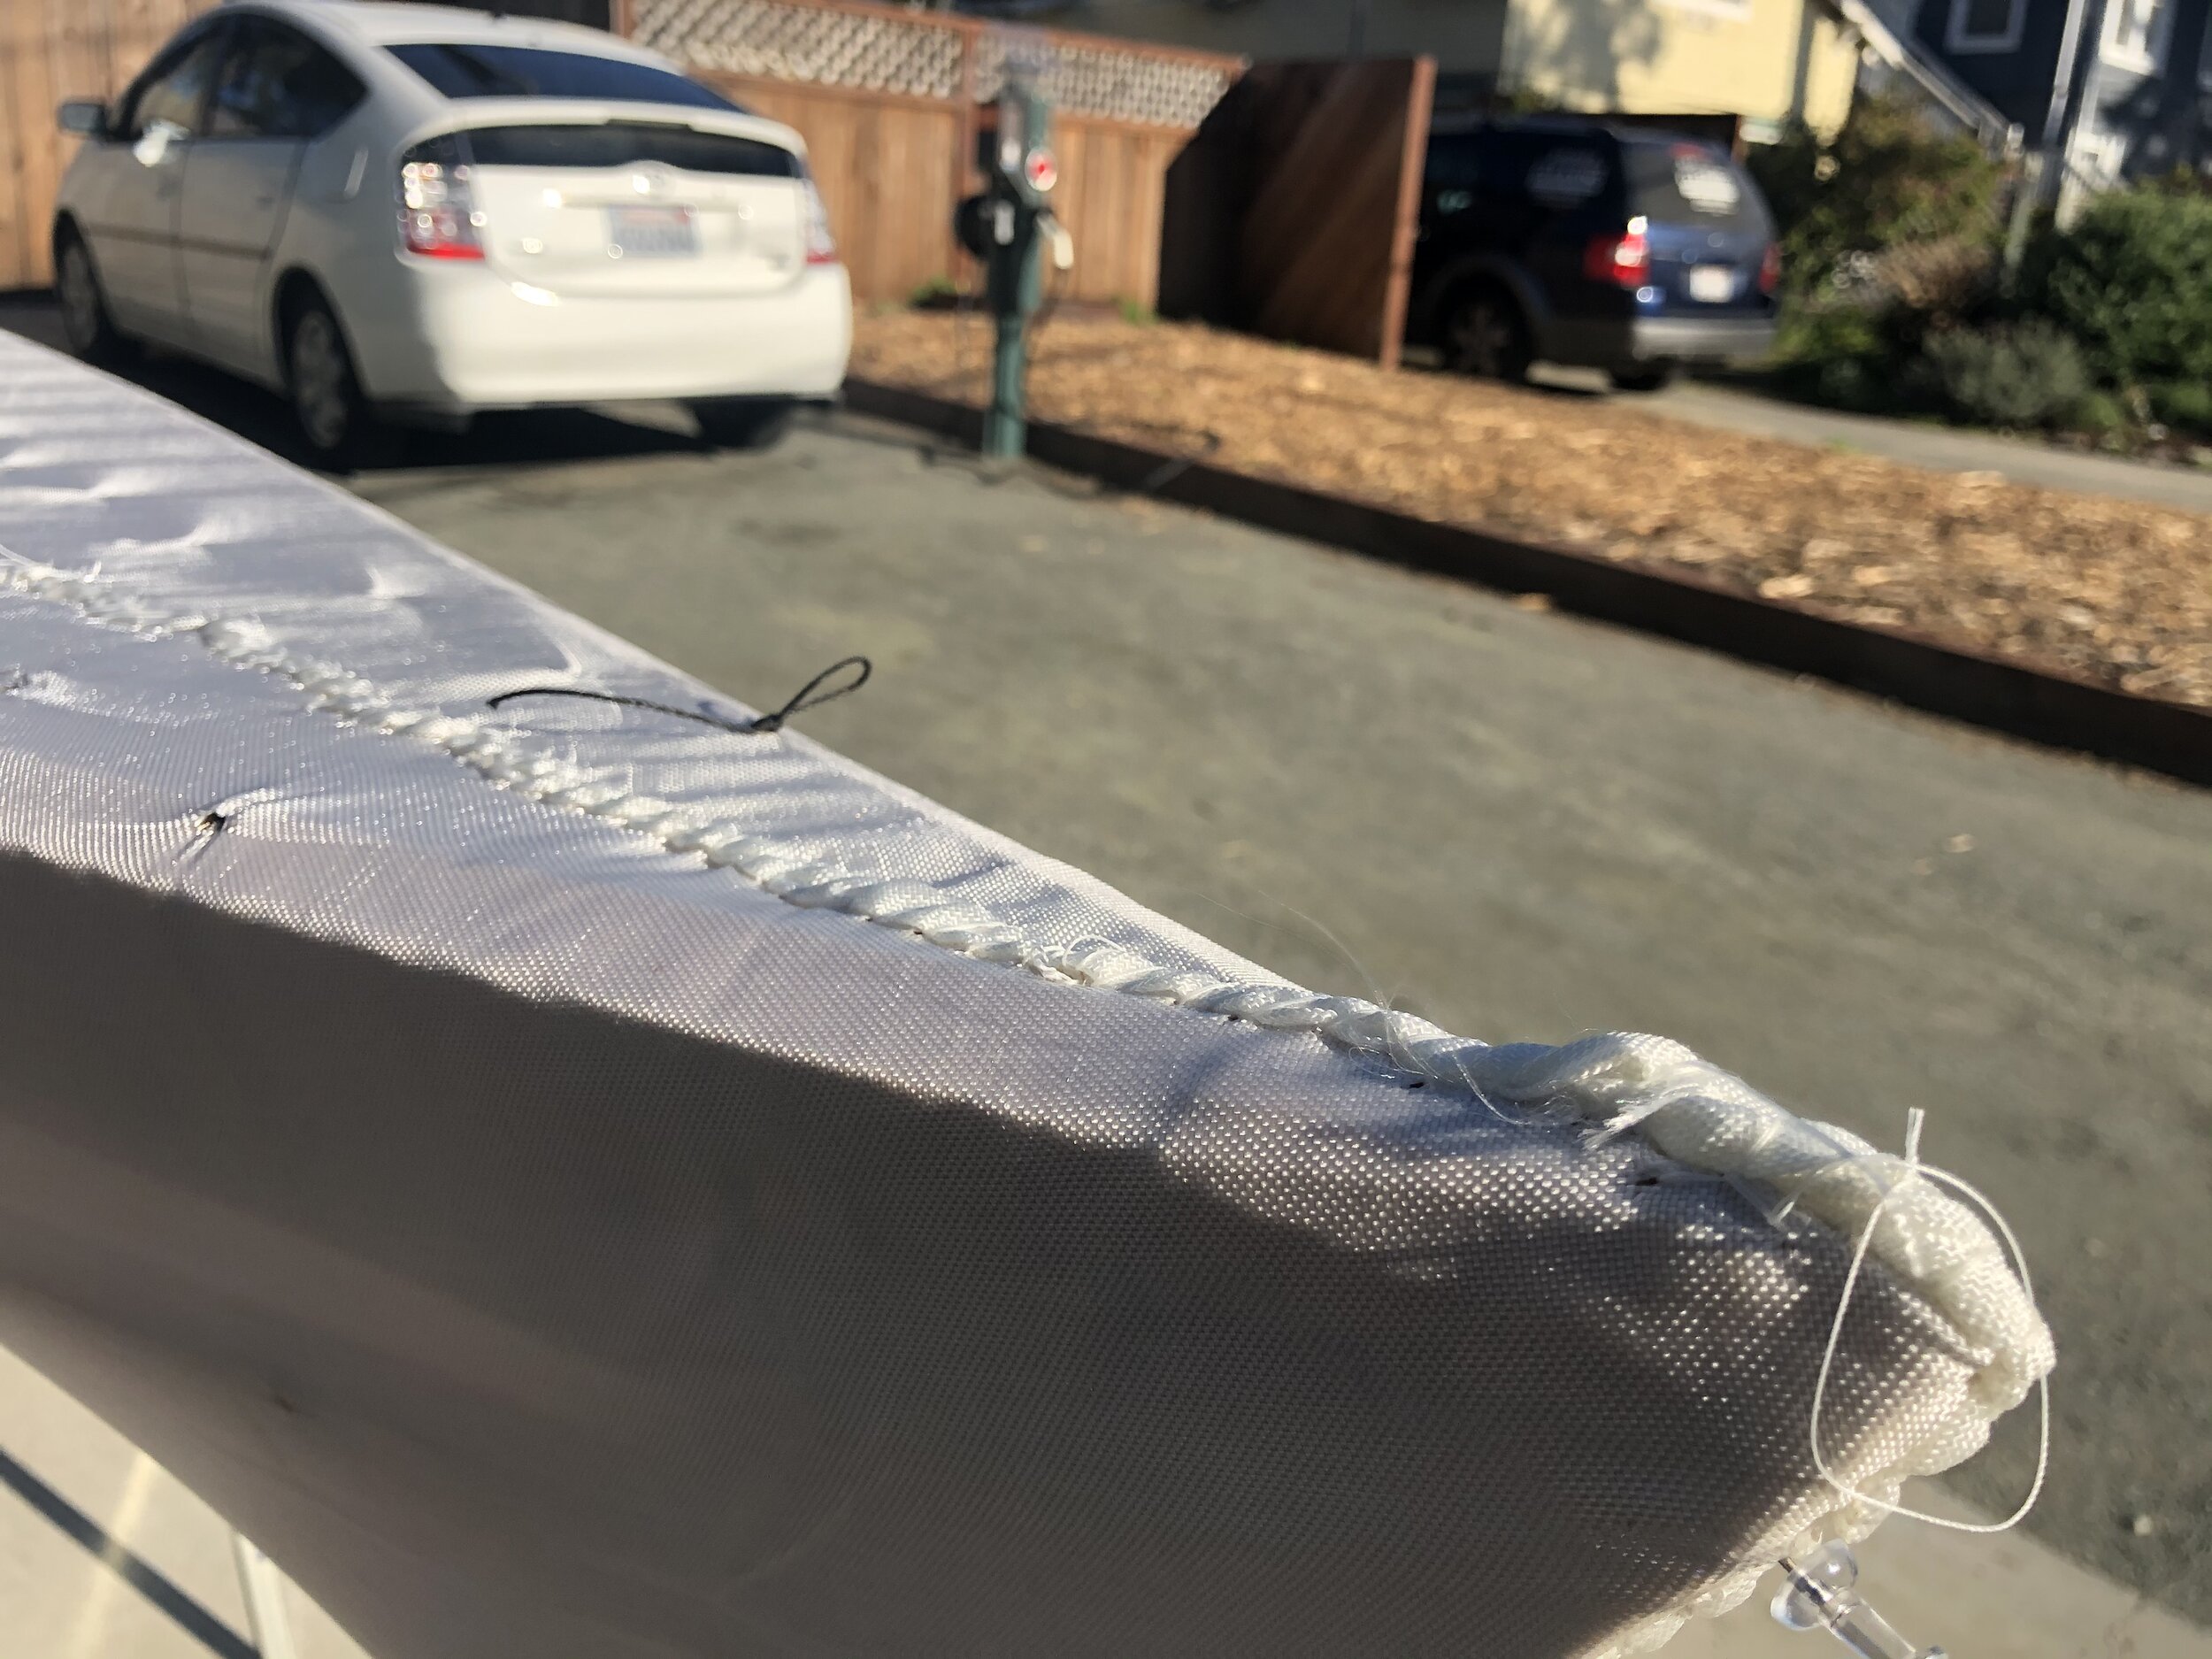
Once the fabric had been sewn up the stems, it was cut approximately to the center of the boat. I then sewed a thick nylon thread across the top the each side of the fabric and used this to pull the fabric tight. After tying this off, the fabric was cut again to the center and sewn together using a whip stitch.
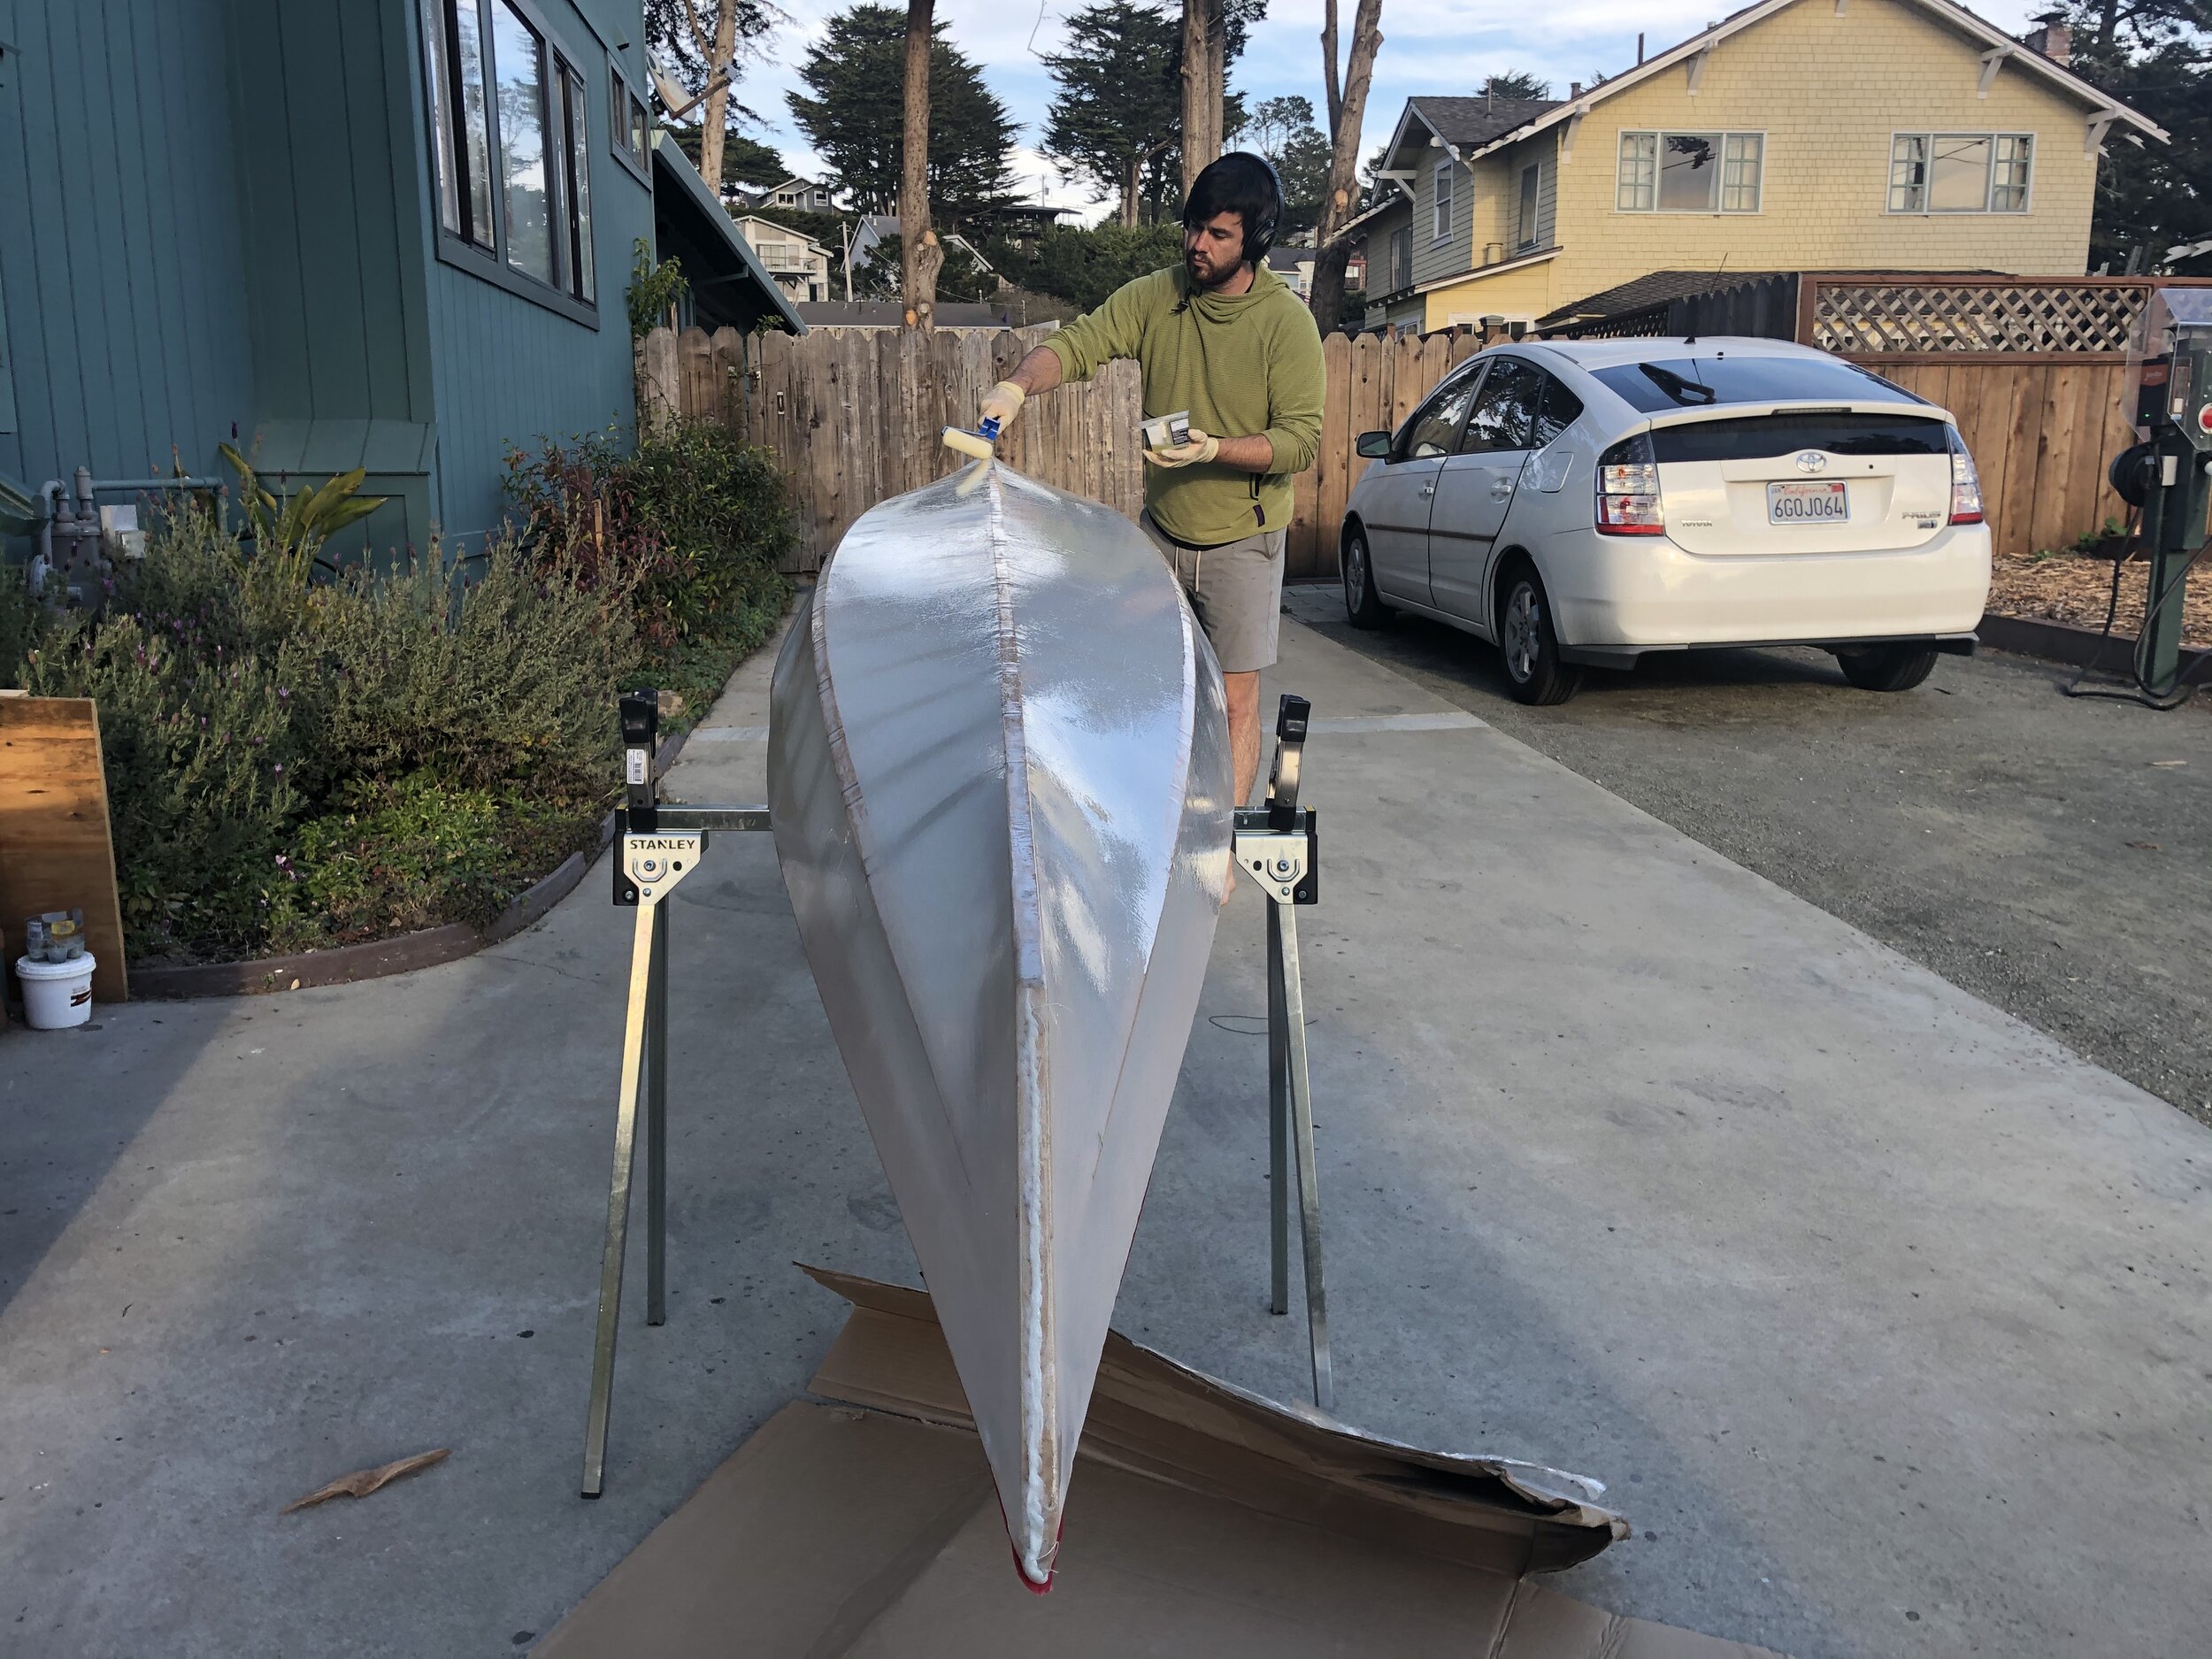
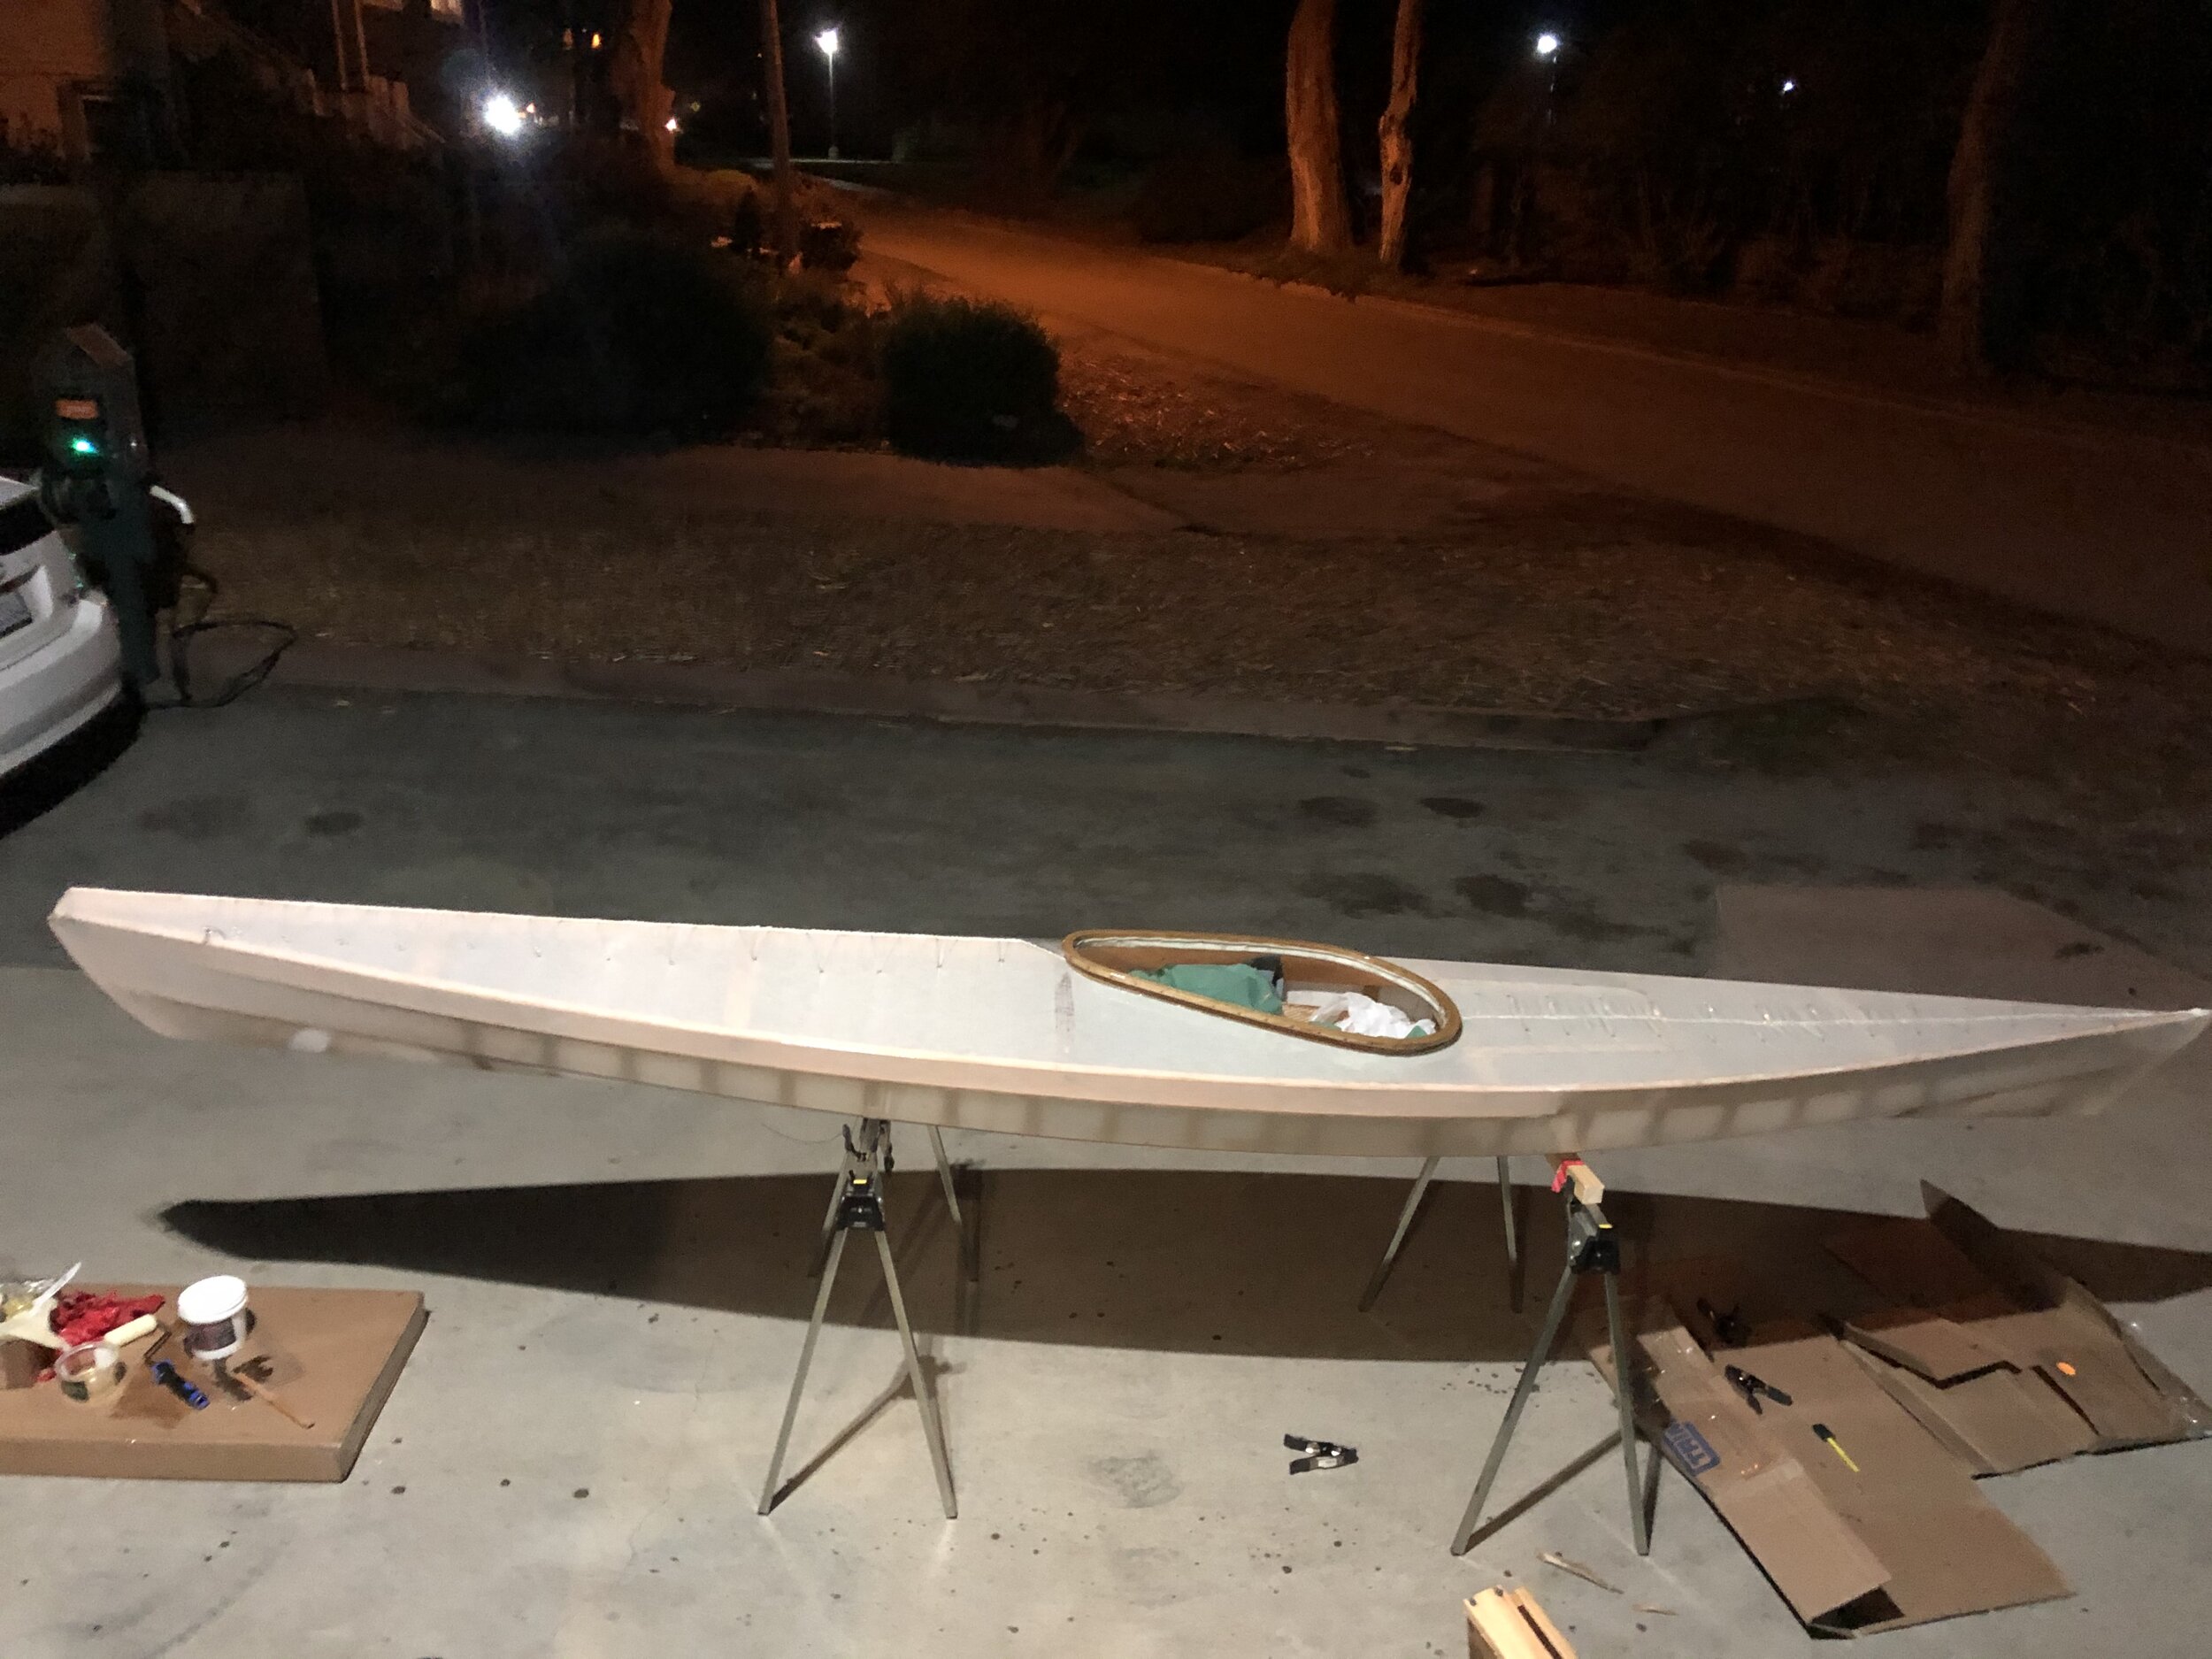
The coaming was then placed into the center, the excess material in the center was removed and the coaming was sewed into the fabric. With the coaming in place, it was time to add the polyurethane layer that would seal everything. I used the 2 part poly system from skinboats.org and I wish I had ordered more so I could have done some additional coats. I also wish I had started earlier as I was finishing in the dark which made it hard to inspect how it looked. Brian was also completely right in saying not to do it outside otherwise you will get bugs stuck in the poly, but since the living room is connected to Nicolette’s bedroom, I thought it best not to expose her to the fumes all night long.
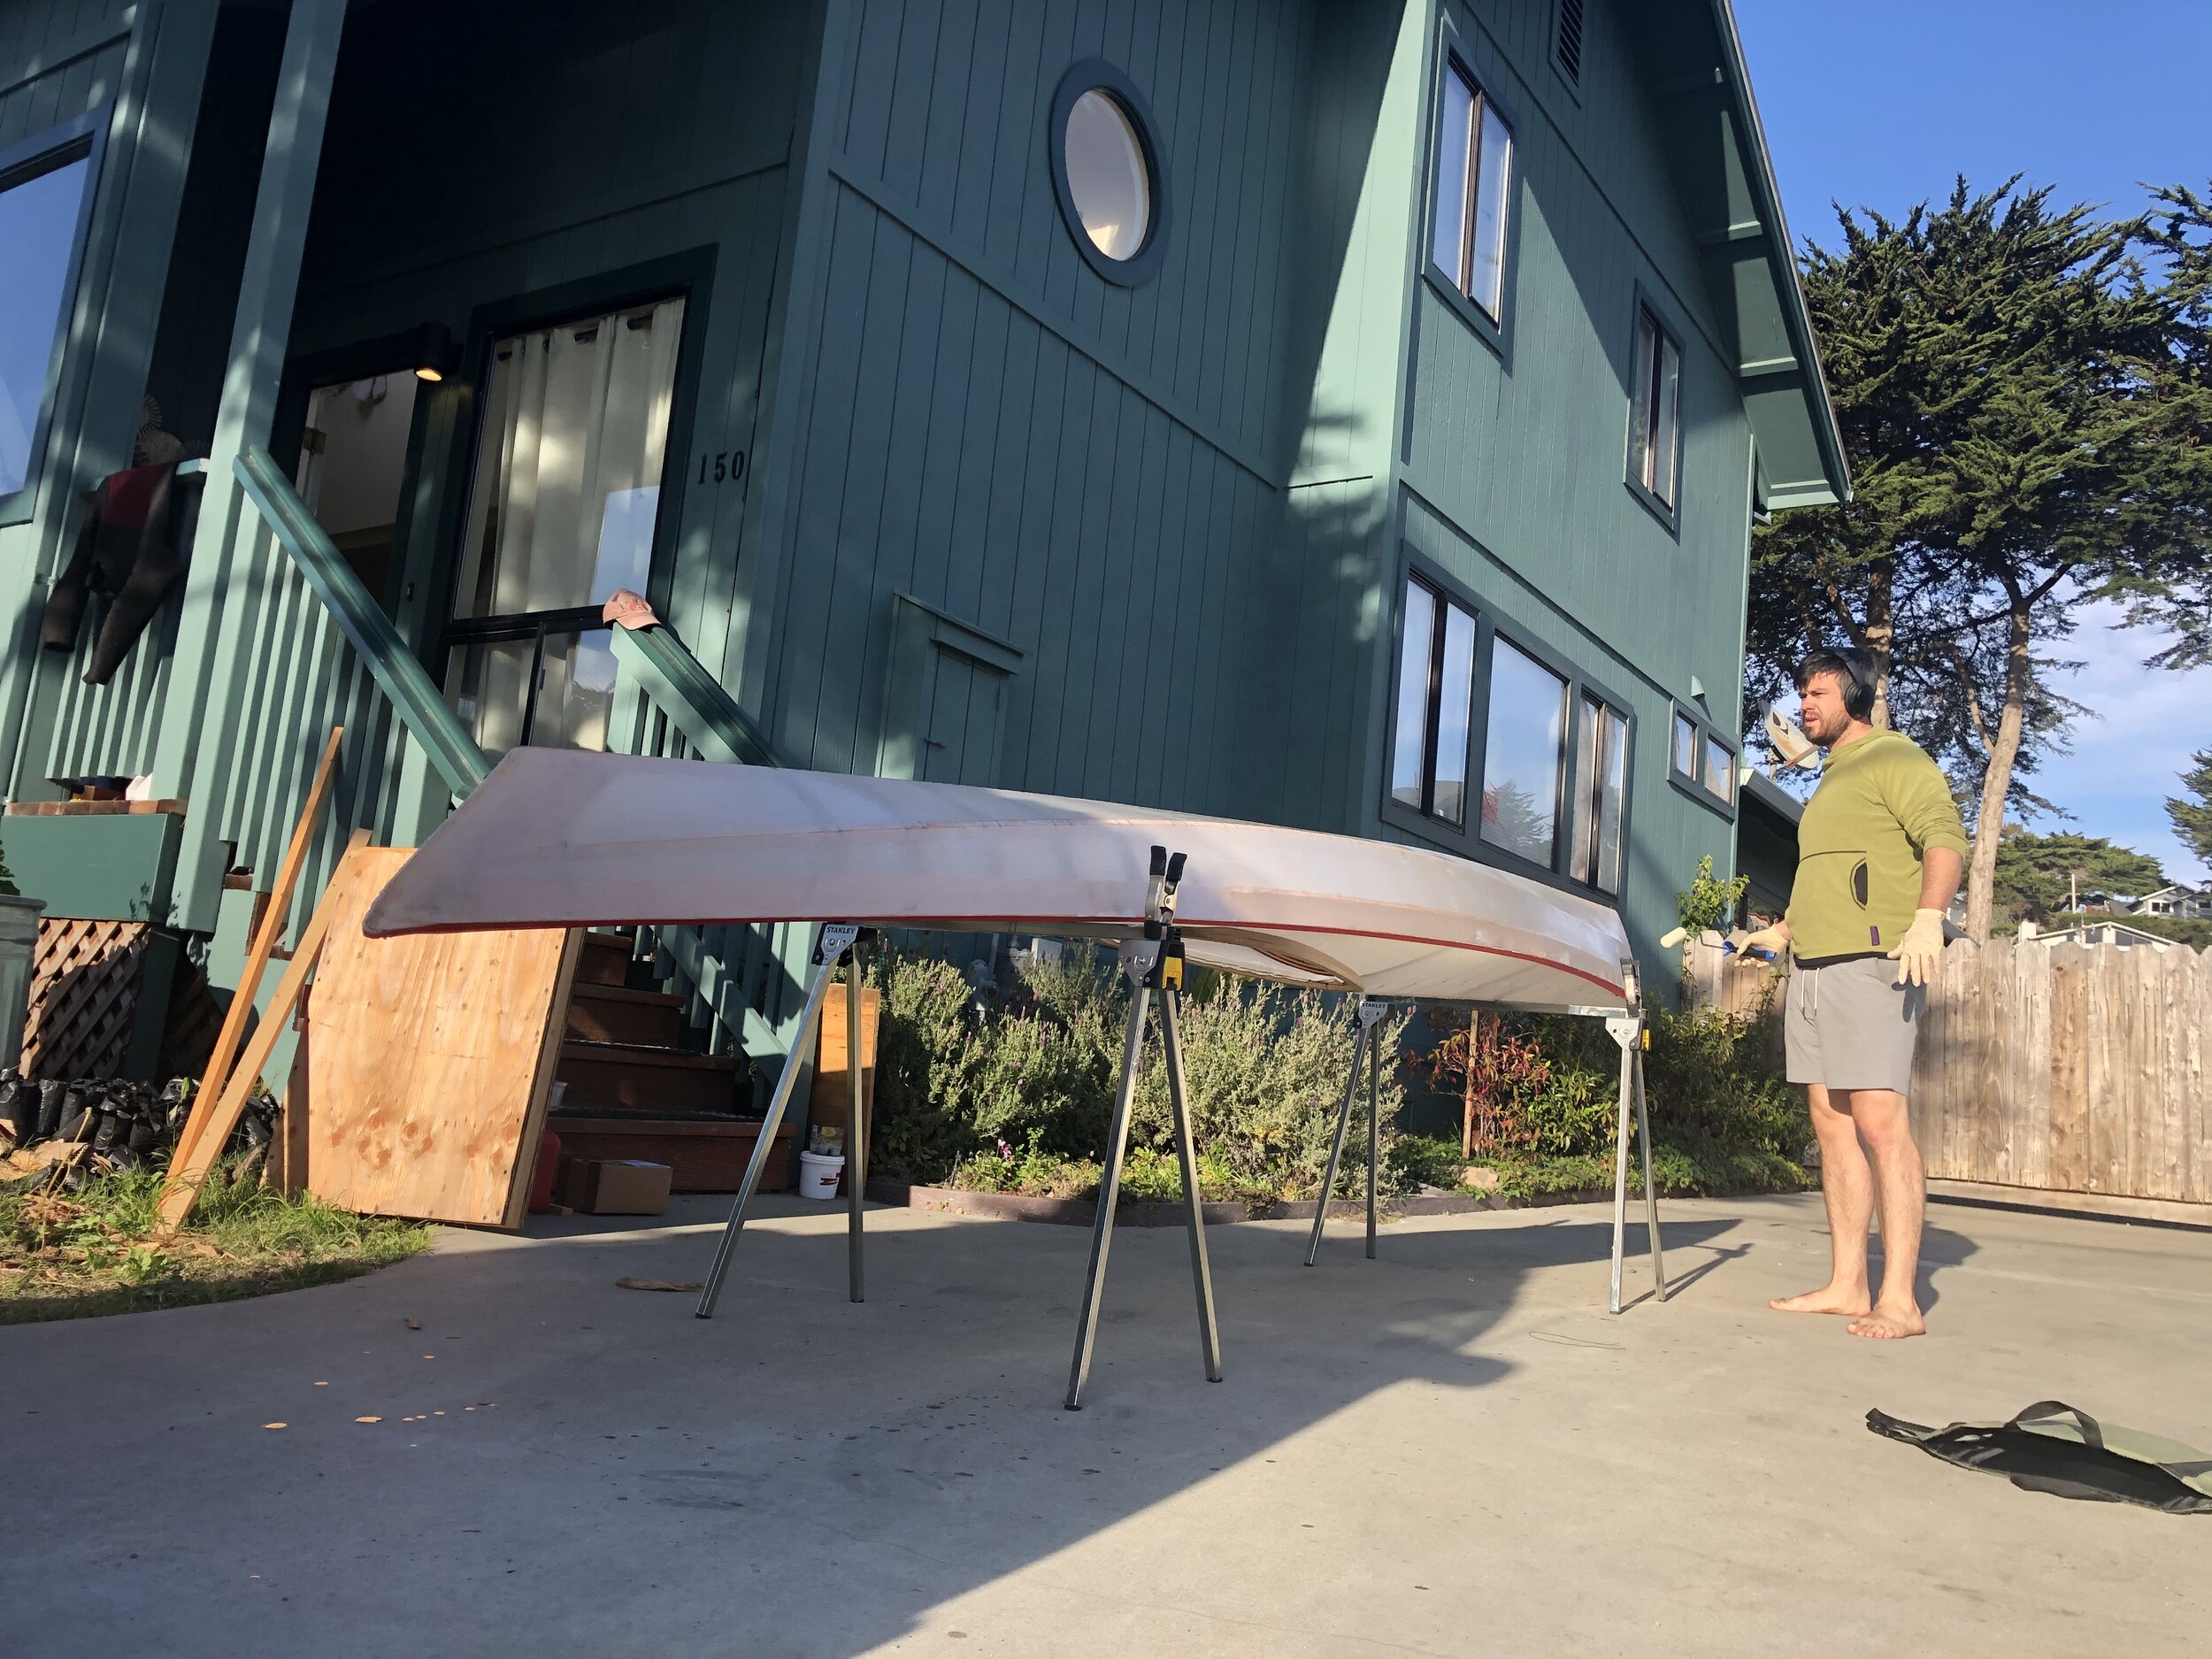
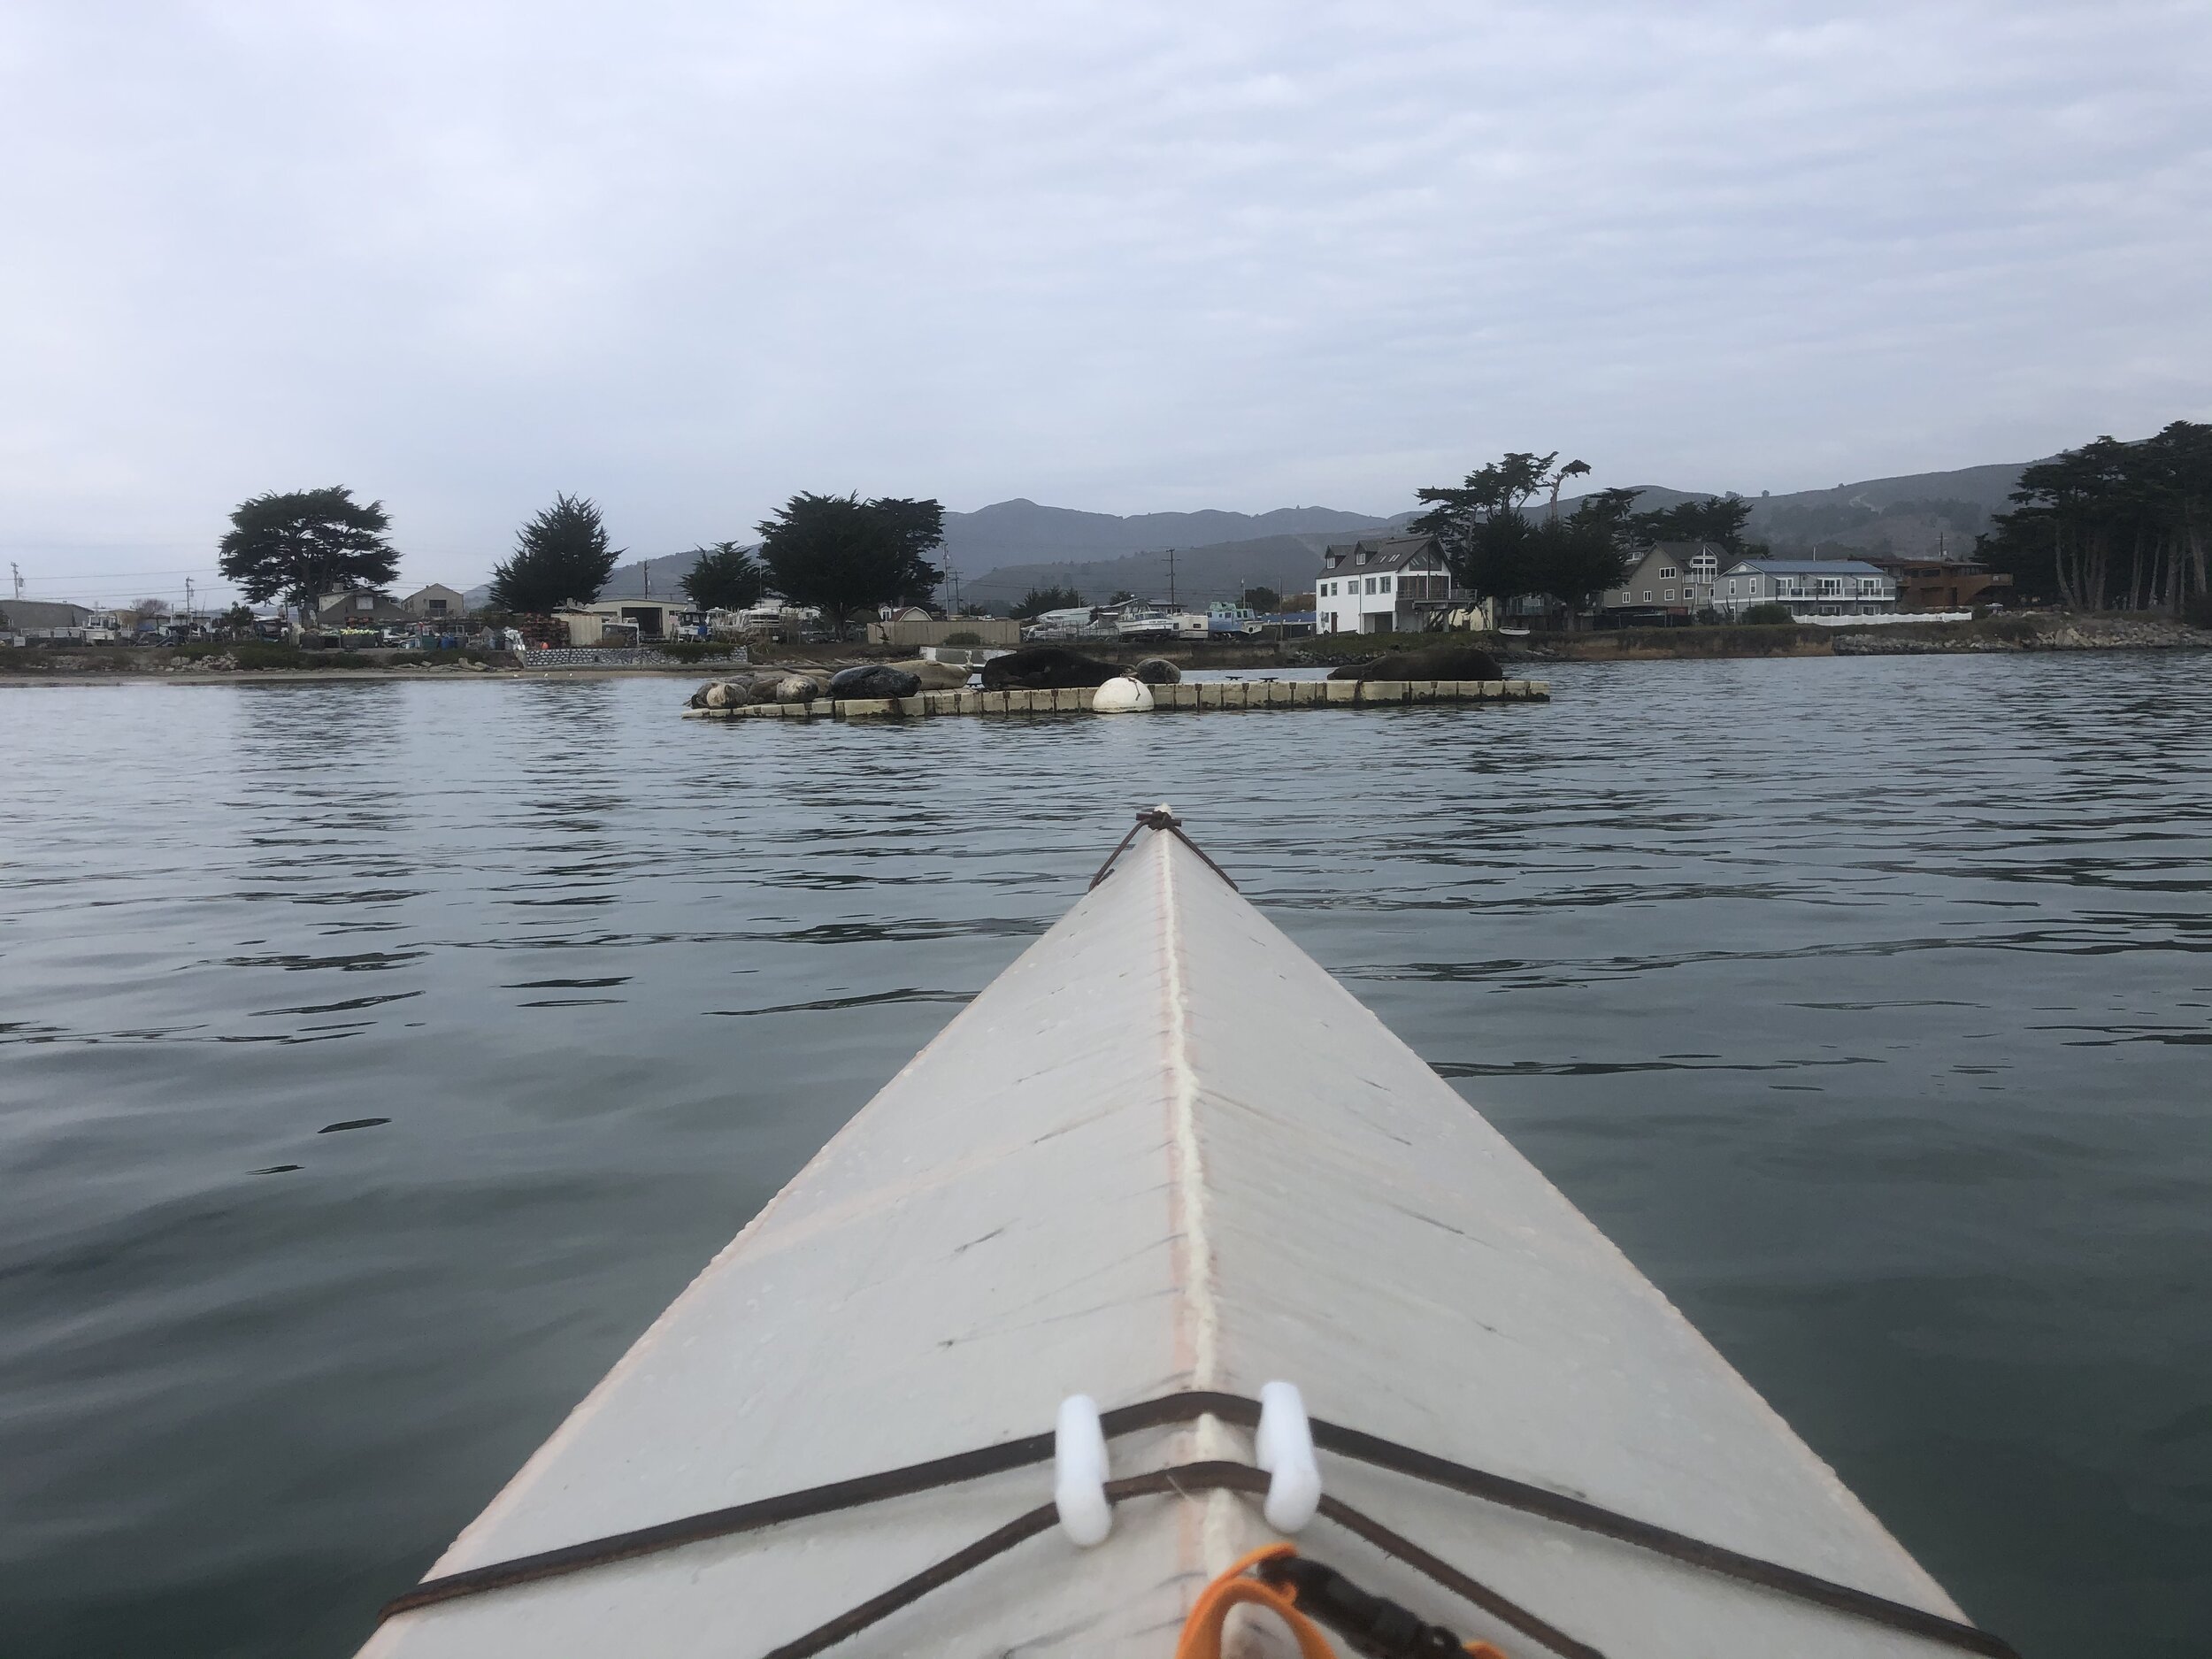
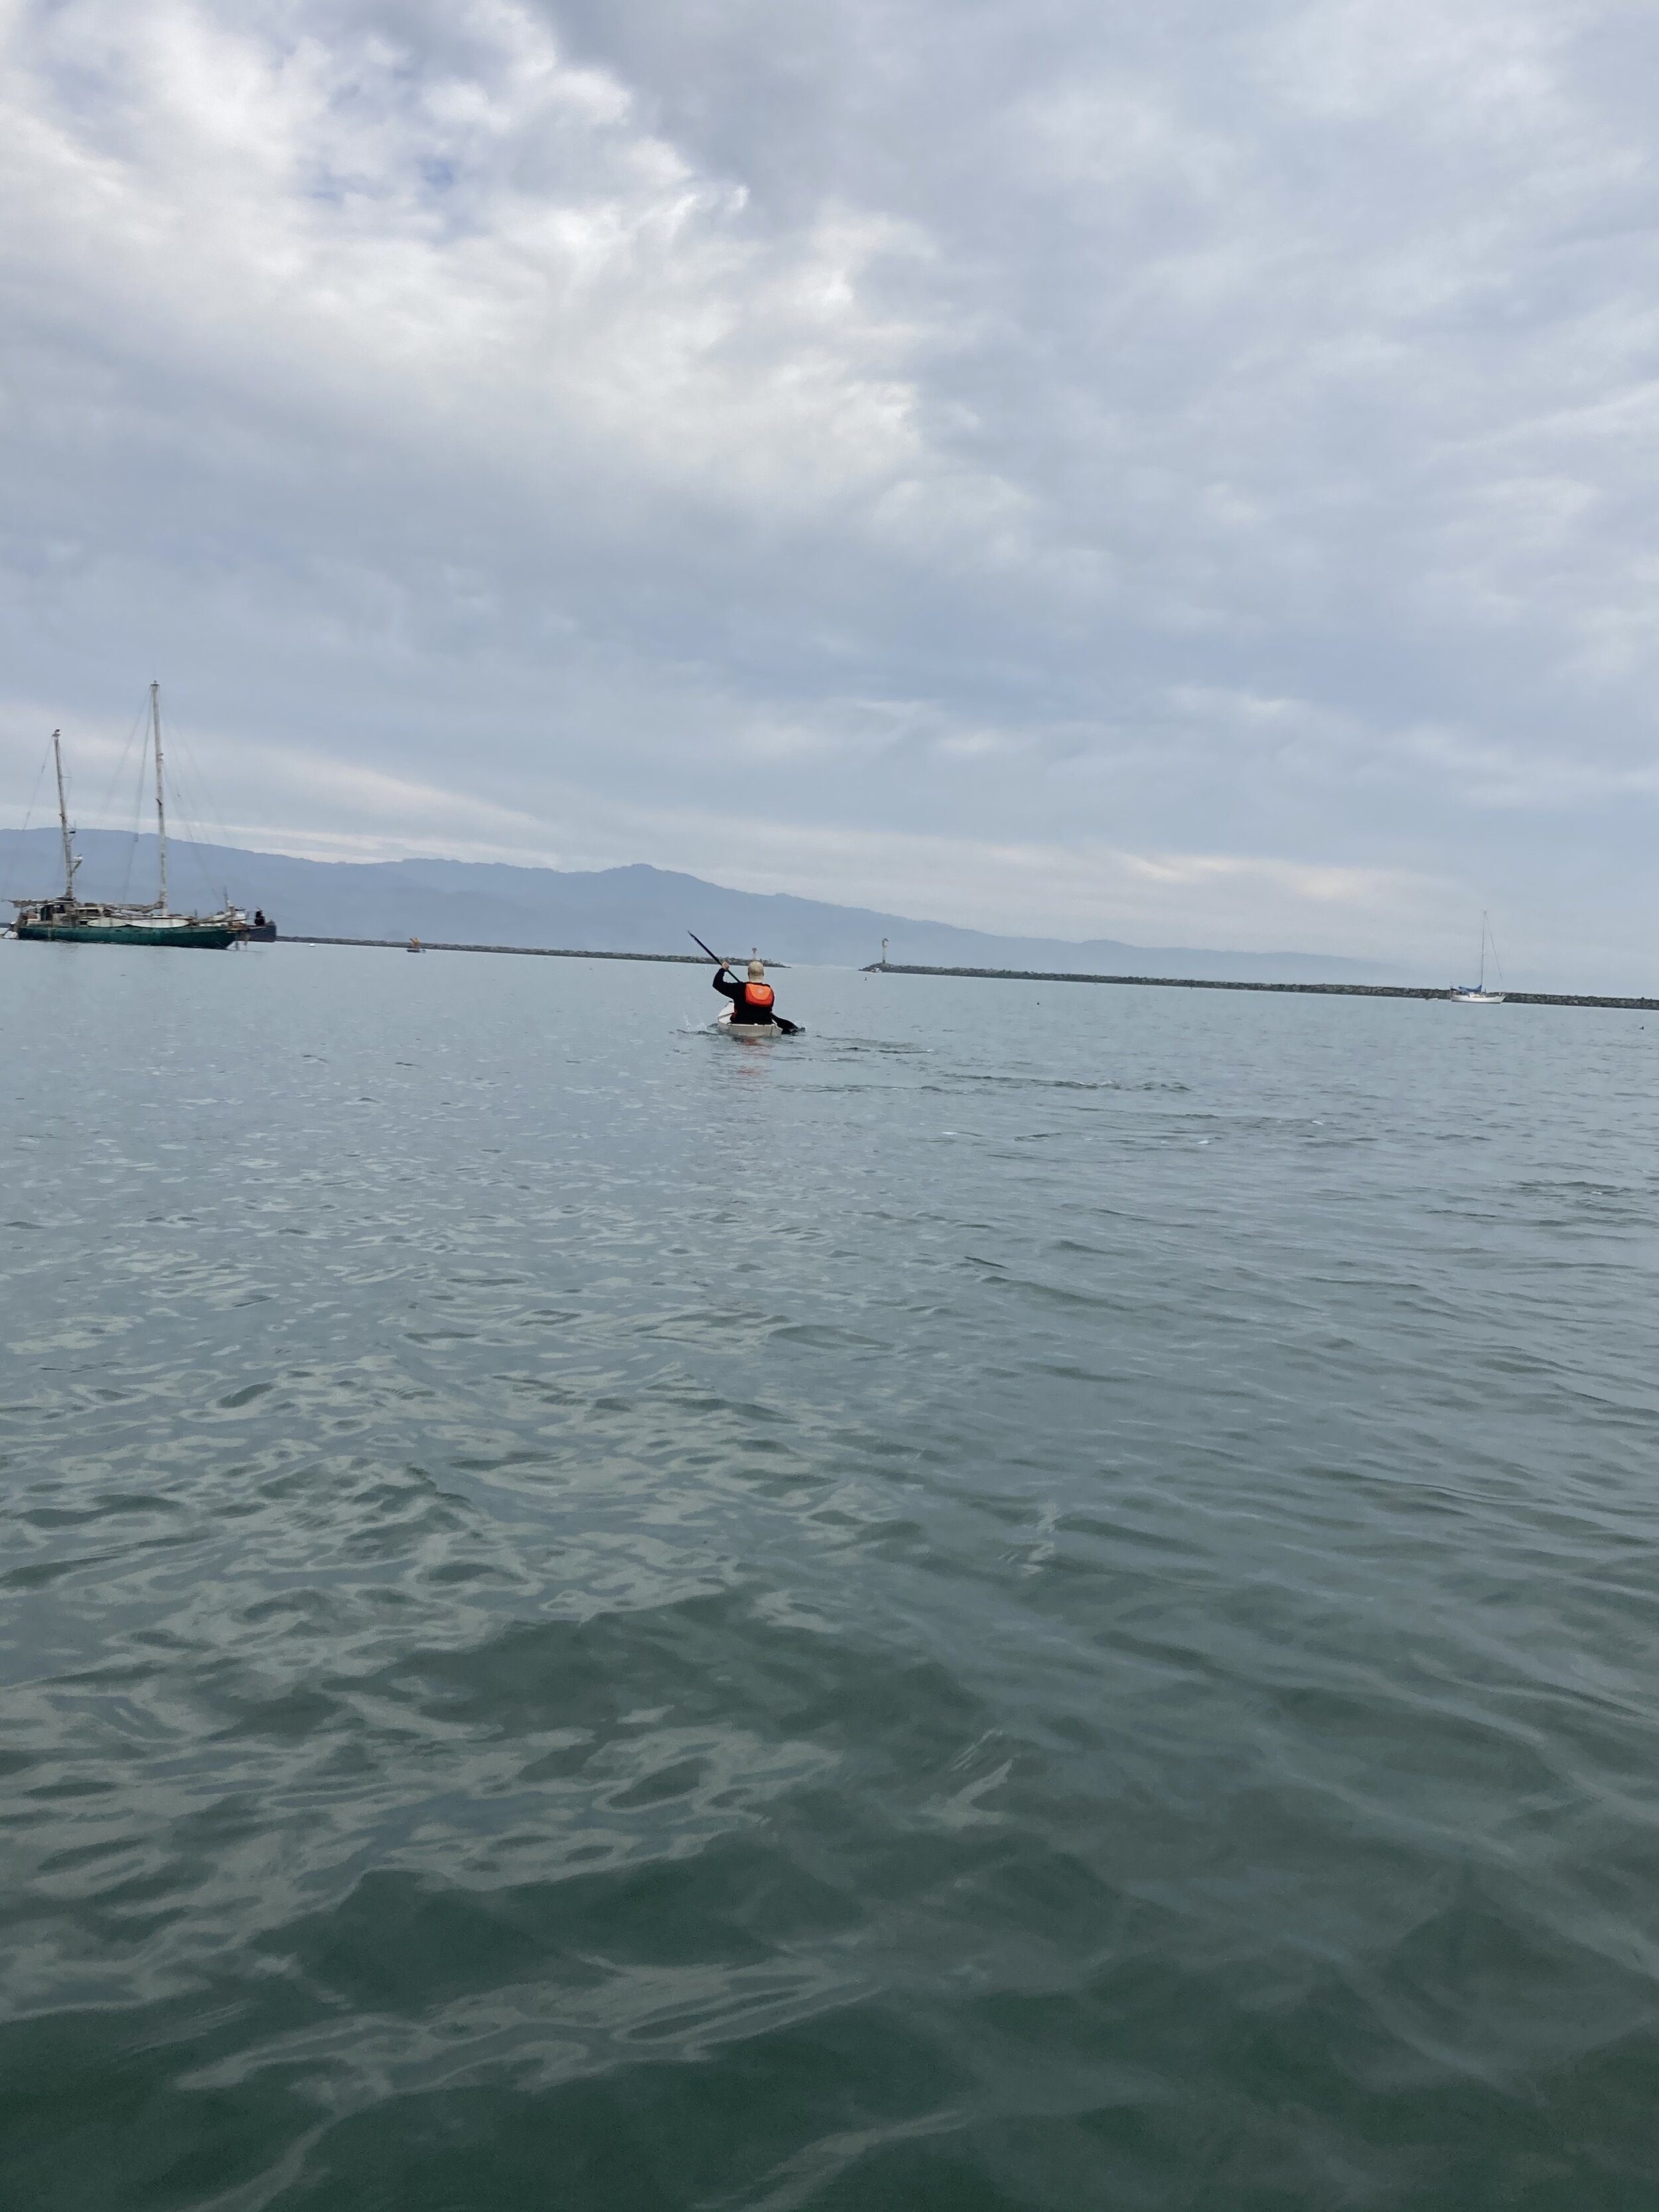
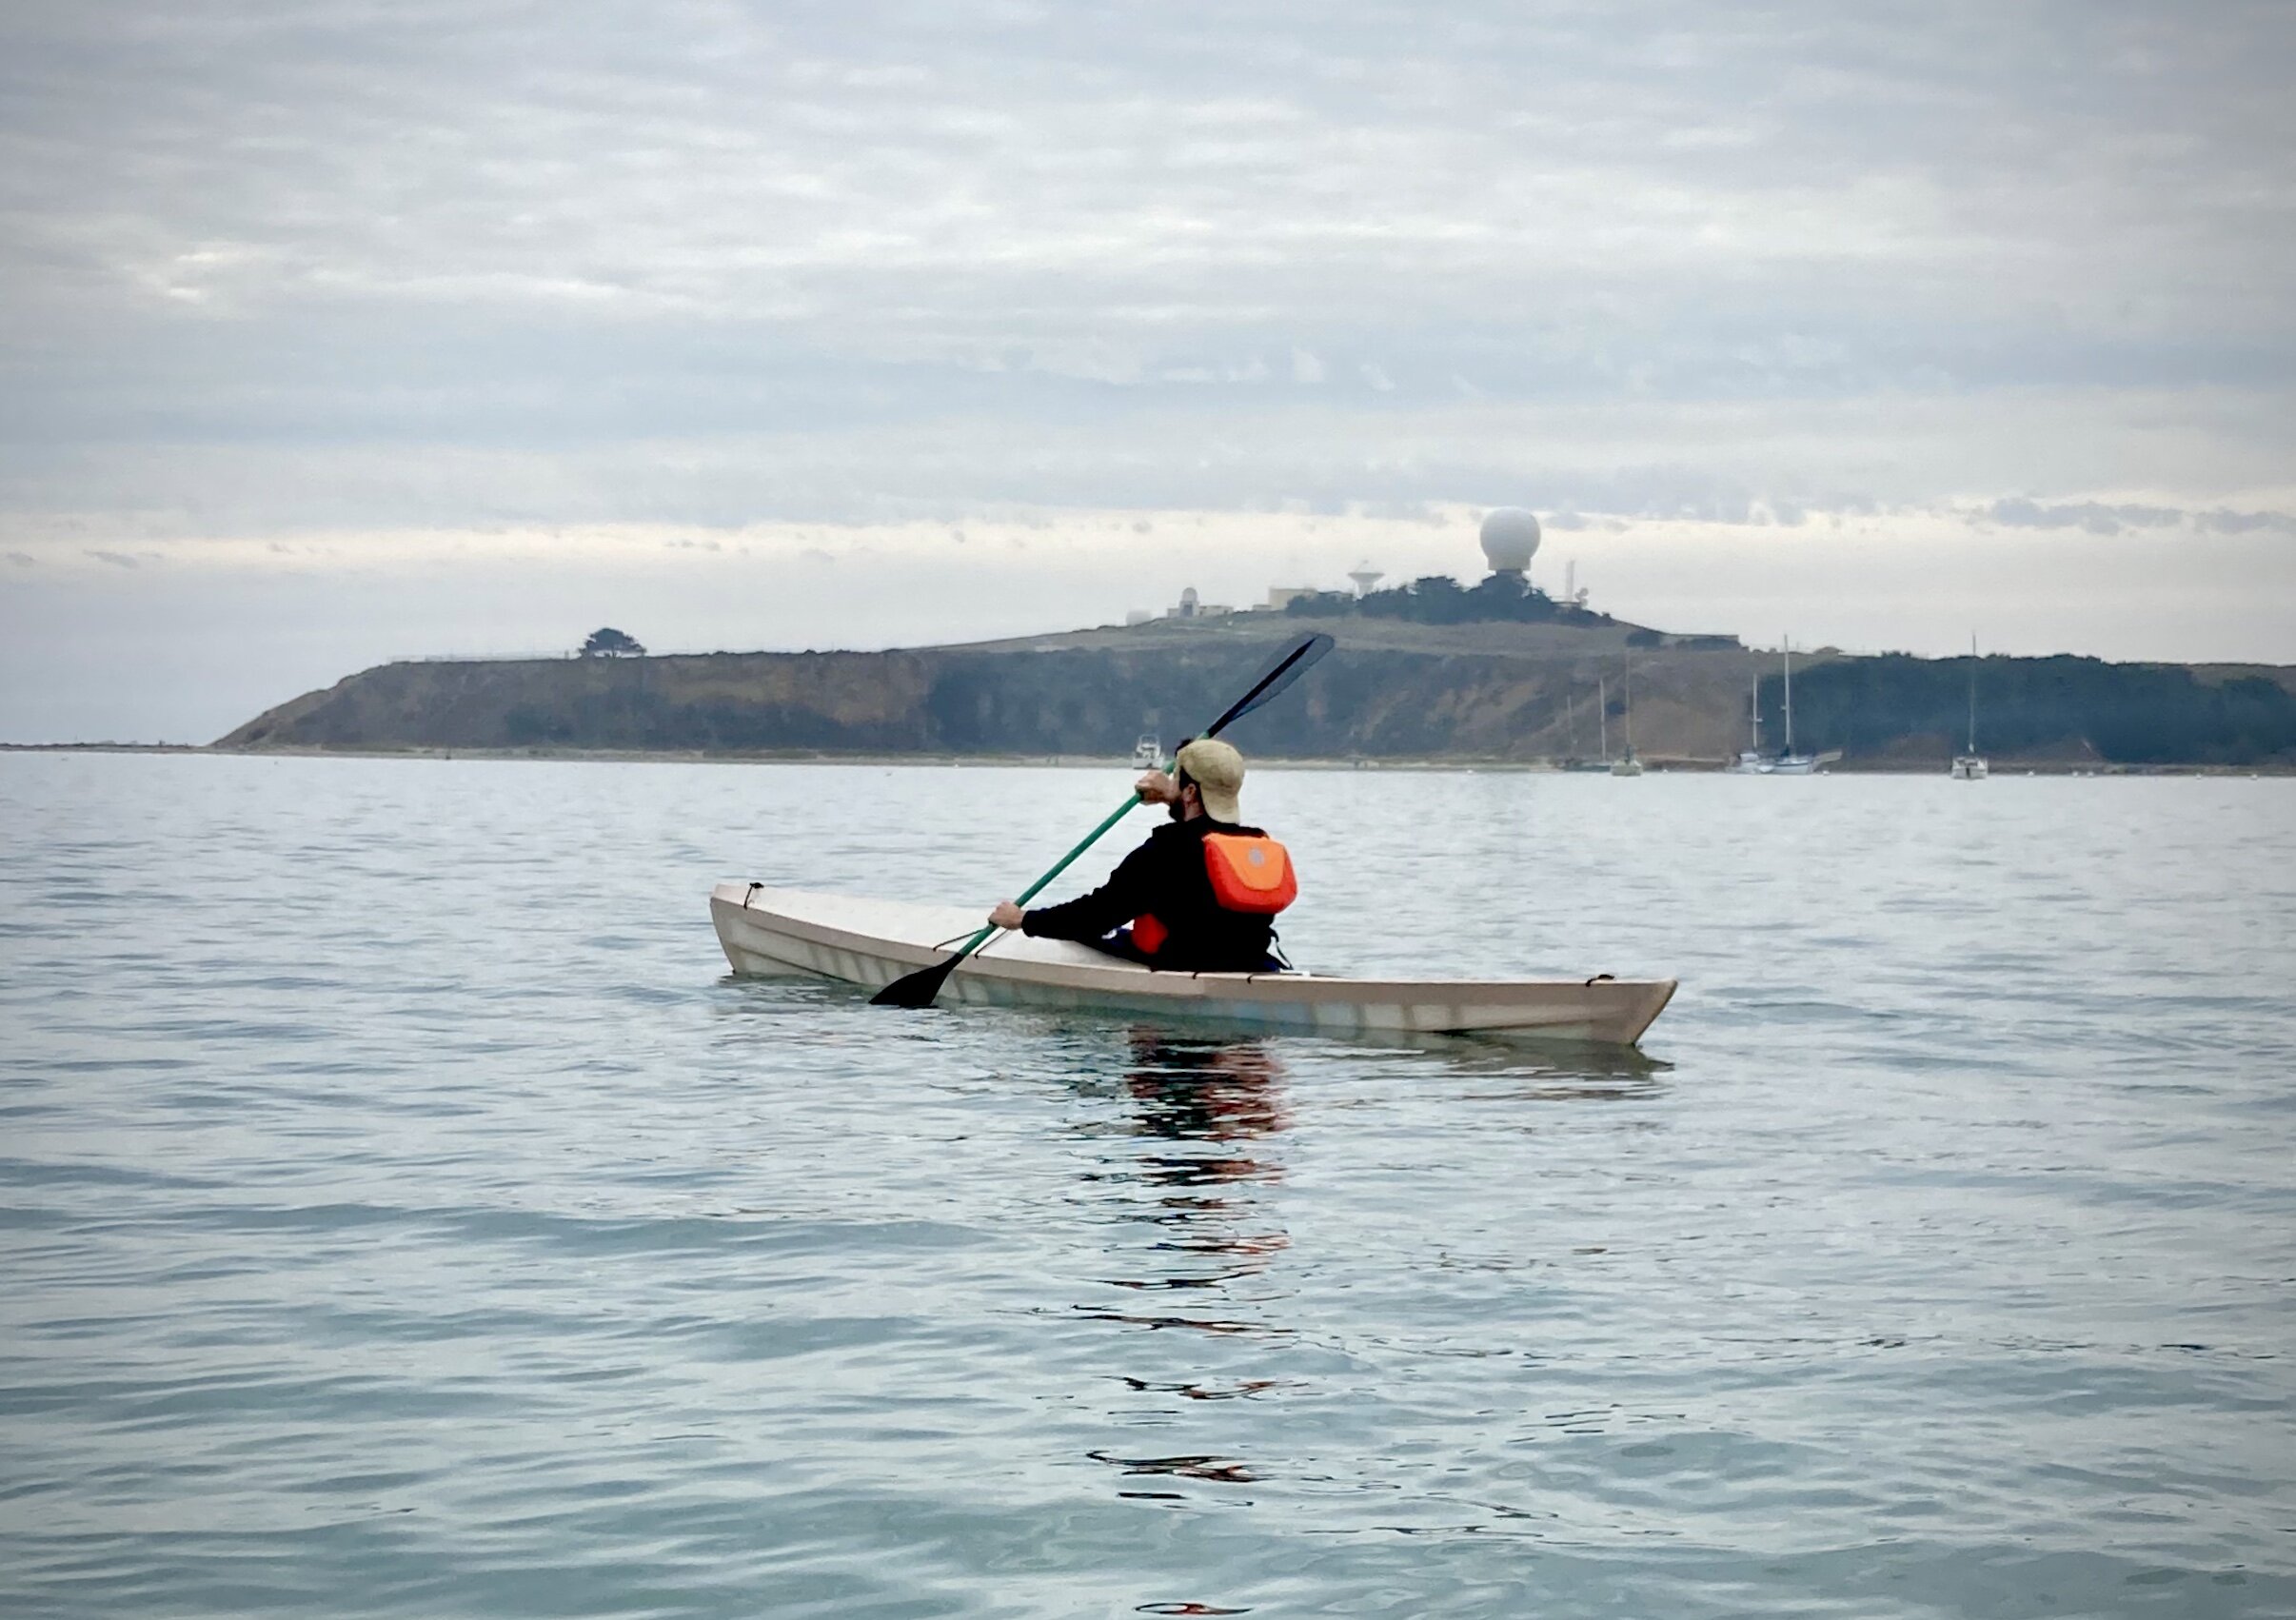
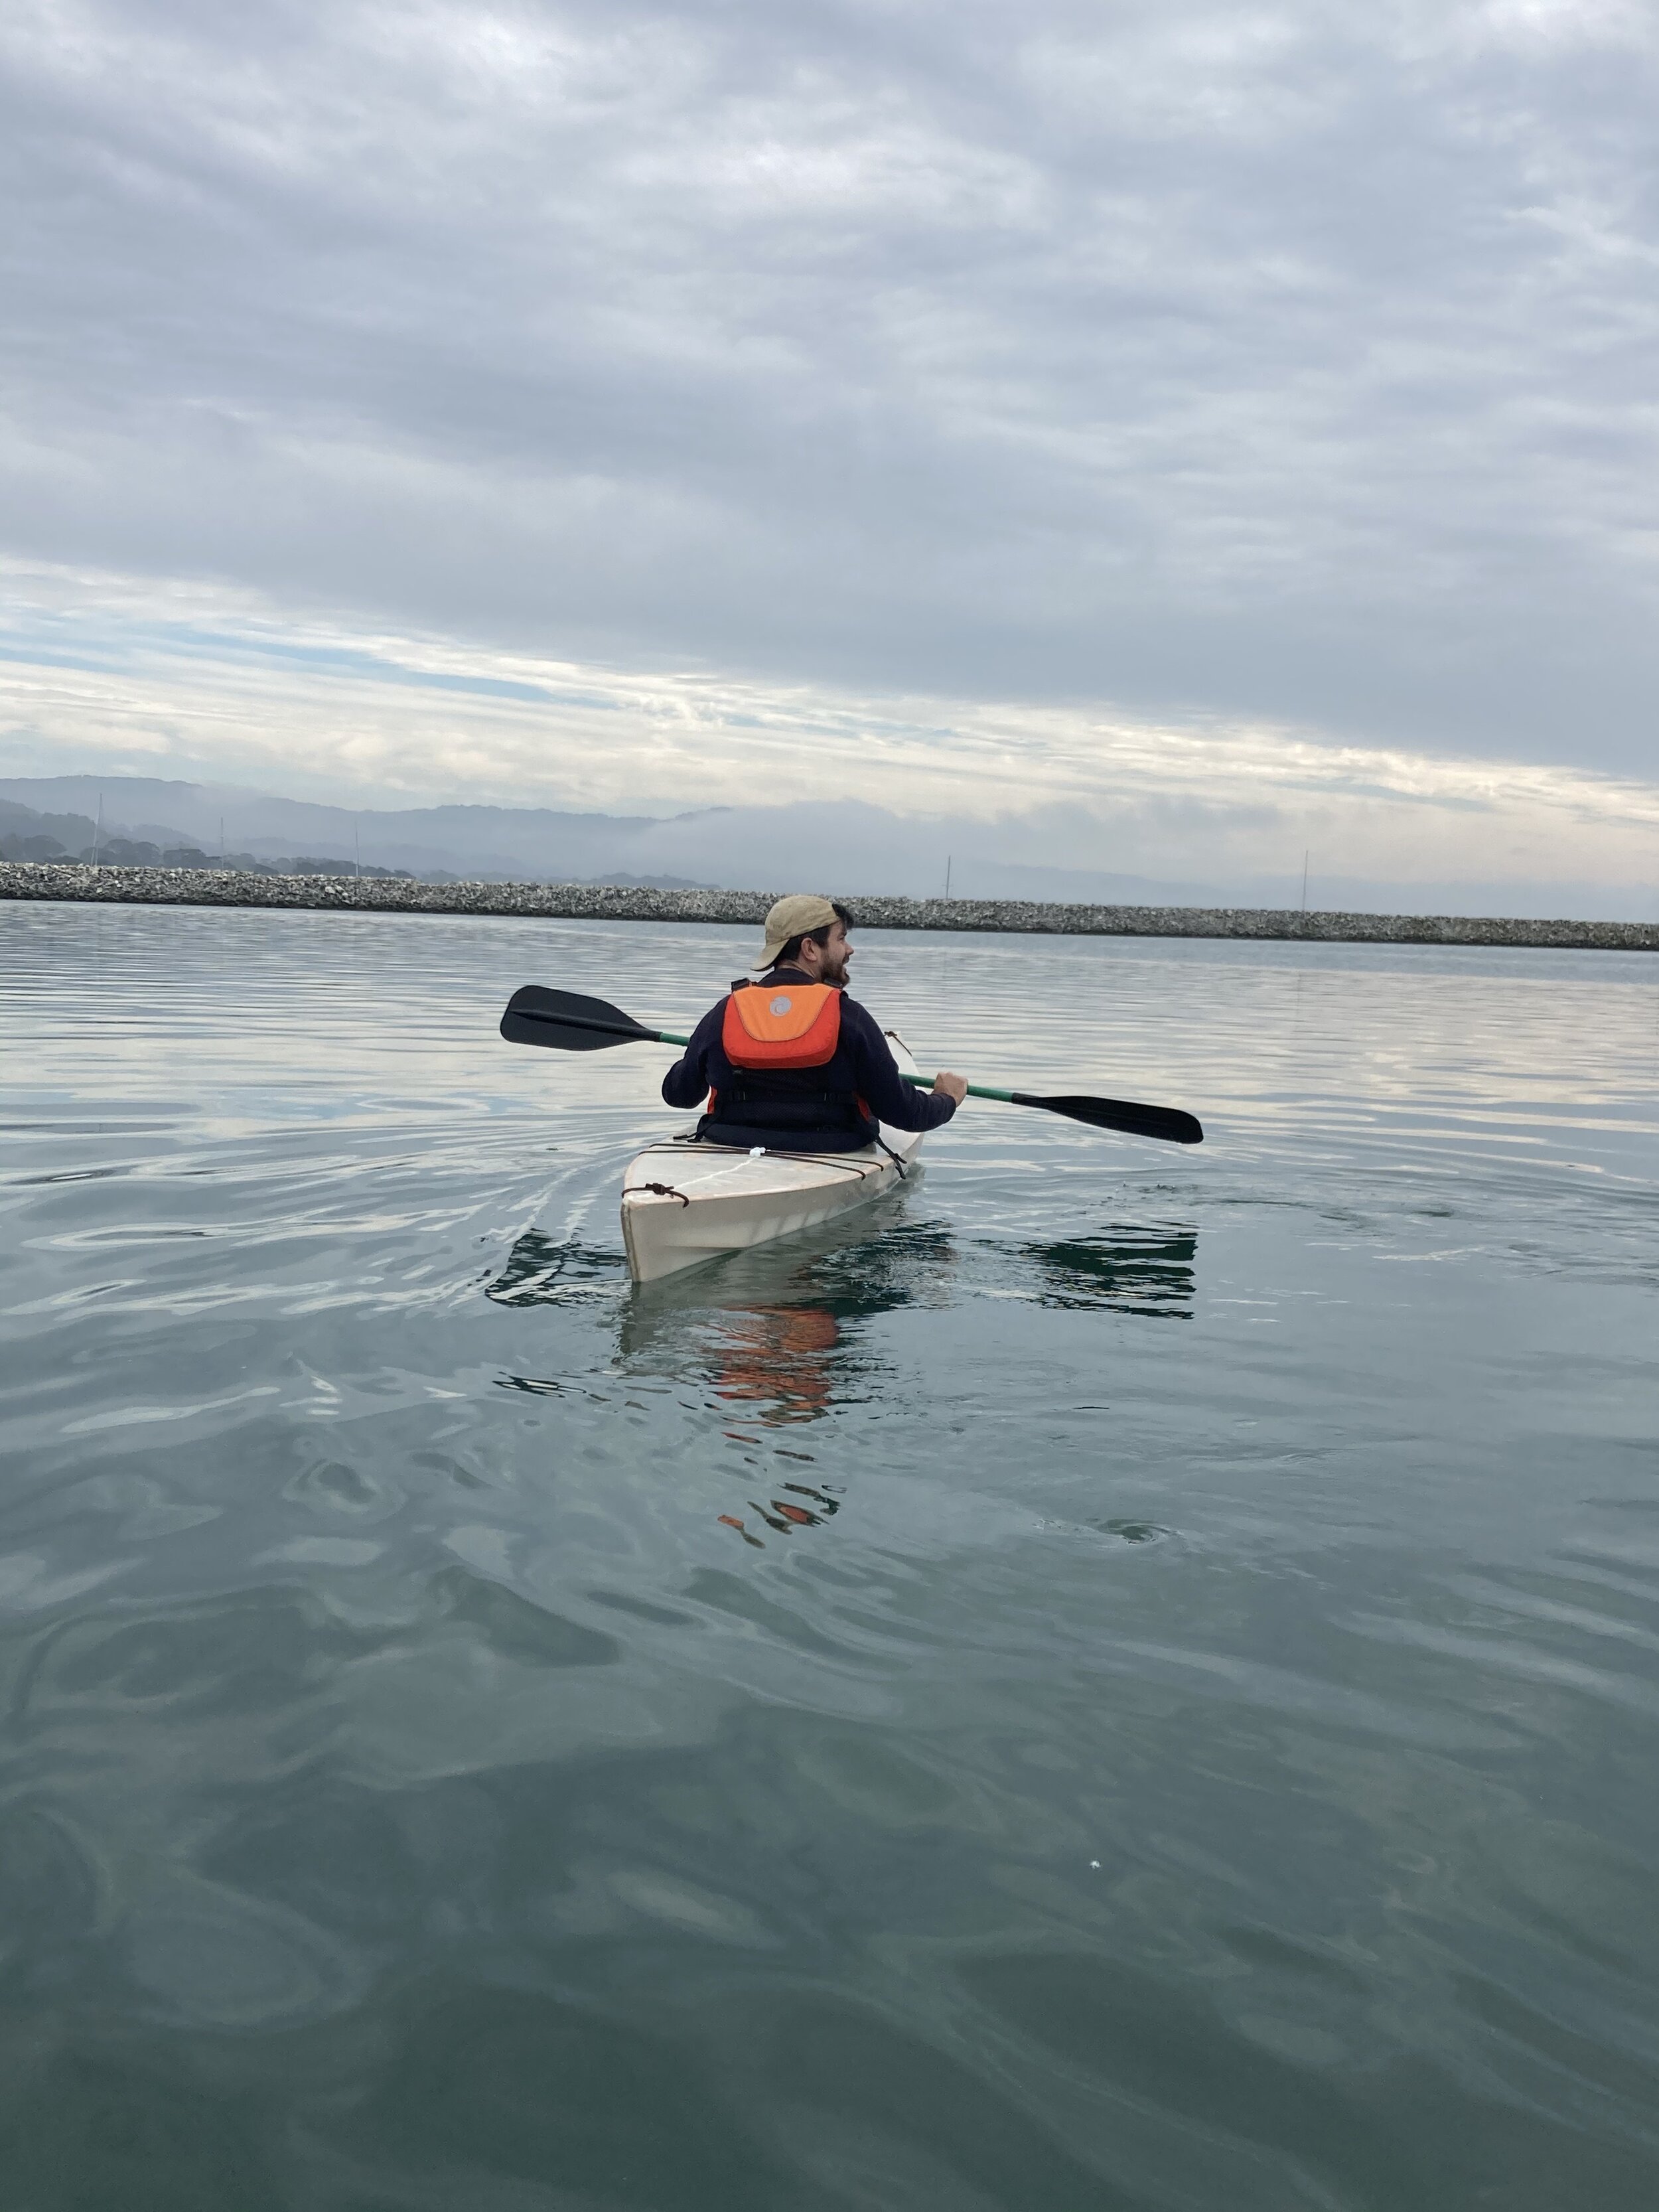
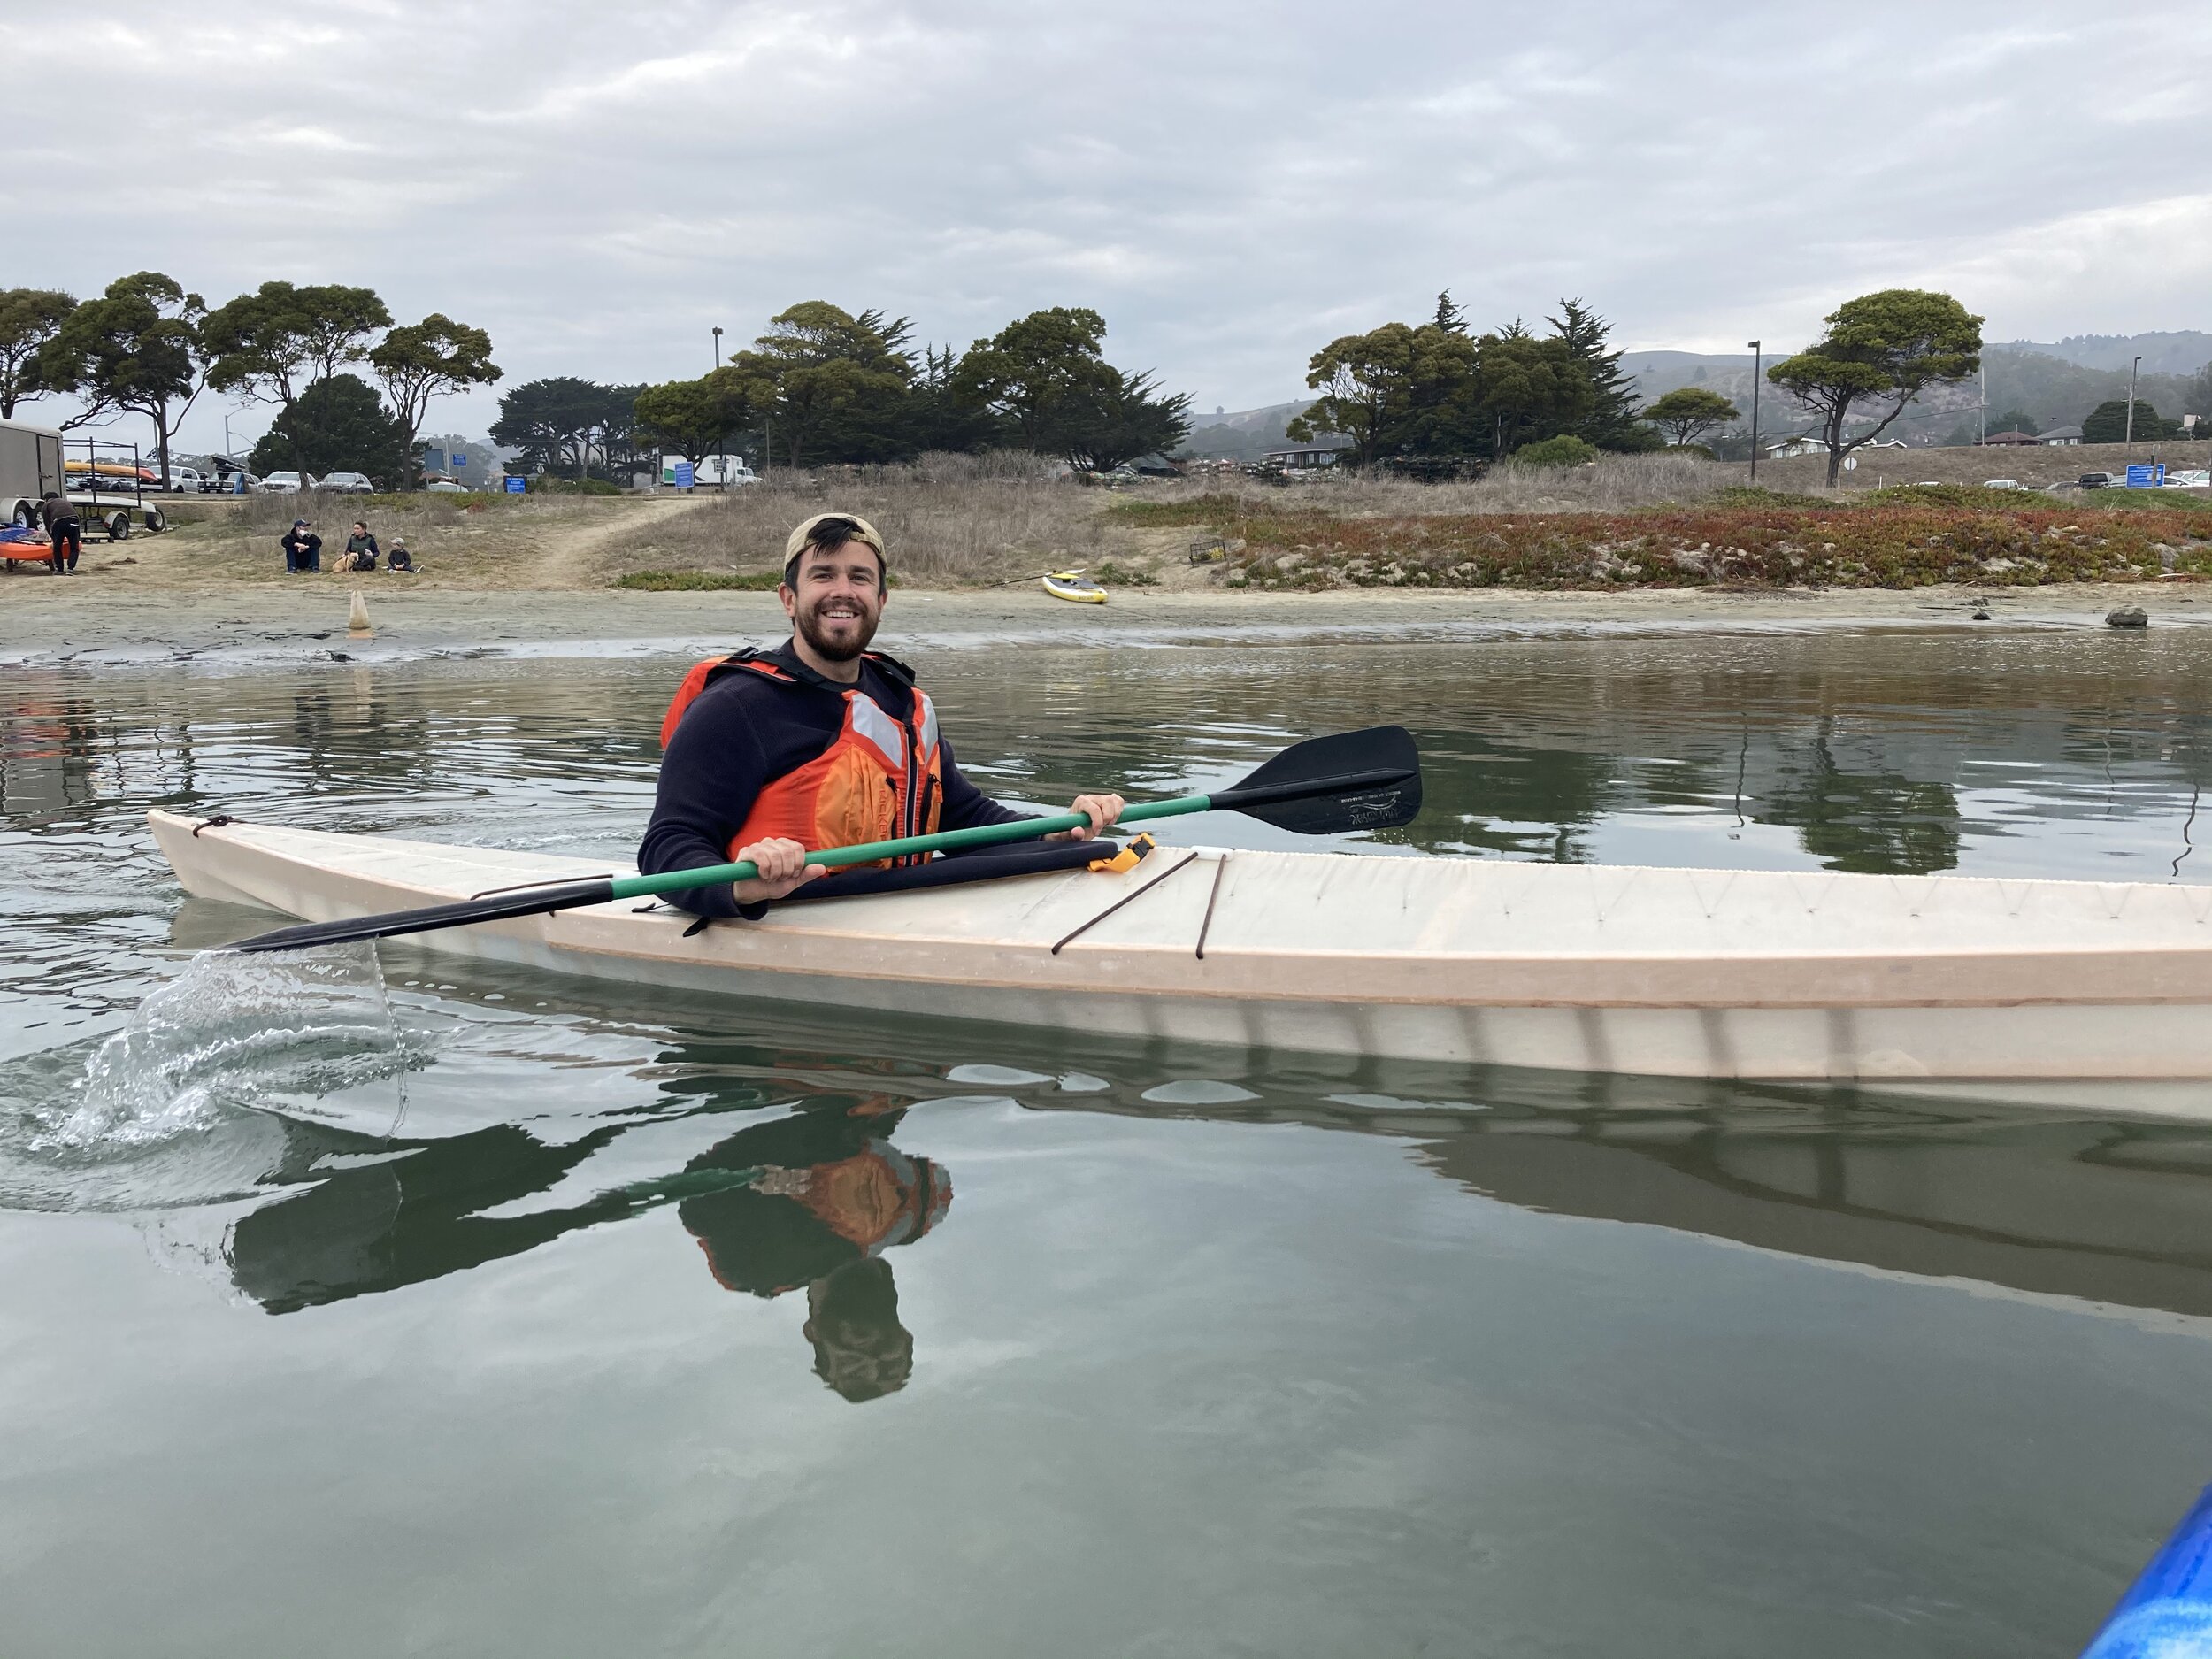
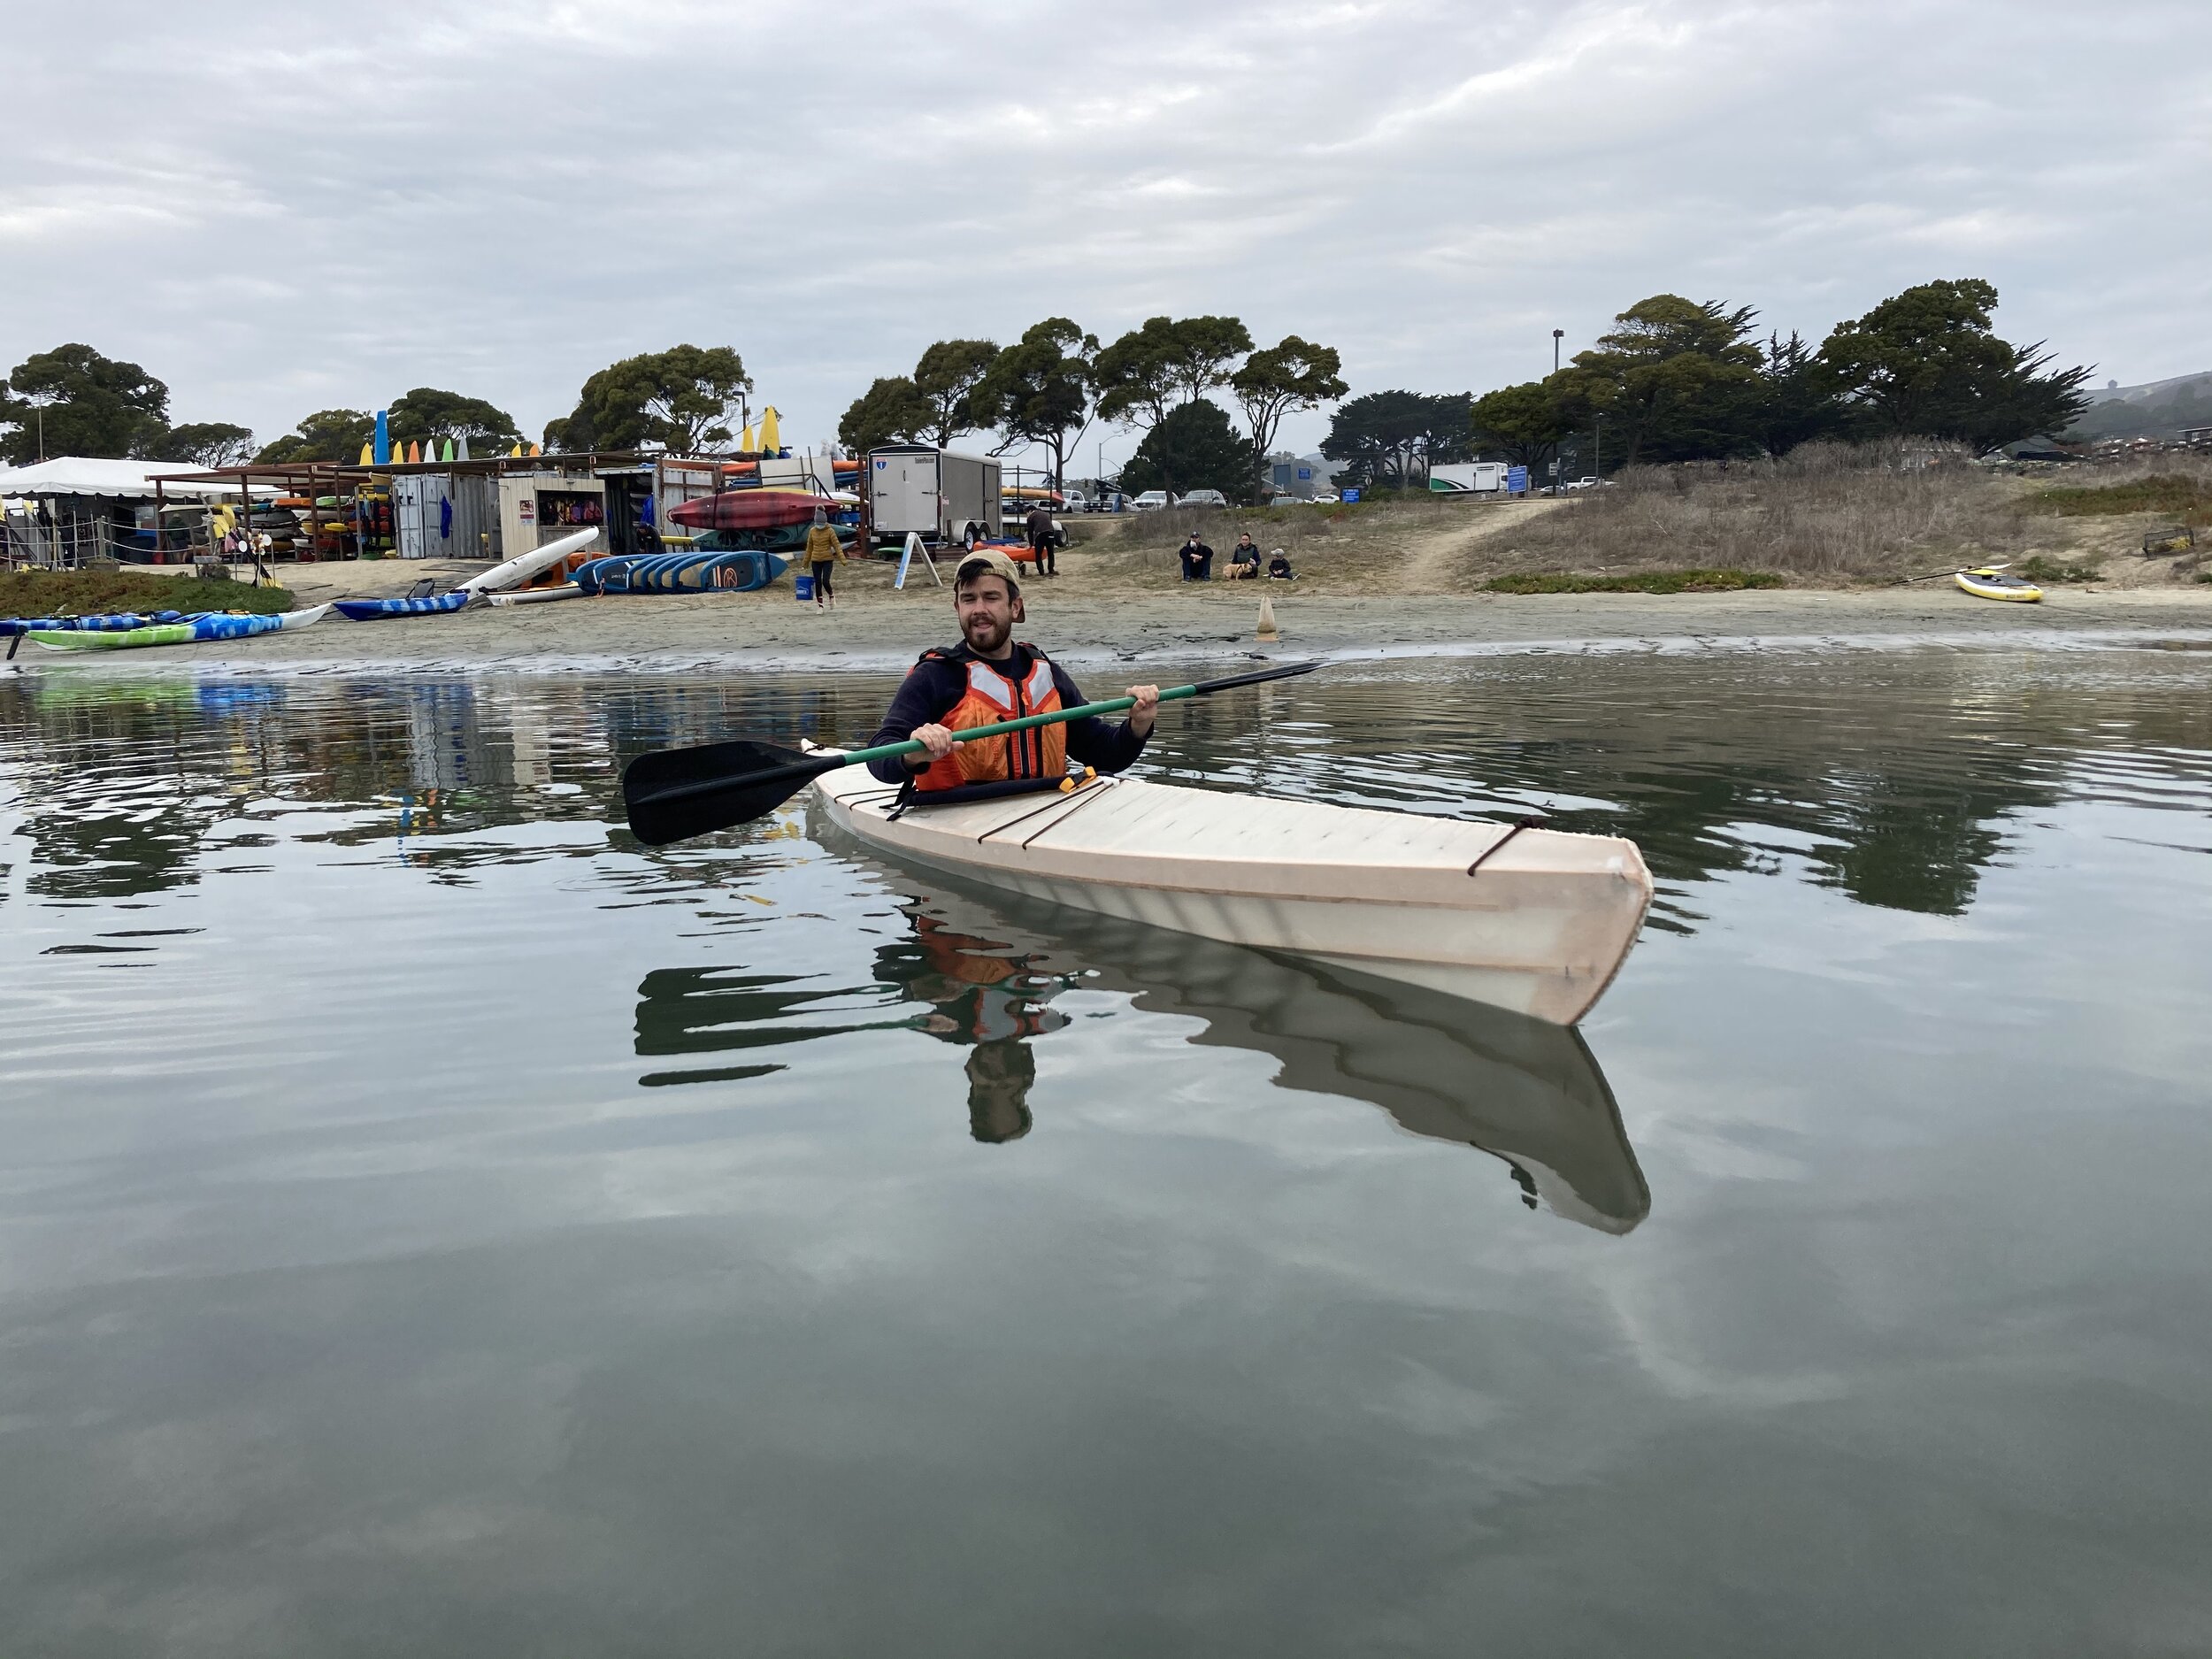
THE ULTIMATE TEST //
After rigging the boat up with some leather straps, there was nothing else to do than take her out for a test run. Lauren and I went down to the Half Moon Bay Harbor and rented her a kayak and took it out for a couple hours. Though it was a bit tippy at first, I ultimately got the hang of it, and it was a load of fun. Most importantly, it didn’t sink.
I guess I’m going to have to get into kayaking now.